Hey guys,
Well as many of you know I finished off my last major project on my car after two years of work.
What many of you don't know is the little hiccup that befell me on the first drive of my car and the cool project that developed out of it.
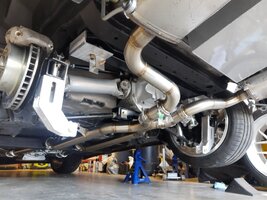
In July I trailered my car to get PPF put on the entire front of the car as well as any critical areas. I drove the car home for the first time in two years and when I got home I noticed the exhaust was way out of alignment. I went underneath to fix it and noticed my rear dual mount mono leaf spring had broken and the weight of the car was resting on the exhaust. Now this happened for a couple reasons. I had my buddy weld up a new cut and weld stainless exhaust and had him do an X pipe under the diff. That moved the exhaust closer to the rear spring. However, there should have still been enough room but my leaf spring was also too weak and flexed more than I calculated which led to its failure. Now, I couldn't get a replacement leaf spring because VB&P was the only company that made the dual mount rear mono spring kit and they went out of business a few years ago. So I was leaf (lol) with two choices; revert back to the old leaf spring, or develop a new Coilover setup. I guess by the title of this thread you can guess what I chose.
I sat under my car and drafted the design and once I was happy with it I made a cardboard prototype to make sure the setup would work. In my design I had to factor in what was available on the market for Coilover lengths as well as the degree that the Coilover would sit at and the how the angle and distance from the wheel would effect the spring rate.
At this point you might be wondering why I didn't just buy a rear Coilover kit. Well, there were three reasons, every option was either over priced, poorly designed, or more involved than needed, or a combination of those. I wanted to build something that could be bolted on in under 1 hour, required no drilling, and performed better or at least comparably to any other rear coilover kit. I also had a brand new set of offset Vansteel trailing arms and didn't want to go through the hassle and expense of swapping them for the coilover version.
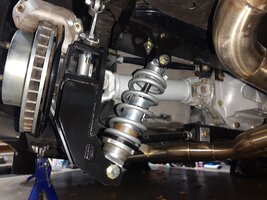
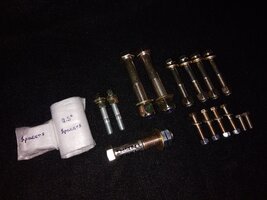
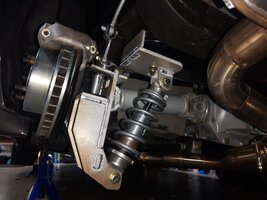
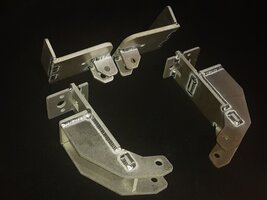
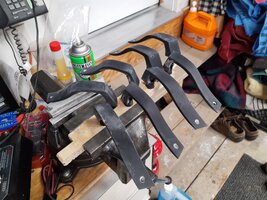
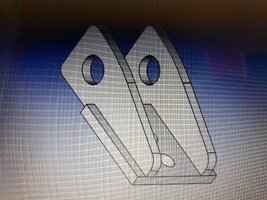
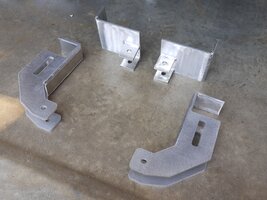
I took my sketched design and created it in CAD, sent the file off to be water jet cut out of 1/4" 6061 Aluminum, ordered the rest of the metal and had my buddy weld it together. After a test fit and a few tweaks I painted the mounts and installed them.
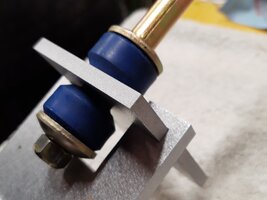
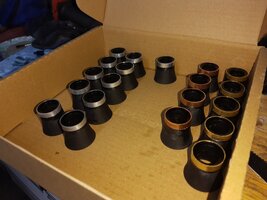
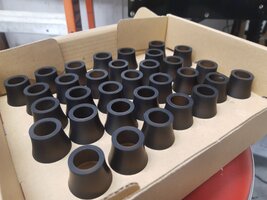
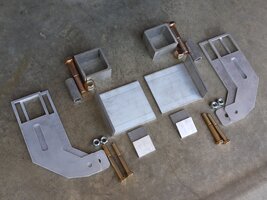
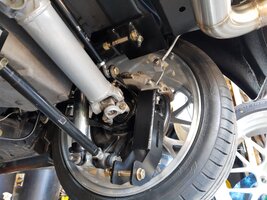
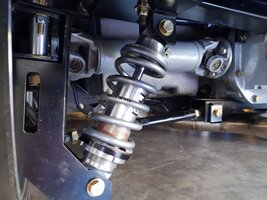
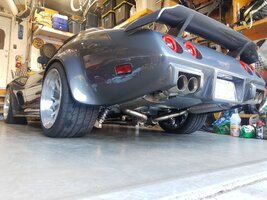
The upper Coilover mounts act like the Van Steel Crossmember reinforcements and bolt in with one nut. The front plate of the mount butts against the crossmember which supports the mount from rotating. The bottom mount bolts onto the trailing arm with a single 3/4" bolt. If you aren't running a rear swap bar, at least one 5/16" bolt should be installed as security to prevent any rotating. The leaf bushing cup needed to be hammered out and I made and installed aluminum tubes to reinforce the crossmember, and so I could use a smaller bolt without having any slop.
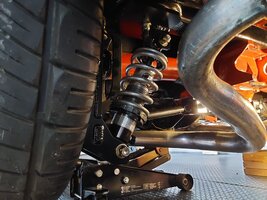
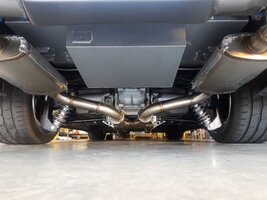
In the end I created a rear Coilover kit that doubles as a crossmember reinforcement, improves vehicle stability by having suspension mounts closer to the edge of the frame, can be bolted in place in under 1 hour without any drilling, improved handling, allows you to use the factory sway bar mounting holes, and is cheaper than any other Coilover kit. The car now handles insanely better than it ever did with the dual mount leaf and miles ahead of my factory leaf spring.
I have made some improvements to the kit since I made this one and I am selling these mounting brackets if anyone has Vansteel trailing arms and is looking to update their suspension.
I've also designed an improved version of my upper strut rod kit which improves the handling of the rear end by removing rear wheel play and improves the camber curve. It also takes the stress off of your different carrier and half shafts. This kit is also available for sale. You can private message me for more information and ordering. I have also partnered with Western Corvette so you can also purchase it through them.
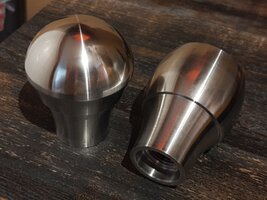
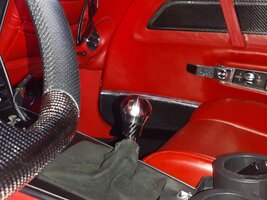
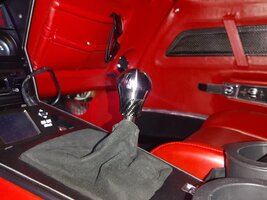
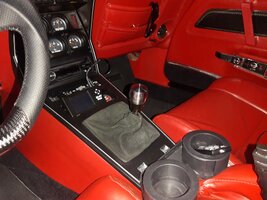
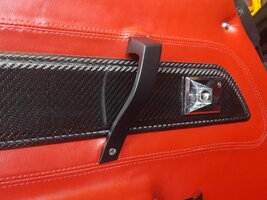
I have a few more projects in the works such as a carbon fiber 14" air filter lid, carbon fiber door panel inserts, and carbon fiber door sills. More recently I have designed a weighted stainless steel shift knob with either forged carbon fiber trim or perforated leather trim. I am currently in the process of getting two prototypes machined.
Hope you guys enjoyed this write up and didn't mind the sales pitch at the end. I have really found a love for part design, and creation and have thoroughly enjoyed my time learning and working with CAD. This is more of what I would like to do for a living so I'm trying to venture into this by creating more parts.
Well as many of you know I finished off my last major project on my car after two years of work.
What many of you don't know is the little hiccup that befell me on the first drive of my car and the cool project that developed out of it.
In July I trailered my car to get PPF put on the entire front of the car as well as any critical areas. I drove the car home for the first time in two years and when I got home I noticed the exhaust was way out of alignment. I went underneath to fix it and noticed my rear dual mount mono leaf spring had broken and the weight of the car was resting on the exhaust. Now this happened for a couple reasons. I had my buddy weld up a new cut and weld stainless exhaust and had him do an X pipe under the diff. That moved the exhaust closer to the rear spring. However, there should have still been enough room but my leaf spring was also too weak and flexed more than I calculated which led to its failure. Now, I couldn't get a replacement leaf spring because VB&P was the only company that made the dual mount rear mono spring kit and they went out of business a few years ago. So I was leaf (lol) with two choices; revert back to the old leaf spring, or develop a new Coilover setup. I guess by the title of this thread you can guess what I chose.
I sat under my car and drafted the design and once I was happy with it I made a cardboard prototype to make sure the setup would work. In my design I had to factor in what was available on the market for Coilover lengths as well as the degree that the Coilover would sit at and the how the angle and distance from the wheel would effect the spring rate.
At this point you might be wondering why I didn't just buy a rear Coilover kit. Well, there were three reasons, every option was either over priced, poorly designed, or more involved than needed, or a combination of those. I wanted to build something that could be bolted on in under 1 hour, required no drilling, and performed better or at least comparably to any other rear coilover kit. I also had a brand new set of offset Vansteel trailing arms and didn't want to go through the hassle and expense of swapping them for the coilover version.
I took my sketched design and created it in CAD, sent the file off to be water jet cut out of 1/4" 6061 Aluminum, ordered the rest of the metal and had my buddy weld it together. After a test fit and a few tweaks I painted the mounts and installed them.
The upper Coilover mounts act like the Van Steel Crossmember reinforcements and bolt in with one nut. The front plate of the mount butts against the crossmember which supports the mount from rotating. The bottom mount bolts onto the trailing arm with a single 3/4" bolt. If you aren't running a rear swap bar, at least one 5/16" bolt should be installed as security to prevent any rotating. The leaf bushing cup needed to be hammered out and I made and installed aluminum tubes to reinforce the crossmember, and so I could use a smaller bolt without having any slop.
In the end I created a rear Coilover kit that doubles as a crossmember reinforcement, improves vehicle stability by having suspension mounts closer to the edge of the frame, can be bolted in place in under 1 hour without any drilling, improved handling, allows you to use the factory sway bar mounting holes, and is cheaper than any other Coilover kit. The car now handles insanely better than it ever did with the dual mount leaf and miles ahead of my factory leaf spring.
I have made some improvements to the kit since I made this one and I am selling these mounting brackets if anyone has Vansteel trailing arms and is looking to update their suspension.
I've also designed an improved version of my upper strut rod kit which improves the handling of the rear end by removing rear wheel play and improves the camber curve. It also takes the stress off of your different carrier and half shafts. This kit is also available for sale. You can private message me for more information and ordering. I have also partnered with Western Corvette so you can also purchase it through them.
I have a few more projects in the works such as a carbon fiber 14" air filter lid, carbon fiber door panel inserts, and carbon fiber door sills. More recently I have designed a weighted stainless steel shift knob with either forged carbon fiber trim or perforated leather trim. I am currently in the process of getting two prototypes machined.
Hope you guys enjoyed this write up and didn't mind the sales pitch at the end. I have really found a love for part design, and creation and have thoroughly enjoyed my time learning and working with CAD. This is more of what I would like to do for a living so I'm trying to venture into this by creating more parts.
Attachments
-
 IMG_20220825_184908432.jpg1.2 MB · Views: 213
 -
 IMG_20220806_143010781.jpg3.1 MB · Views: 111
 -
 IMG_20220730_215102864.jpg1.7 MB · Views: 73
 -
 IMG_20220712_142621113.jpg1.3 MB · Views: 72
 -
 IMG_20220716_140138641.jpg1.4 MB · Views: 73
 -
 IMG_20220717_172747896.jpg1.3 MB · Views: 74
 -
 IMG_20220801_154312155.jpg1.5 MB · Views: 77
 -
 IMG_20220825_171338356.jpg1.3 MB · Views: 80
 -
 IMG_20220825_185614383.jpg1.3 MB · Views: 88