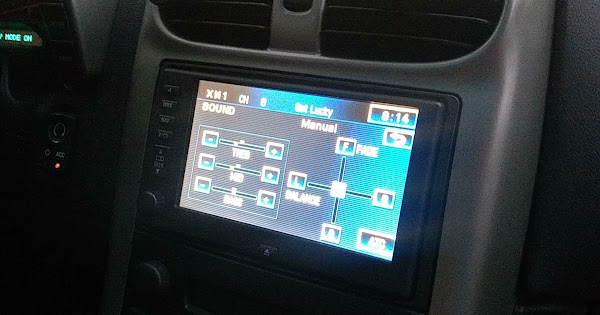
I finally got around to upgrading the stereo. I decided to do a budget build since I just wanted it better than the Bose which practically any option would be, and I also wanted an OEM or OEM plus look, so no amp racks sticking out. I tried to get some pictures but forgot a few steps along the way and it's also hard to get pictures in my car port depending on the position of the sun.
I retained the factory head unit since I already have an iSimple Bluetooth/aux module, upgraded the front speakers to components, added a small sub (in progress, see below) and power everything with a 4 channel amp with 2 of the channels bridged for the sub. If I were starting from scratch with a stock head unit, I'd probably replace it with an Android head unit, but I have the nav, 2016 disc which is still useable where I go, and it's fun having the nav in the HUD.
For the component speakers I had been looking at Hertz Dieci DSK165.3, JL Audio C1-650, or Alpine SS5C components, but I didn't like that the Hertz use paper cones, people complain the tweeters are harsh, and the JLs and the Alpines don't go on sale very often. Needing speaker adapters for the doors, Crutchfield was a good choice because they include free install gear, I went with their house brand Sound Ordinance P-67CB. They are allegedly made by the same manufacturer as Rockford Fosgate which is worth whatever you think it is. The reviews are fantastic, especially for the price at $97 which is great, and being this is a budget build I'm not being a brand snob. They seem well made with poly cones, silk dome tweeters, and separate cross over with a 3dB limiter for the tweeter. Crutchfield recommends the 6.5", they say the 6.7" won't fit the doors, but according to the measurements it seemed okay, and there turned out to be lots of clearance.
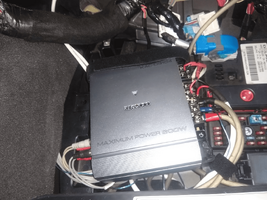
For the amp I chose the Kenwood KAC-D-3104, 50 watts x 4 RMS which is perfect for the components, 150 watts RMS bridged which should be suitable for a small sub, and it fits in the passenger footwell.
The factory head unit outputs line level and flat frequency to the Bose amp, so you can tap the line level for an aftermarket amp. The best way to do this and not cut the wiring harness is to modify a PAC Audio AOEM-GM24 line level converter, using just the harness and adding RCAs to the line out wires. PAC used to sell just the harness separately but it's been discontinued. The line level converter adds unwanted frequency variances so it's best to remove it.
PAC Audio AOEM-GM24.

Modified with RCAs. The factory remote turn on wire is in this harness on position B3, so I tapped it for the amp and it turns on just like the Bose when the doors are opened.

Power wire. The positive terminal on the fuse box worked better than the battery terminal.

Power wire through gromet in firewall.

Power wire in passenger side footwell. For ground I used a ground terminal in the footwell beside the side kick plate.

Getting amp read to go in the passenger footwell.

Mounting tweeter to door panel. I made a mounting plate out of a dense piece of foam, surface mounted the tweeter to it, and then mounted the foam to the door panel.

Removing the Bose woofers, wiring the doors, and mounting the cross overs. I mounted the cross overs inside the door since it was hard to find a space on the door or the door panel. I used 16/2 CL2 copper wire from a previous project. It was pretty easy to snake the wire through the door conduits.

Amp in place (sort of) using a combination of factory screw holes and a velcro strap since I've had it in and out to tune. It works really well so I may stay with it. Left, right, and sub wires, along with front and rear RCA inputs, power, ground, and remote turn on.

With the footwell closed you can barely tell.

Subwoofer wire run into the cargo area, some 14/2 CL2 I had left over from a project. I don't have a sub picked out yet so this is still in progress.

Tweeter. With the mounting plate at the same angle the Bose twiddlers were, the tweeter points slightly towards the passengers which looks like a good angle to me. I'm running the tweeter with the limiter off and the sound great.

Woofer. I screwed the woofer to the adapter plate with speaker mounting foam in between, screwed the mounting plate to the door with 2 sided window sealing tape, and then cut some foam strips and attached it around the edge of the mounting plate to seal against the door panel and direct the sound in.

Because it's a Chev!

The stereo works the same as stock, with the amp powering on when the door is opened and the chimes working through the driver side speaker. The audio is very clean with no alternator whine or other noise. The sound quality is significantly better, even the door chime sounds better! The mids and highs are way clearer (of course, real tweeters, no twidder nonsense!), the bass is cleaner, louder, deeper and there is less rattle from the doors. With the bass as is, I could leave it and not have a sub and be happy, but I'll likely still add a sub at some point since the amp and wiring are ready to go. I would recommend the Sound Ordinance components if you don't mind not having brand name, as they probably play like a $200-$300 speaker.
I retained the factory head unit since I already have an iSimple Bluetooth/aux module, upgraded the front speakers to components, added a small sub (in progress, see below) and power everything with a 4 channel amp with 2 of the channels bridged for the sub. If I were starting from scratch with a stock head unit, I'd probably replace it with an Android head unit, but I have the nav, 2016 disc which is still useable where I go, and it's fun having the nav in the HUD.
For the component speakers I had been looking at Hertz Dieci DSK165.3, JL Audio C1-650, or Alpine SS5C components, but I didn't like that the Hertz use paper cones, people complain the tweeters are harsh, and the JLs and the Alpines don't go on sale very often. Needing speaker adapters for the doors, Crutchfield was a good choice because they include free install gear, I went with their house brand Sound Ordinance P-67CB. They are allegedly made by the same manufacturer as Rockford Fosgate which is worth whatever you think it is. The reviews are fantastic, especially for the price at $97 which is great, and being this is a budget build I'm not being a brand snob. They seem well made with poly cones, silk dome tweeters, and separate cross over with a 3dB limiter for the tweeter. Crutchfield recommends the 6.5", they say the 6.7" won't fit the doors, but according to the measurements it seemed okay, and there turned out to be lots of clearance.
For the amp I chose the Kenwood KAC-D-3104, 50 watts x 4 RMS which is perfect for the components, 150 watts RMS bridged which should be suitable for a small sub, and it fits in the passenger footwell.
The factory head unit outputs line level and flat frequency to the Bose amp, so you can tap the line level for an aftermarket amp. The best way to do this and not cut the wiring harness is to modify a PAC Audio AOEM-GM24 line level converter, using just the harness and adding RCAs to the line out wires. PAC used to sell just the harness separately but it's been discontinued. The line level converter adds unwanted frequency variances so it's best to remove it.
PAC Audio AOEM-GM24.
Modified with RCAs. The factory remote turn on wire is in this harness on position B3, so I tapped it for the amp and it turns on just like the Bose when the doors are opened.
Power wire. The positive terminal on the fuse box worked better than the battery terminal.
Power wire through gromet in firewall.
Power wire in passenger side footwell. For ground I used a ground terminal in the footwell beside the side kick plate.
Getting amp read to go in the passenger footwell.
Mounting tweeter to door panel. I made a mounting plate out of a dense piece of foam, surface mounted the tweeter to it, and then mounted the foam to the door panel.
Removing the Bose woofers, wiring the doors, and mounting the cross overs. I mounted the cross overs inside the door since it was hard to find a space on the door or the door panel. I used 16/2 CL2 copper wire from a previous project. It was pretty easy to snake the wire through the door conduits.
Amp in place (sort of) using a combination of factory screw holes and a velcro strap since I've had it in and out to tune. It works really well so I may stay with it. Left, right, and sub wires, along with front and rear RCA inputs, power, ground, and remote turn on.
With the footwell closed you can barely tell.
Subwoofer wire run into the cargo area, some 14/2 CL2 I had left over from a project. I don't have a sub picked out yet so this is still in progress.
Tweeter. With the mounting plate at the same angle the Bose twiddlers were, the tweeter points slightly towards the passengers which looks like a good angle to me. I'm running the tweeter with the limiter off and the sound great.
Woofer. I screwed the woofer to the adapter plate with speaker mounting foam in between, screwed the mounting plate to the door with 2 sided window sealing tape, and then cut some foam strips and attached it around the edge of the mounting plate to seal against the door panel and direct the sound in.
Because it's a Chev!
The stereo works the same as stock, with the amp powering on when the door is opened and the chimes working through the driver side speaker. The audio is very clean with no alternator whine or other noise. The sound quality is significantly better, even the door chime sounds better! The mids and highs are way clearer (of course, real tweeters, no twidder nonsense!), the bass is cleaner, louder, deeper and there is less rattle from the doors. With the bass as is, I could leave it and not have a sub and be happy, but I'll likely still add a sub at some point since the amp and wiring are ready to go. I would recommend the Sound Ordinance components if you don't mind not having brand name, as they probably play like a $200-$300 speaker.
Attachments
Last edited: