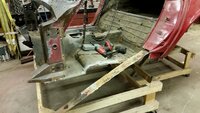
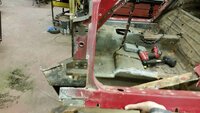
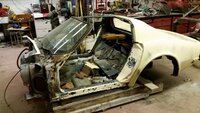
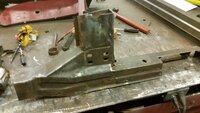
And it begins....Body off

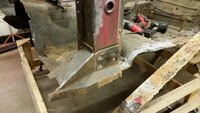
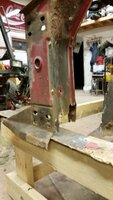
Well i have been doing some interneting and looking a birdcage fixes and noticed my #1 body mount looks different than it "should". Obviously it is rusty and needs fixing but mine seems to be basically just a flat bar where as the ones i am seeing on the interwebs appear to have more steel (channel shape) to them. I will need to look closer at whether there is evidence of previous modification or not. Anyway if anyone has a pic of their own car (although I have my doubts) I could use a hand in sorting out how I need to fix this area.

Thanks

T
 
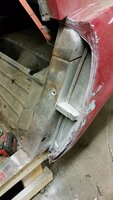
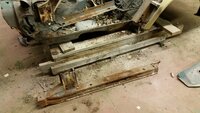
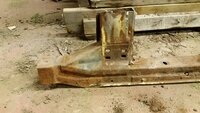
Well upon looking closer at my body I am afraid I will be tearing all the fiberglass off the birdcage anyway. The bottom of the birdcage (rockers) were replaced at some point in history by a doorknob who decided a piece of flatbar would be adequate. The actual parts are a press formed channel. So I will be removing the flatbars to replace them properly.

Luckily a member here, 73vette, who also happens to live about 10 miles from me, has a parts car that I can buy and salvage these parts off of. I will be stopping by to look at it withing the next week to see if they are usable. He seems to think they will be from talking on the phone with him.

So some terrible news followed by some light at the end of the tunnel news.

T
 
That sucks to hear you have to remove the fiberglass, but it's good to hear the car will be fixed properly. Would that be the reason the tunnel is hitting the transmission?
 
Never thought of that, but my guess is no. Car still sat level and at the right height even with the flatbars, just weaker.

T
 
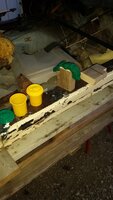
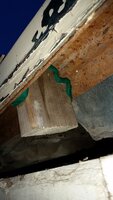
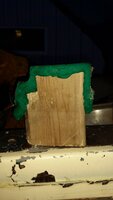
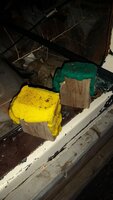
For starters...those rocker parts art bloody expensive so I did some calling around and turns out that a member (who lives 10 miles from me luckily) has a parts car he is done with. So i bought all his parts from him. The rockers are not in great shape but the front #1 mount look good. I will attempt to have sheet metal bent to match the rockers to piece together. So step on (after picking up the parts car ) was to try to get the shape of the rocker figured. I used some of my kids playdoh (which i promised to replace) and a chunk of wood to make a negative to measure off of. I repeated this two times to get an average.

20160501_204324.jpg 20160501_204444.jpg 20160501_204551.jpg 20160501_204920.jpg

I will try to get some metal bent at my work to match this profile.

Next I started to tear into the birdcage on my car. Removing the fiberglass was not what I expected. I separated the door trim from the floor board ok but could not get the vertical part behind the door to separate from the rear quarter. I ended up getting mad and cutting it. I hope I don't regret that later.

20160520_222733.jpg 20160520_222736.jpg 20160520_222756.jpg 20160520_230535.jpg 20160520_230541.jpg

The sad part is when I was looking at the car to buy I looked at some of these areas and seeing the flatbar ( I now know) I thought he mounts looked pretty good! They are not good. At this point I gave up for that night debating if it was worth continuing with this body. It actually kept me up for hours while I looked on kijiji for other corvettes. Turns out there are not many 1973 vettes for sale around sask/alberta that aren't in pretty good shape.

After evaluating and deciding that this body could still work (with a lot of work) I got back into the shop the next weekend. I started cutting out the rocker from the parts car.......


T
 
....Continuing:
20160521_211827.jpg 20160521_213758.jpg 20160521_213806.jpg 20160521_215425.jpg

As mentioned above the front #1 mount looks usable. The middle of the rocker is very rusted (gone in many places) however I think I can remake that portion with some brake work.

I am purposely only doing one side at a time to retain some structure and so I can measure from side to side.

I am going to be needing some fiberglass help and advice in the future so if anyone has hints I will be open to them. When it comes to steel I have no hesitation, but fiberglass I am not familiar enough with to say that.

T
 
Holy smokes, awesome breakdown of the car and nice use of playdoh! Woo!
Glad to see you have one useable mount so far but that sucks whoever repaired your car didn't just replace them properly in the first place.
 
Last edited:
Hey T... Remember this quote from 2012.....
Well after the car not coming out of the garage all year I finally decided to pull the cover off. Connected the battery. Turned the key. 10 Seconds of cranking and fired up. Then I drove it 200ft into my shop and proceeded to make it not drivable for awhile.

I am amazed at your skills... And like others on the forum I am watching your build.
Stay the course.... We can't wait to see this someday.

Thanx for posting.
Graham
 
Now that the summer is winding down I am finding some time to work on the vette. Got some plate bent up at work to match (almost) the proper profile for the rocker channels. Spent some time splicing to my donor car dog leg and then onto the car. Still needs a bit of work at the back joint but it is coming along nicely. Just tacked for now will weld once the other side is positioned also. So here are some pics.

20160904_183312.jpg
20160904_185330.jpg
20160904_185340.jpg
20160904_192453.jpg
20160904_203915.jpg
20160904_203919.jpg
20160904_204743.jpg
20160904_211719.jpg
20160904_211739.jpg
 
That looks really good! I imagine this project is a little more involved than planned! :jawdrop::jawdrop:
This car is going to be brand new when you're done!!!
 
Found a couple hours for the car. No big progress but still some. Test fit the birdcage on the chassis (made me feel good and like I was progressing) Then started to weld it up. Just got the one corner done for now but it looks good considering it will just be covered up with fiberglass and no one will see it.

20160915_185447[1].jpg
20160915_201336[1].jpg
20160915_204347[1].jpg
 
Had most of a day to fix the rest of the birdcage. Got the door pillars welded up and fixed the windshield frame. Now I get to scrape and blast for rust paint! Progress feels so good.
Here are some pics:

Pass. Side Door Post Welded Up:
20160927_093953.jpg
20160927_094003.jpg


Windshield frame rust:

20160927_094011.jpg
20160927_094017.jpg
20160927_094019.jpg
20160927_094025.jpg


Windshield Frame Fixes:
20160927_104321.jpg
20160927_111019.jpg
20160927_121829.jpg
20160927_141101.jpg
 
I wish I had half your skill in metal fabrication. I am an auto technician, I can fix about anything mechanical, eletrical, about any possible warning light in the dash, a/c, wheel alignement but with a welding machine, it's a different story.
great work:thumbs::thumbs:
 
Finished off the welding on the birdcage. Had to add a custom made seat belt bar reinforcement. Didn't even realize there was supposed to be one until I was browsing the internet and came across a guy doing a similar resto. Mine never had one on before the tear down, probably due to the fact that the rockers were terribly replaced at some point. Anyway, after cleaning up the welds I gave it a blast and 2 coats of POR15. Came out looking very good. To bad no one will ever see any of it except where the VIN tag shows through.

Here are some pics.
20161112_181809.jpg
20161112_181818.jpg
20161112_181825.jpg


I also took a few hours to scrape off the sound deadening in the floor pans. A heat gun and a scraper worked very well for this.

20161113_154846.jpg
20161113_154858.jpg


Next up is to clean up the firewall and do some fixes. Started scraping out the windshield wiper trough and a heat gun does not work on that stuff! I ended up using a hammer and stiff scraper to chip it away. More to come. I hope this winter is more productive than last!

T
 
Side note: The shop got all new LED lights put up this past week as well to replace the old florescent T12's. Much nicer light with a way better power usage. I will try to get a pic one day.

T
 

Users who are viewing this thread

Back
Top