Great work Taylor as usual , but getting back to the driveshaft. As far as balance goes I don't think you would of needed it. The original weights would stay in same place, all you did was take a piece of pipe out that is neutral. I've lengthened a couple for my truck and never had any issues. Didn't the yoke have a step that slid into the tubing ? But the weld does look abit rough not enough heat, did you use a stick ? a mig would of just flowed nicely and it holds. You could still just grind off the weld and then take it to someone with a good mig and lay another bead all around and I would not be scared to use it and no need to balance it.
 
  • Informative
Reactions: Rruuff Day
Ya I only have a stick right now. Want to get a tig but money is going elsewhere right now. I may try to Chuck it it the lathe to clean up the welds. I would have to set it up I the steady rest since my bed isn't long enough to use the tailstock. I did cut out one of the original weights with the piece that was removed. I may just right up my own balance test with go kart engine. Time will tell. At least it is a part that can be replaced fairly easily down the road.

T
 
Last edited:
  • Like
Reactions: ddgermann
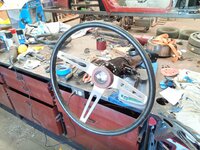
Well i got the steering column together. Looks great. I did end up sanding and painting the plastic parts to get a uniform color. The old steering wheel hub fit perfect and the original wheel can be used. May look for a new horn button (in black), but for now it looks good. Just needs a few tweeks to be able to fit some wiring plugs in. I did fit it in the car but didn't grab a pic I guess!
IMG_20190412_202909.jpg
IMG_20190417_164103.jpg
IMG_20190417_164118.jpg


Also decided to just use my driveshaft. I chucked it in the lathe with a steady rest (since that is the only way it would fit) and machined off the high spots of weld. I hope this is enough to balance it out. It did have a small vibration on the lathe to start and it seemed to go away after machining so i am hopeful. Installed the u-joints and gave it some red paint. I may have to pull out the half shafts and paint them red....it does look good.
IMG_20190418_055015.jpg
IMG_20190418_055026.jpg


Still need to check angles but from a glance it looks close.

Getting closer to having the body on the frame again!

T
 

Attachments

  • IMG_20190417_164112.jpg
    IMG_20190417_164112.jpg
    529.4 KB · Views: 14
This looks like its progressing well! I am new to the forum, so I haven't seen all the posts yet. I do want to say, I really love the way you set things up to roll your frame around! A few brackets, some wheel rollers and some ingenuity really can go a long way!
 
No work done lately but in an effort to keep motivated I am thinking of getting wheels. Corvette Central has a black version of a C6 Z06 Style rim which is exactly what I want (although a red stripe would be nice too). I just emailed them to see if they would package price me 17" x 8.5" for the fronts and 18" x 8.5" for the rears with some Sumitomo rubber (245/45R17 and 255/45R18). I will need adapter to make them work but would figure them out when the wheels got here to make sure they clear.

Hope to hear back from them soon! Also hope they give me a huge discount as I am sure shipping will hurt a little.
27967


Let me know what you think about my choice!

T
 
So turns out that the company making these no longer makes the 18" x 8.5" and CC doesn't make up the package deals, the company making the rims does. Now I need to decide whether to go 17" x 8.5" on all 4 or keep looking (or try to go WIDER, although may require some changes). I wanted the 18" x 8.5" to go with 255/45R18 to get almost identical diameter to stock. Front would be smaller. I would have to go a bit higher profile on a 17" to get stock diameter.

I finally made a decision and now I have to go back to the drawing board.

Oh well....not like I needed them right away anyway.

T
 
  • Like
Reactions: hemicat
yeah you really need to measure things out and not get a wheel that will rub. Your front openings are smaller than the latest C3's so got less room to turn a bigger tire. Something will pop up to your liking and like you say, you don't need them today. It's going to be a nice car when you are done.
 
  • Like
Reactions: hemicat
Well spent some time on the car. Partly to clear up some space in the shop for another project. Placed the body on the frame. Partially visual to look like I accomplished something! what do you know it looks like a car again...sort of. I decided to shift some effort to the front end, although i did get the steering colum half assed bolted in the car. Started to bolt parts on the front of the frame. Realized how bent up the vacuum tank/nose support was. Went to the spare car parts bin and found some goodies. The one from there is in great shape, just some rust. Also dug out the spare radiator support while I was there. Clearly some of the parts will still need a paint job but here is what that looked like:

IMG_20191102_173014.jpg


As for the nose bar.....I didn't even take on off my car that I can remember. There are 2 bent one from the parts car bin that I am going to try to piece together into a good one.

Next I decided to tackle the fitting a different cars radiator/condenser/fans into this car. I was hoping it would just fall into place with zero work. Hoping, but no luck as expected. I removed the lower "holder" from the 98 Camaro to use as a start point. Plus it already supports the radiator as intended. Since the donor radiator frame is pretty rusted I decided to use it as my start for the mods. Seems kinda backwards but I knew I would be cutting away a lot of it anyway so I decided it was better to leave the non rusty one intact as a backup (when this mod doesn't work) plan. Here is the spare parts car rad frame:

IMG_20191103_093405.jpg
IMG_20191103_093408.jpg
IMG_20191103_093422.jpg


Quick check for what all will need to be modified:

IMG_20191103_115533.jpg


It took some works but here is the picture evidence:

IMG_20191103_173001.jpg
IMG_20191103_173005.jpg
IMG_20191103_173011.jpg
IMG_20191103_173139.jpg
IMG_20191103_173142.jpg
IMG_20191103_173936.jpg
IMG_20191103_173940.jpg


So with no modification to the frame and fitting into the stock mount holes there is how it looks. Fans fit in and clear upper A arms (barely). Top of the rad frame is still stock shape so I don't foresee any fit issues there. The radiator/condenser can be removed out the engine side. The Coolant hoses may be tricky but I think this radiator will work. Just need to weld it up a bit better (only tacked together right now) and get some paint on these parts!

Things are sllllooowwwwlllyyy moving again.

T
 
Old Thread: Hello . There have been no replies in this thread for 100 days.
Content in this thread may no longer be relevant.
Perhaps it would be better to start a new thread instead.

Similar threads

Users who are viewing this thread