thanks for the info, I'm putting the car up on jackstands today in preparation to remove the body, never done anything like this before and its freakin me out a bit.
have a good weekend
have a good weekend
Follow along with the video below to see how to install our site as a web app on your home screen.
Note: This feature may not be available in some browsers.

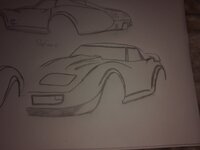
Wow Cody. Very impressive. she's looking great. I really like the wing concept drawing as well. Chip Foose talent there too..Hey guys,
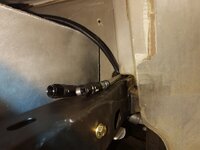
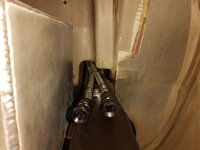
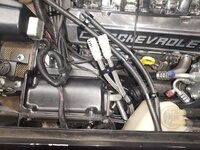
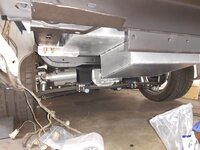
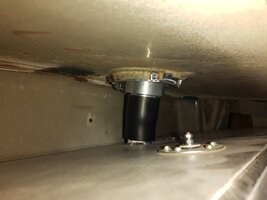
Weekly update! I got my new 8AN PTFE fuel lines last Friday and routed them into place. I dressed them in the engine bay with some aluminum hose clamps. I also reran the pump fuel power wire as I had poorly routed it the first time. I installed some wire loom over it then routed it to follow my new fuel lines all the way back to the tank. I'm really happy with how it turned out.
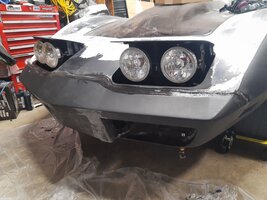
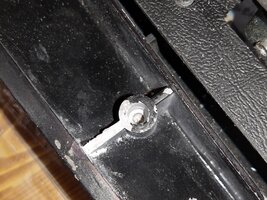
I also cleaned and painted all of my crash protection bumpers with POR15 and zero rust. I got some new Grade 8 hardware and installed some of it back onto the car.
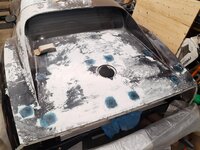
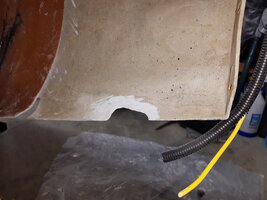
After I was done that I finished up my fiberglass repair on the rear deck. I filled the deep holes from the luggage rack with some chopped up fiberglass and resin then applied two layers on glass over it. On the antenna holes and front inner luggage rack holes I applied just 2 layers over top. The antenna holes have a total of 5 layers, the deeper luggage rack holes have 4 years and a thick layer of chopped fiberglass in the holes. The thinnest area are the two inner holes closest to the rear bumper. I wasn't able to get underneath those holes because of the bonding strip so they have 4 layers on top.
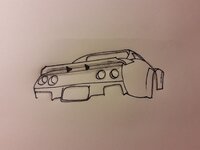
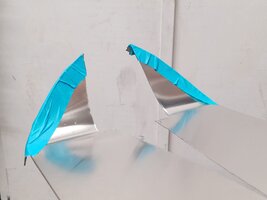
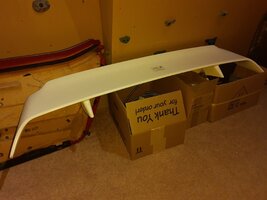
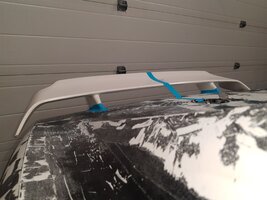
Right now I'm razor blading the body and once I'm done that I will cut the rear quarter panels off and install the new panels. Hopefully the rear quarter panels will be on in the next post! I've also decided to go with a rear wing on the build so I will be ordered that next week! I'll post a picture with a concept drawing I did of what it should look like.
In the next post I'll also be posting some links to a video with a little bit of the process or razor blade scrapping next week.

Thanks Paul! Kind of, I work in telecommunications.Living vicariously through your build Cody! Great job, and to think your an electrician by trade right?


Wow. Looking really good. And yes. We are certainly enjoying following you along.Hey guys,
Made some good progress this week.
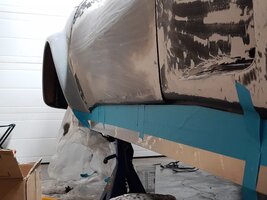
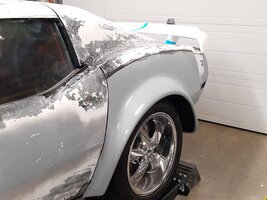
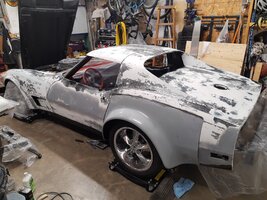
I finished razor blading the whole car. I left the are at the front because it is extremely well adhered so I'll have o sand it down.
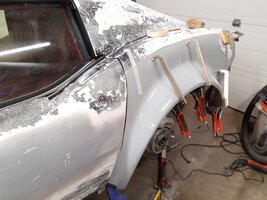
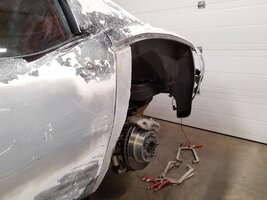
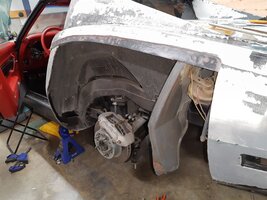
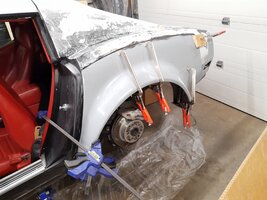
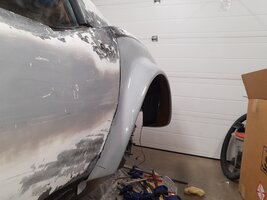
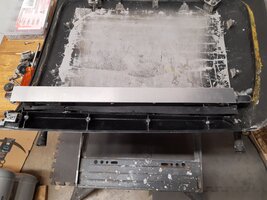
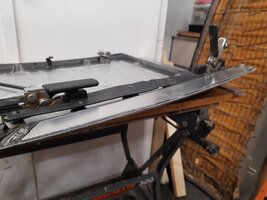
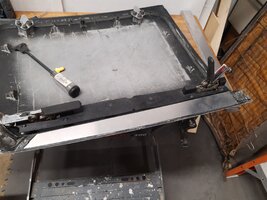
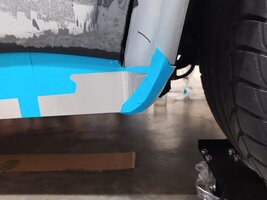
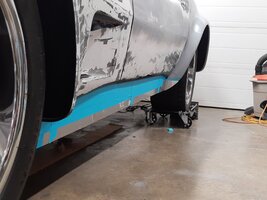
After that was done I hammered, chiseled, and cut my old quarter panel out with a Dremel, mini crowbar and a bigger crowbar. I first laid the new quarter over the old one and traced were to cut it at the back. I made sure to leave extra material to trim later. Once I finished the cut I began to hammer out the old quarter starting at the top, working my way along, then moved onto the sides. Once the quarter was out I had to cleanup and trim the bonding strip so that the new quarter sat nice. Once I got it sitting close I trimmed the new quarter along the score line. Again, I left some extra here so that I could sand it down to achieve a proper gap between it and the door. Next I lined up the new quarter and made a new cut line for the rear of it. Once that cut was done all I needed to do was clean up the bonding strip so that it was down to fiberglass and had little to no panel adhesive on it. I did this to the splash shield and also the bonding area by the door. Then I cleaned up the area with some mineral spirits and once dry, wiped it with a tack rag. I used Eastwood panel adhesive which I found out gets quiet runny and it made a bit of a mess. However, I got lots of adhesive in place and attached the panel. After I applied a few clamps and inspected the area, I found I needed a little more panel adhesive in some area. The runny property of the panel adhesive made it easy to fill in these voids as I could place it above the void and allow it to run down.once it had ran down I clamped it and made sure there was complete coverage.
The today I checked it and the panel had bonded well and is extremely strong. I picked up some Pro-form panel sealant and filled in any remaining voids. Tomorrow I'll be spraying some rubberized undercoating on the inside to match the rest of the wheel well then I can move onto the passenger side. I also cleaned up and painted my shims for the crash bumper so I can finish assembling it.
I'm still waiting on my new bumper and hood and I just ordered my rear wing! Once I'm done the other quarter panel I'll move on to making some custom side skirts.
Thanks for all the encouragement on this project. I hope you guys are enjoying the progress as much as I am.


Thank you so much! I really appreciate that and I'm really happy you and others are enjoying my write ups and my projects. You all give me so much support and encouragement for my work that I keep trying more challenging projects with the confidence you all have fostered.Watching this is a big part of my way for coping thru this current year-end partial shut-down; Covid-isolating; no family Christmas-gathering Winter.
The Final Project ... omg ... I am both smiling at this current work, looking forward to seeing it all post-paint and also
worried about what will keep me inspired during Winter 2021-22
I say it over and over ... Thank you for your many Winters of sharing
... looking forward to the next episode in the Finale
 ...
...

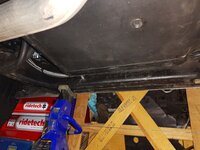
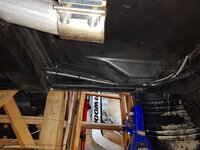
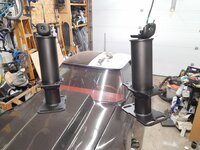
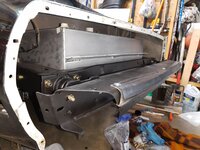
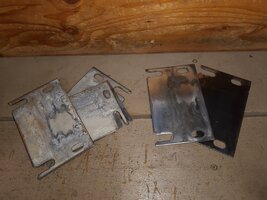
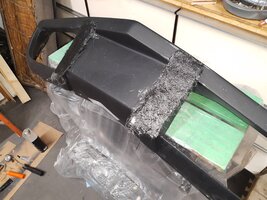
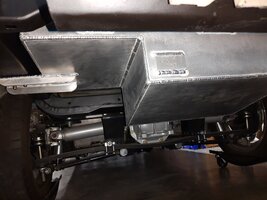
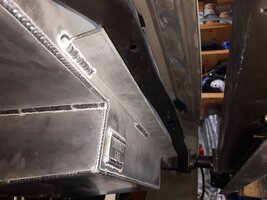
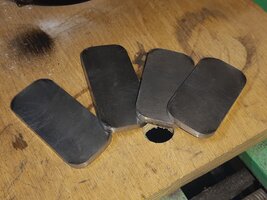
") . I bought some 1/4" steal plates and used a grinder to round off the corners so that, in the event of a crash, I don't have anything sharp that could puncture the tank. I definitely ordered the tabs too thick but I wanted to over engineer them to make sure the tank was solid. I still have to drill some holes and paint them but I have to wait for the tank to get back from powder coating. They will mount in the pocket of the rear crossmember and I'll step the tabs so they'll sit flush with the frame. I'll also tap the holes on the tabs so the gas tank bolts can screw into them.
. I bought some 1/4" steal plates and used a grinder to round off the corners so that, in the event of a crash, I don't have anything sharp that could puncture the tank. I definitely ordered the tabs too thick but I wanted to over engineer them to make sure the tank was solid. I still have to drill some holes and paint them but I have to wait for the tank to get back from powder coating. They will mount in the pocket of the rear crossmember and I'll step the tabs so they'll sit flush with the frame. I'll also tap the holes on the tabs so the gas tank bolts can screw into them. 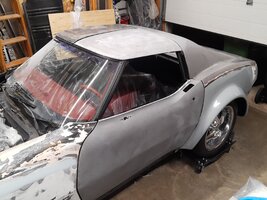


The word WOW! just doesn't cut it anymore Cody. Total admiration for the work you are putting into your baby.Hey guys,
Happy new year! Hope everyone had a great Christmas.
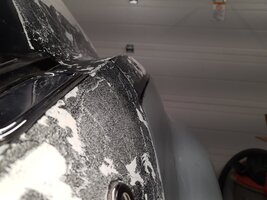
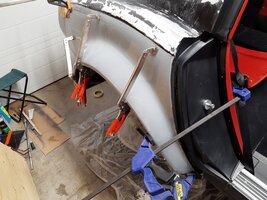
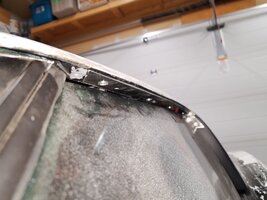
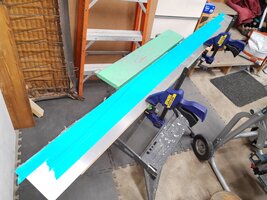
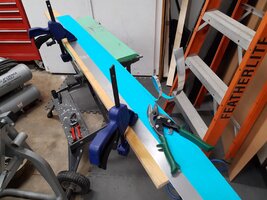
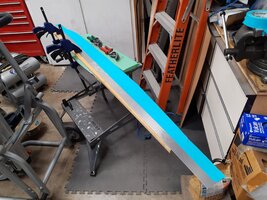
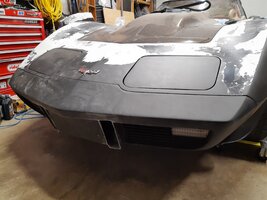
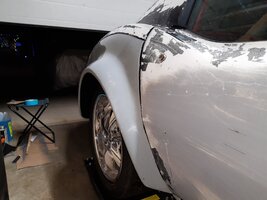
So over the past couple weeks I grooved out my front fenders and glassed in two layers of 1.5oz mat fiberglass on each side. They are one piece layers each 5"x 76". Then I sanded them down to match the contour of the fender. While I was making a mess sanding down the fiberglass I decided to sand down the holes I glassed on the rear deck.
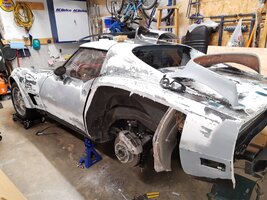
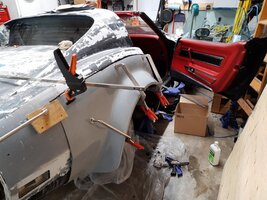
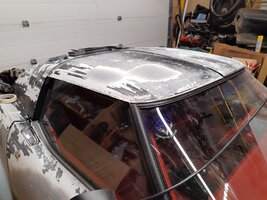
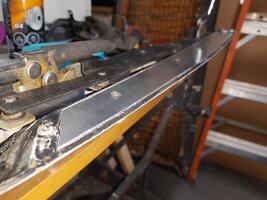
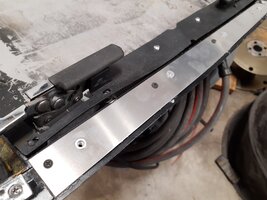
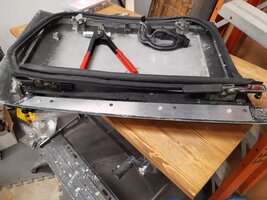
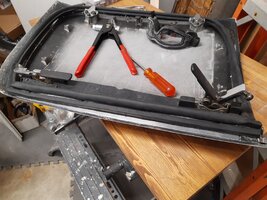
Next I disassembled the majority of the car which included everything from each door and the rear glass. To remove the rear glass I tried some fishing line first but it snapped right away. Then I tried some trimmer wire and it worked like a charm. Once the glass was out I scraped off the old adhesive with a razor blade and got the rest off with some mineral spirits. Fun fact, mineral spirits doesn't hurt window tint!
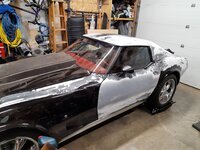
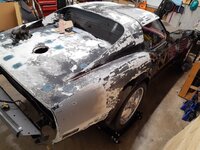
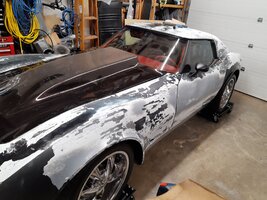
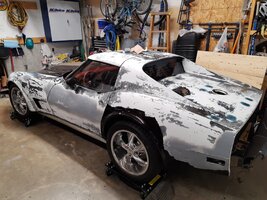
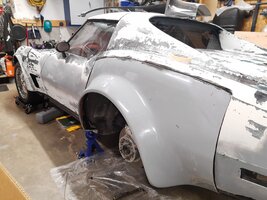
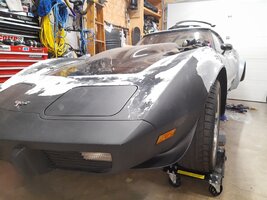
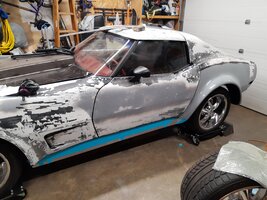
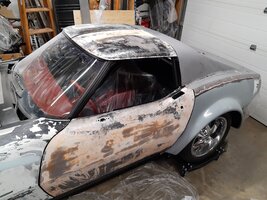
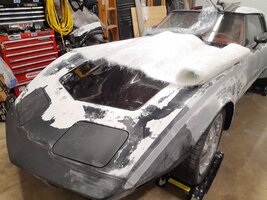
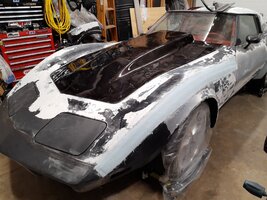
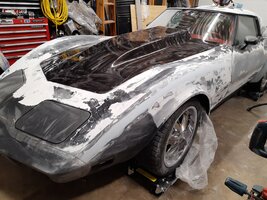
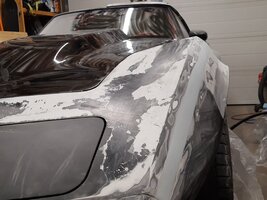
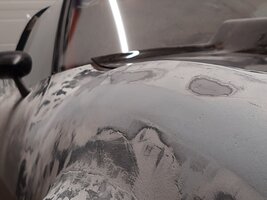
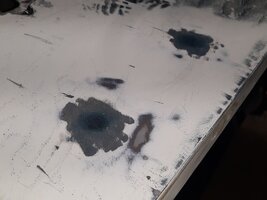
After the car was disassembled I laid out some plastic over the rear frame, the interior, and on the ground, then I started applying the paint stripper. I went with Citris Strip after reading a few forums where guys have used it previously. It costs about $50 on Amazon but you only need two cases to do the entire car (after razor blading of course). This stuff actually says not to use it on fiberglass but I tested it on a spare piece of SMC and polyester and it doesn't hurt it at all. I found it takes about 3-4 applications of this stuff waiting between 7-12 hours per application and any spot I hadn't razor bladed did not come off. Inbetween applications I have to scrape off each panel with a razor blade then reapply the stripper. After all the paint is off I usually have a red layer of factory primer that comes off with some stripper on a red scotch bright pad. After that I clean the panel with mineral spirits. So far the entire rear of the car from the doors back has been stripped down to fiberglass. I have the hood surround on it's last application and the front fenders should be done on Monday. This whole process has been very labor intensive and I'd recommend anyone who is considering doing this to just soda blast your car. All in all I have around 70 hours just stripping paint.
I've also made 4 mounting tabs for the gas tank because I may have measured the rear mounting tab a bit short... I mean, I meant to do that and it'll be easier to install the tank. Ya, that's right
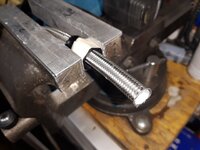
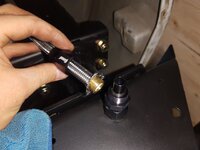
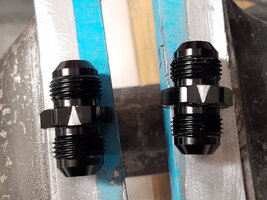
One little thing I did while waiting for the fuel tank to get back from powder coating is I filed a few directional arrows into two of my fuel line fittings. That way if I ever disconnect them I know which line is supply and return.
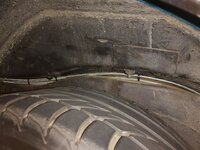
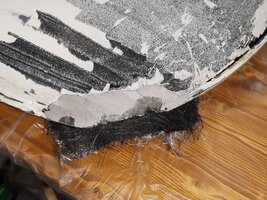
Lastly, I started a few fiberglass repairs. I did a few layers of fiberglass on my rear quarter where a tree branch had wreaked the bottom of the quarter, and I did a few layers on my T-top where I broke the corner removing the trim. I also fixed one of the holes for my T-top weather stripping retainer. I found a good way to repair a screw hole in fiberglass is to drill it out quite a bit bigger than the hole needed then clean the hole. Cut up some fiberglass mat into small pieces. Mix the resin then add a little resin to the hole and grab some chopped fiberglass, wet it, then shove it in the hole. I then took a Q-tip, snapped it in half and used the hard end to pack the hole down. Once it cured I drilled the hole then installed the screw with a quick clockwise then counter clock wise turn to walk it down (because I didn't have a tap that pitch). It worked great and the quality of the threads are amazing.
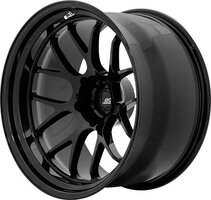
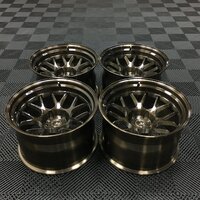
I should get my hood and bumper this coming week and my rims should be shipping soon as well!
Once I finish stripping the car I'll start to correct any damaged areas, fill the rear quarter panel seams, and I'll start the blend the front bumper to the body.
