She is going to be a looker Cody. Great color choice also. 
Follow along with the video below to see how to install our site as a web app on your home screen.
Note: This feature may not be available in some browsers.
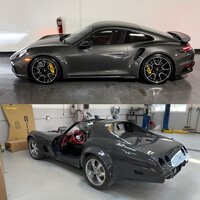
Thanks Paul.That color is going to look amazing in the sun! Coming together really nicely! Where are you going to get the painting done?

Thanks @netsinah! Ya, I got one other price and it was really high. The guy I'm now getting to paint it owns his own shop and my dad has done work for him over the years so he's giving me a good price. He's also Audi, Porsche, and Bentley certified so I know that the Porsche Agate Grey that I'm going with should be perfect.Keeps looking better and better. Here's hoping you'll get a reasonable quote for a good paint job and you'll soon (in the next 6 weeks??) be driving your "new" wheels! You may want to get at least 2 quotes for the paint job to make sure you're in the ballpark. Sometimes people will try to take advantage of you when they see how much time/effort you've already put into the car.
Damn Cody. That is looking soooooo good... Man. You certainly put your heart and soul into this restoration and it shows. Many thanks for including us here on the forum throughout.Hey guys,
I'm sorry it's been so long since I've posted. I've done a ton of work since I last posted and I'm excited to share this with you all.
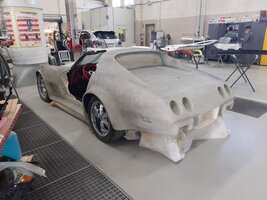
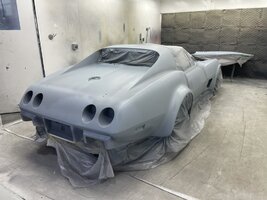
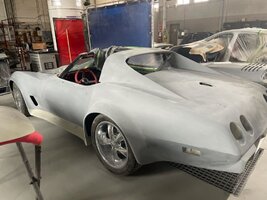
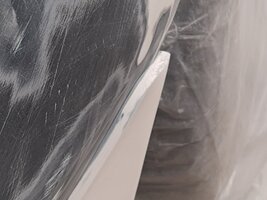
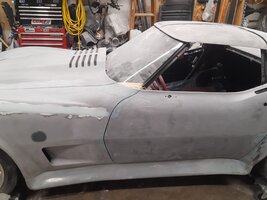
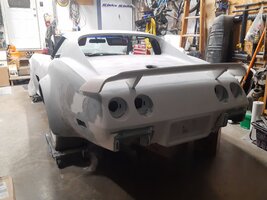
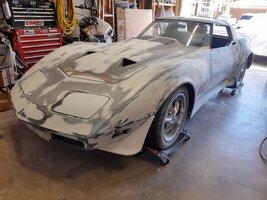
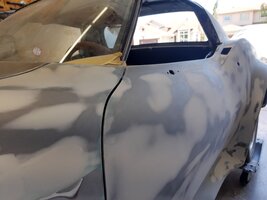
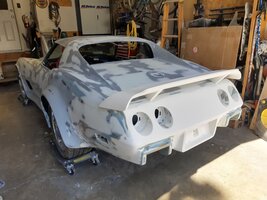
So, after over 900 hours I've finally finished all the body work. I filled the entire car with Evercoat Rage Gold Ultra then blocked everything down. The only thing I didn't get to was the door jambs but I'm running out of time to work on the car and I'd like to drive it this summer. I had to fix a ton of air bubbles that were in the panels. The original panels were all nearly flawless but the Ecklers panels were filled with hundreds of air bubbles. Some as big as 1"X3" that I had to chip out, clean, and fill. The ACI panels on the other hand were all nearly flawless.
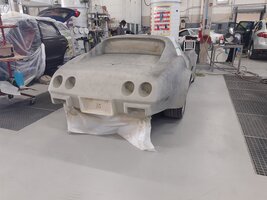
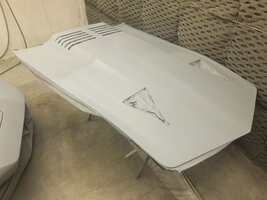
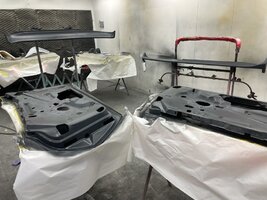
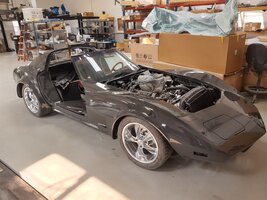
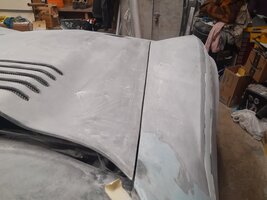
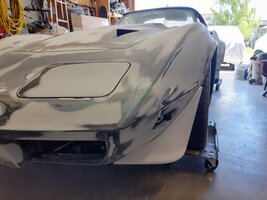
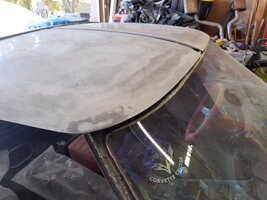
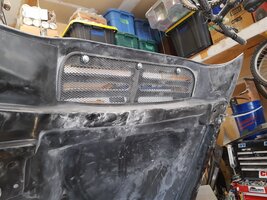
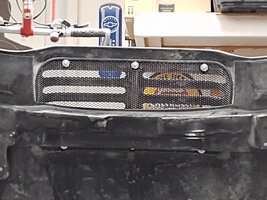
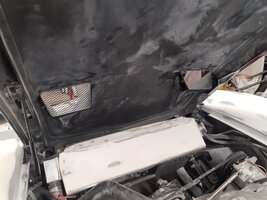
In addition to the body work I fixed the grill on my hood. My dad was bored one day so I gave him the job of removing the terrible grill on the hood lol. Took him a few hours with a heat gun and a scraper but he got it off! I then cleaned up the hood and made a new grill out of aluminum. It's way lighter than the old stainless stuff and isn't as restrictive. To mount it I used some urethane to attach some elevator bolts to the hood.
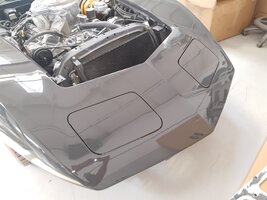
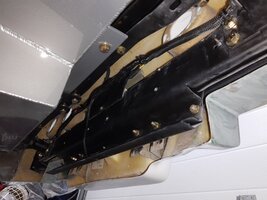
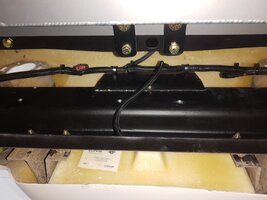
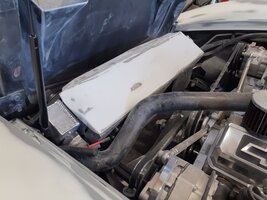
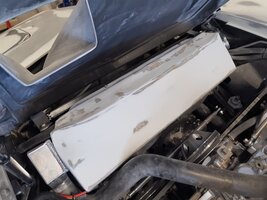
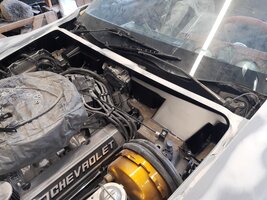
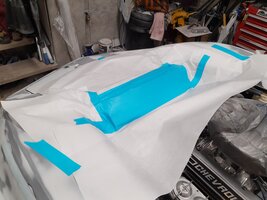
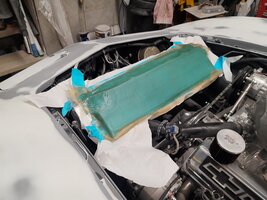
I then decided to make a new radiator/fan shroud cover. I used some masking tape to create the shape of the cover. I then masked everything off and sprayed some mold release agent over the tape. I laid 5 layers of cloth fiberglass over the tape and waited for it to setup. Once it cured I removed it and found it to be a little flimsy. I thought this might cause it to warp over time so I added two layers of 1.5oz mat cloth to the bottom which made it incredibly strong. After that I just filled and sanded it then drilled two holes to mount it and installed some threaded rivets in the rad support. It fits perfectly and the mounting screws are relatively hidden.
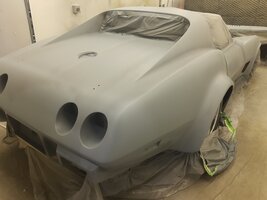
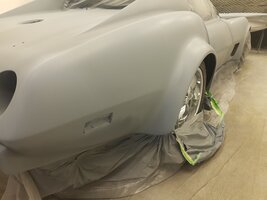
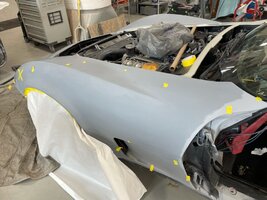
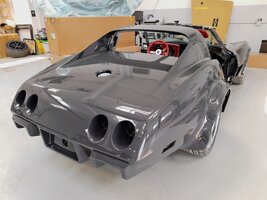
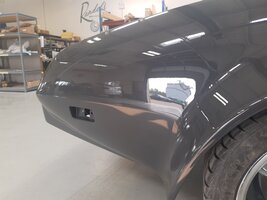
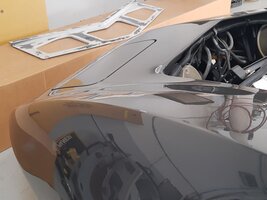
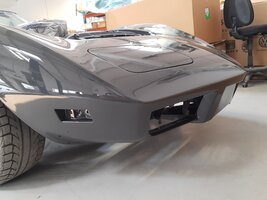
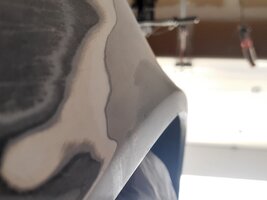
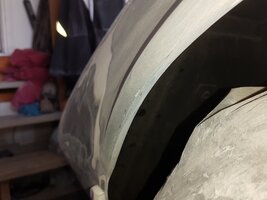
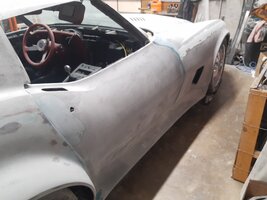
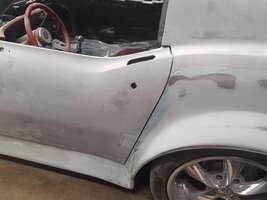
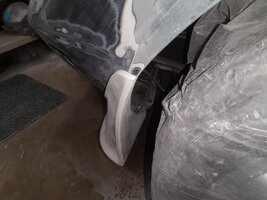
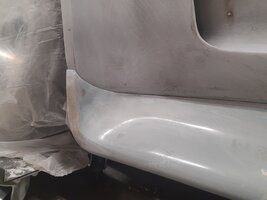
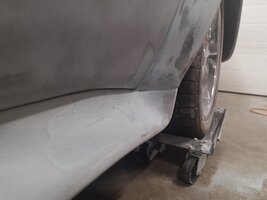
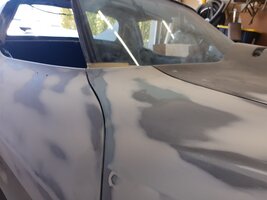
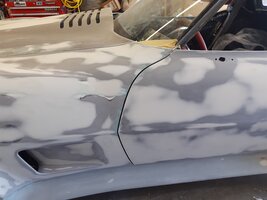
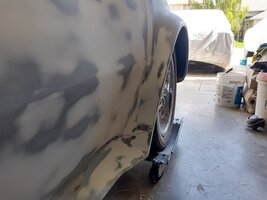
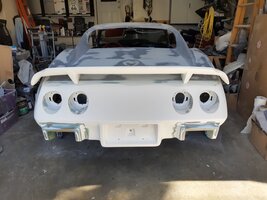
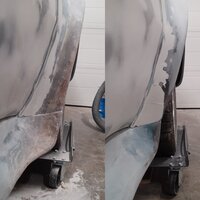
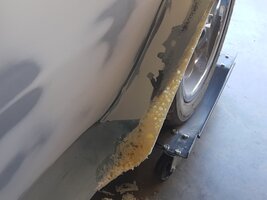
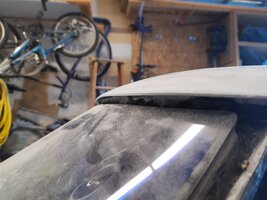
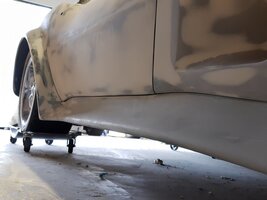
After that I decided to redesign the front of the quarters and back of the skirts. I wanted to redesign it to match the shape and angle of the front spoiler. I used some polyurethane foam and created a mold. I used a digital angle finder to get the angle of the front spoiler and matched it to the mold. I also took the curve of the bottom the front spoiler to make the flare of the side skirt. Lastly I measured the height of the spoiler so I could match that to the rear. Once I was happy with the shape I fiberglassed it with cloth and mat fiberglass. Once that was cured I filled and sanded it. It took around 20 hours for this small change. I only added 2" to it at the widest point but I feel it's made a huge difference.
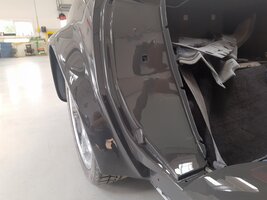
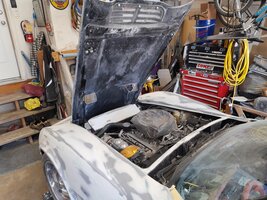
I also had to fix my engine bay. I did some bad filling 5 years ago and the engine bay was chipping in a few areas. I ground it down, filled, and painted it.
My painter just came today and is really impressed with the body work. He told me I should seriously consider a job in it. I don't think it's for me. I little too itchy lol. I should have a quote today or tomorrow and hopefully I'll have the car in for paint soon.
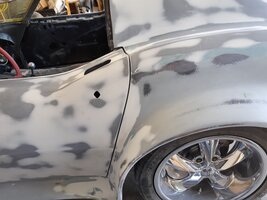
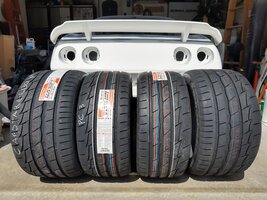
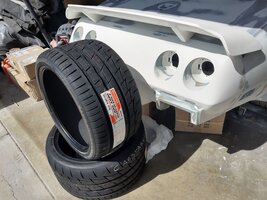
I've saved the best for last. I picked up my new tires a few weeks ago! 275's for the front and 325's on the rear. Firestone Firehawk Indy 500's.
Looking very nice Cody. I mean absolutely no disrespect and you are doing excellent work. I am no expert at bodywork, but I have done a fair bit. I believe the largest cost at this point is many coats of high build primer and likely 50-100 hours of wet sanding. All of this added work is what makes an outstanding paint job stand out from a good or decent paint job. Blocking the body for hours and hours and several resprays of hi build will make it into to masterpiece you are building. $15-20k sounds about right for a perfect paint job. I'm sure you could do all of the primer and blocking if you got set up for it. I have all the faith in you, and this would likely save you of $10k. JMHOHey guys,
I'm sorry it's been so long since I've posted. I've done a ton of work since I last posted and I'm excited to share this with you all.
So, after over 900 hours I've finally finished all the body work. I filled the entire car with Evercoat Rage Gold Ultra then blocked everything down. The only thing I didn't get to was the door jambs but I'm running out of time to work on the car and I'd like to drive it this summer. I had to fix a ton of air bubbles that were in the panels. The original panels were all nearly flawless but the Ecklers panels were filled with hundreds of air bubbles. Some as big as 1"X3" that I had to chip out, clean, and fill. The ACI panels on the other hand were all nearly flawless.
In addition to the body work I fixed the grill on my hood. My dad was bored one day so I gave him the job of removing the terrible grill on the hood lol. Took him a few hours with a heat gun and a scraper but he got it off! I then cleaned up the hood and made a new grill out of aluminum. It's way lighter than the old stainless stuff and isn't as restrictive. To mount it I used some urethane to attach some elevator bolts to the hood.
I then decided to make a new radiator/fan shroud cover. I used some masking tape to create the shape of the cover. I then masked everything off and sprayed some mold release agent over the tape. I laid 5 layers of cloth fiberglass over the tape and waited for it to setup. Once it cured I removed it and found it to be a little flimsy. I thought this might cause it to warp over time so I added two layers of 1.5oz mat cloth to the bottom which made it incredibly strong. After that I just filled and sanded it then drilled two holes to mount it and installed some threaded rivets in the rad support. It fits perfectly and the mounting screws are relatively hidden.
After that I decided to redesign the front of the quarters and back of the skirts. I wanted to redesign it to match the shape and angle of the front spoiler. I used some polyurethane foam and created a mold. I used a digital angle finder to get the angle of the front spoiler and matched it to the mold. I also took the curve of the bottom the front spoiler to make the flare of the side skirt. Lastly I measured the height of the spoiler so I could match that to the rear. Once I was happy with the shape I fiberglassed it with cloth and mat fiberglass. Once that was cured I filled and sanded it. It took around 20 hours for this small change. I only added 2" to it at the widest point but I feel it's made a huge difference.
I also had to fix my engine bay. I did some bad filling 5 years ago and the engine bay was chipping in a few areas. I ground it down, filled, and painted it.
My painter just came today and is really impressed with the body work. He told me I should seriously consider a job in it. I don't think it's for me. I little too itchy lol. I should have a quote today or tomorrow and hopefully I'll have the car in for paint soon.
I've saved the best for last. I picked up my new tires a few weeks ago! 275's for the front and 325's on the rear. Firestone Firehawk Indy 500's.
Thanks Zig! No disrespect taken. My efforts of filling the whole car and blocking out was to get all the panels perfectly flat. Your absolutely right though, I don't really know how good I did till they lay the high build primer on. I believe I've got it very flat and there are just a couple of areas that seem very slightly low. I did scour the entire car too and filled all the little pin holes. I'm hoping to have it between $10-12.5k.I should also mention, until the first coat of primer lays down, followed by a mist guide coat and then a block sand to show any high or low spots or missed imperfections, you won't really know how much extra labour is required. Once again, no disrespect meant, and your hard work is highly noted up to this point.

Can't wait to see it Cody. Along with the rest of us here that have been following your build. The only one who can't wait to see it more is you buddy.Hey guys,
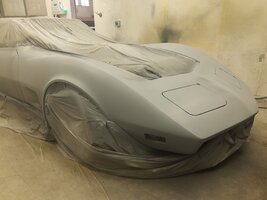
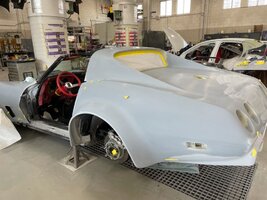
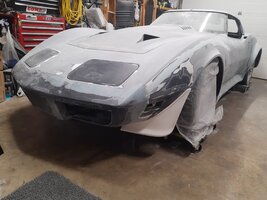
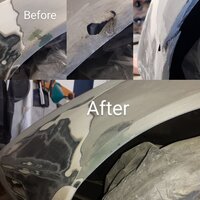
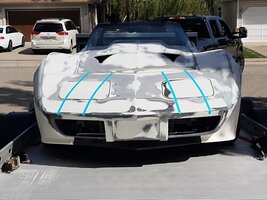
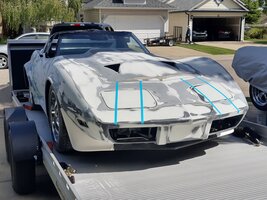
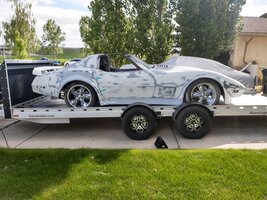
Well it's finally at the body shop!! Over 800 hours of work but it was well worth it. I love how it turned out. Looks really wide and aggressive.
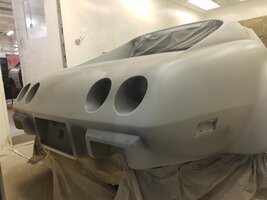
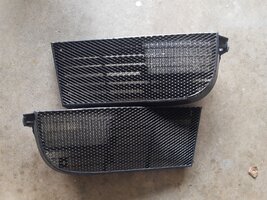
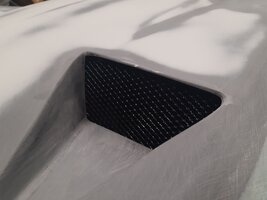
I decided to add some grills to the NACA ducts before it went in. I made these grills out of the same aluminum mesh that I made the hood grill out of. I think I will cut some more material and make some grills for the front bumper just to keep it all consistent.
The body shop said it should be done in 2-3 weeks so I will keep you guys updated with some pictures.
Good on ya. You deserve this.