Final Winter Project 2020-2021

Hey guys,

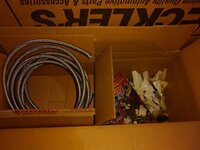
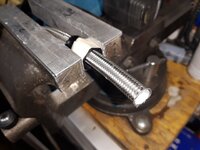
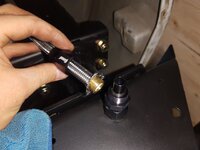
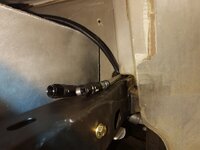
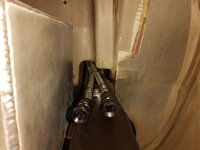
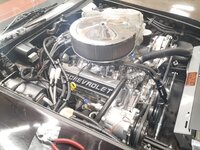
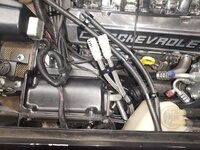
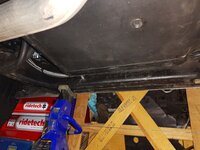
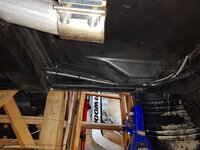
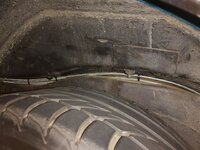
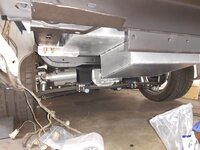
Weekly update! I got my new 8AN PTFE fuel lines last Friday and routed them into place. I dressed them in the engine bay with some aluminum hose clamps. I also reran the pump fuel power wire as I had poorly routed it the first time. I installed some wire loom over it then routed it to follow my new fuel lines all the way back to the tank. I'm really happy with how it turned out.

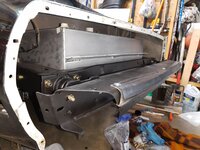
I also cleaned and painted all of my crash protection bumpers with POR15 and zero rust. I got some new Grade 8 hardware and installed some of it back onto the car.

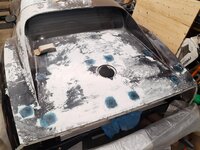
After I was done that I finished up my fiberglass repair on the rear deck. I filled the deep holes from the luggage rack with some chopped up fiberglass and resin then applied two layers on glass over it. On the antenna holes and front inner luggage rack holes I applied just 2 layers over top. The antenna holes have a total of 5 layers, the deeper luggage rack holes have 4 years and a thick layer of chopped fiberglass in the holes. The thinnest area are the two inner holes closest to the rear bumper. I wasn't able to get underneath those holes because of the bonding strip so they have 4 layers on top.

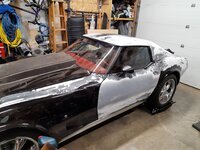
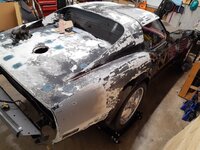
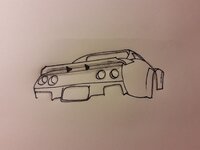
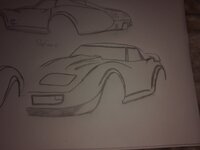
Right now I'm razor blading the body and once I'm done that I will cut the rear quarter panels off and install the new panels. Hopefully the rear quarter panels will be on in the next post! I've also decided to go with a rear wing on the build so I will be ordered that next week! I'll post a picture with a concept drawing I did of what it should look like.

In the next post I'll also be posting some links to a video with a little bit of the process or razor blade scrapping next week.
 

Attachments

  • IMG_20201112_174616701.jpg
    IMG_20201112_174616701.jpg
    338.4 KB · Views: 69
  • IMG_20201114_180614821.jpg
    IMG_20201114_180614821.jpg
    250.6 KB · Views: 65
  • IMG_20201114_183124305.jpg
    IMG_20201114_183124305.jpg
    306.9 KB · Views: 57
  • IMG_20201115_161540721.jpg
    IMG_20201115_161540721.jpg
    315.5 KB · Views: 52
  • IMG_20201114_200833720.jpg
    IMG_20201114_200833720.jpg
    254.6 KB · Views: 48
  • IMG_20201115_155038617.jpg
    IMG_20201115_155038617.jpg
    553.7 KB · Views: 46
  • IMG_20201115_155045967.jpg
    IMG_20201115_155045967.jpg
    599.3 KB · Views: 37
  • IMG_20201115_160253812.jpg
    IMG_20201115_160253812.jpg
    405.4 KB · Views: 36
  • IMG_20201115_161633351.jpg
    IMG_20201115_161633351.jpg
    398.5 KB · Views: 36
  • IMG_20201114_201700799.jpg
    IMG_20201114_201700799.jpg
    557.5 KB · Views: 36
  • IMG_20201112_102715240.jpg
    IMG_20201112_102715240.jpg
    394.1 KB · Views: 37
  • IMG_20201113_225016435.jpg
    IMG_20201113_225016435.jpg
    399.1 KB · Views: 36
  • IMG_20201113_224338129.jpg
    IMG_20201113_224338129.jpg
    352.9 KB · Views: 34
  • IMG_20201112_205642270.jpg
    IMG_20201112_205642270.jpg
    579.2 KB · Views: 31
  • IMG_20201117_173608011.jpg
    IMG_20201117_173608011.jpg
    479.6 KB · Views: 31
  • IMG_20201117_173626976.jpg
    IMG_20201117_173626976.jpg
    524.2 KB · Views: 35
  • IMG_20201117_210447713.jpg
    IMG_20201117_210447713.jpg
    209.4 KB · Views: 35
  • IMG_20201115_182706193.jpg
    IMG_20201115_182706193.jpg
    150.6 KB · Views: 36
Hey guys,

Weekly update! I got my new 8AN PTFE fuel lines last Friday and routed them into place. I dressed them in the engine bay with some aluminum hose clamps. I also reran the pump fuel power wire as I had poorly routed it the first time. I installed some wire loom over it then routed it to follow my new fuel lines all the way back to the tank. I'm really happy with how it turned out.

I also cleaned and painted all of my crash protection bumpers with POR15 and zero rust. I got some new Grade 8 hardware and installed some of it back onto the car.

After I was done that I finished up my fiberglass repair on the rear deck. I filled the deep holes from the luggage rack with some chopped up fiberglass and resin then applied two layers on glass over it. On the antenna holes and front inner luggage rack holes I applied just 2 layers over top. The antenna holes have a total of 5 layers, the deeper luggage rack holes have 4 years and a thick layer of chopped fiberglass in the holes. The thinnest area are the two inner holes closest to the rear bumper. I wasn't able to get underneath those holes because of the bonding strip so they have 4 layers on top.

Right now I'm razor blading the body and once I'm done that I will cut the rear quarter panels off and install the new panels. Hopefully the rear quarter panels will be on in the next post! I've also decided to go with a rear wing on the build so I will be ordered that next week! I'll post a picture with a concept drawing I did of what it should look like.

In the next post I'll also be posting some links to a video with a little bit of the process or razor blade scrapping next week.
Wow Cody. Very impressive. she's looking great. I really like the wing concept drawing as well. Chip Foose talent there too.. :thumbs:
 
Hey guys,

Made some good progress this week.

I finished razor blading the whole car. I left the are at the front because it is extremely well adhered so I'll have o sand it down.

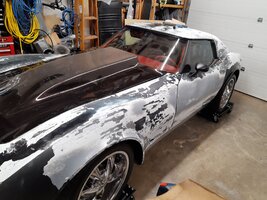
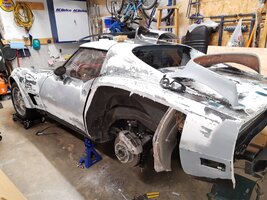
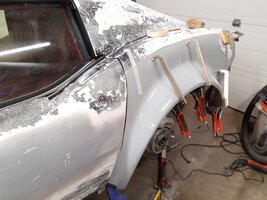
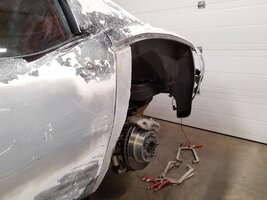
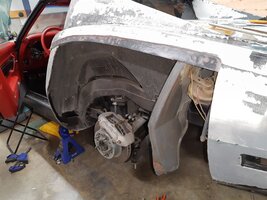
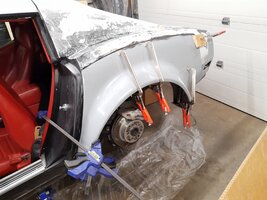
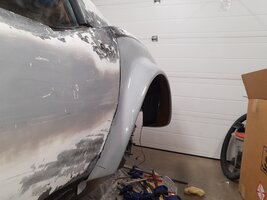
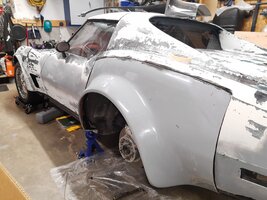
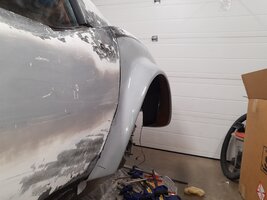
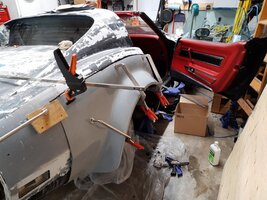
After that was done I hammered, chiseled, and cut my old quarter panel out with a Dremel, mini crowbar and a bigger crowbar. I first laid the new quarter over the old one and traced were to cut it at the back. I made sure to leave extra material to trim later. Once I finished the cut I began to hammer out the old quarter starting at the top, working my way along, then moved onto the sides. Once the quarter was out I had to cleanup and trim the bonding strip so that the new quarter sat nice. Once I got it sitting close I trimmed the new quarter along the score line. Again, I left some extra here so that I could sand it down to achieve a proper gap between it and the door. Next I lined up the new quarter and made a new cut line for the rear of it. Once that cut was done all I needed to do was clean up the bonding strip so that it was down to fiberglass and had little to no panel adhesive on it. I did this to the splash shield and also the bonding area by the door. Then I cleaned up the area with some mineral spirits and once dry, wiped it with a tack rag. I used Eastwood panel adhesive which I found out gets quiet runny and it made a bit of a mess. However, I got lots of adhesive in place and attached the panel. After I applied a few clamps and inspected the area, I found I needed a little more panel adhesive in some area. The runny property of the panel adhesive made it easy to fill in these voids as I could place it above the void and allow it to run down.once it had ran down I clamped it and made sure there was complete coverage.

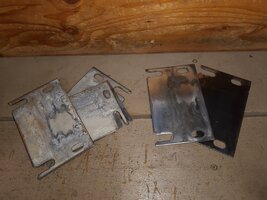
The today I checked it and the panel had bonded well and is extremely strong. I picked up some Pro-form panel sealant and filled in any remaining voids. Tomorrow I'll be spraying some rubberized undercoating on the inside to match the rest of the wheel well then I can move onto the passenger side. I also cleaned up and painted my shims for the crash bumper so I can finish assembling it.

I'm still waiting on my new bumper and hood and I just ordered my rear wing! Once I'm done the other quarter panel I'll move on to making some custom side skirts.

Thanks for all the encouragement on this project. I hope you guys are enjoying the progress as much as I am.
 

Attachments

  • IMG_20201118_174335024.jpg
    IMG_20201118_174335024.jpg
    935.2 KB · Views: 38
  • IMG_20201118_174355360.jpg
    IMG_20201118_174355360.jpg
    998.7 KB · Views: 32
  • IMG_20201120_225944653.jpg
    IMG_20201120_225944653.jpg
    1 MB · Views: 36
  • IMG_20201122_184323833.jpg
    IMG_20201122_184323833.jpg
    890.8 KB · Views: 32
  • IMG_20201122_193253601.jpg
    IMG_20201122_193253601.jpg
    791.6 KB · Views: 33
  • IMG_20201122_192748812.jpg
    IMG_20201122_192748812.jpg
    871.8 KB · Views: 33
  • IMG_20201122_214452380.jpg
    IMG_20201122_214452380.jpg
    829.7 KB · Views: 30
  • IMG_20201123_151546887.jpg
    IMG_20201123_151546887.jpg
    631.7 KB · Views: 28
  • IMG_20201123_151625441.jpg
    IMG_20201123_151625441.jpg
    777.3 KB · Views: 27
  • IMG_20201123_151546887.jpg
    IMG_20201123_151546887.jpg
    631.7 KB · Views: 26
  • IMG_20201123_151534761.jpg
    IMG_20201123_151534761.jpg
    767.5 KB · Views: 26
  • IMG_20201123_152201155.jpg
    IMG_20201123_152201155.jpg
    920 KB · Views: 26
  • IMG_20201123_152228432.jpg
    IMG_20201123_152228432.jpg
    890 KB · Views: 26
  • IMG_20201123_220138219.jpg
    IMG_20201123_220138219.jpg
    860.2 KB · Views: 29
Hey guys,

Made some good progress this week.

I finished razor blading the whole car. I left the are at the front because it is extremely well adhered so I'll have o sand it down.

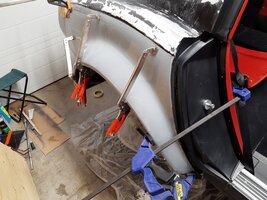
After that was done I hammered, chiseled, and cut my old quarter panel out with a Dremel, mini crowbar and a bigger crowbar. I first laid the new quarter over the old one and traced were to cut it at the back. I made sure to leave extra material to trim later. Once I finished the cut I began to hammer out the old quarter starting at the top, working my way along, then moved onto the sides. Once the quarter was out I had to cleanup and trim the bonding strip so that the new quarter sat nice. Once I got it sitting close I trimmed the new quarter along the score line. Again, I left some extra here so that I could sand it down to achieve a proper gap between it and the door. Next I lined up the new quarter and made a new cut line for the rear of it. Once that cut was done all I needed to do was clean up the bonding strip so that it was down to fiberglass and had little to no panel adhesive on it. I did this to the splash shield and also the bonding area by the door. Then I cleaned up the area with some mineral spirits and once dry, wiped it with a tack rag. I used Eastwood panel adhesive which I found out gets quiet runny and it made a bit of a mess. However, I got lots of adhesive in place and attached the panel. After I applied a few clamps and inspected the area, I found I needed a little more panel adhesive in some area. The runny property of the panel adhesive made it easy to fill in these voids as I could place it above the void and allow it to run down.once it had ran down I clamped it and made sure there was complete coverage.

The today I checked it and the panel had bonded well and is extremely strong. I picked up some Pro-form panel sealant and filled in any remaining voids. Tomorrow I'll be spraying some rubberized undercoating on the inside to match the rest of the wheel well then I can move onto the passenger side. I also cleaned up and painted my shims for the crash bumper so I can finish assembling it.

I'm still waiting on my new bumper and hood and I just ordered my rear wing! Once I'm done the other quarter panel I'll move on to making some custom side skirts.

Thanks for all the encouragement on this project. I hope you guys are enjoying the progress as much as I am.
Wow. Looking really good. And yes. We are certainly enjoying following you along. :thumbs:
 
Hey guys,

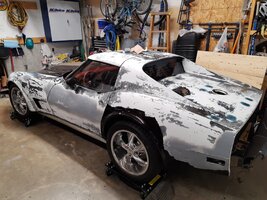
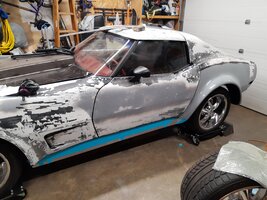
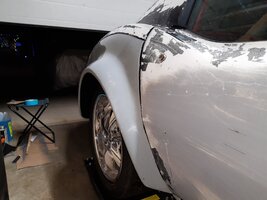
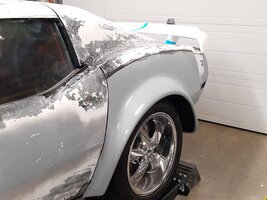
This past week I was able to remove the passenger quarter panel and got the new flared quarter panel on. I just finished filling in some gaps with urethane yesterday so I have to wait a little bit before I can apply the undercoating to the inside of the wheel well.

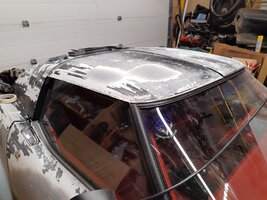
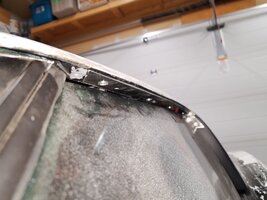
I also removed all of the T-top trim. I didn't care for the look of it and how it sticks out from the body when your looking down the side. With this more modern look I'm going for I think it will look nice. I have to repair the passenger T-top but then I'll sand down the lip at the front of the T-top and contour it. I'll also round the edges a little going down the sides.
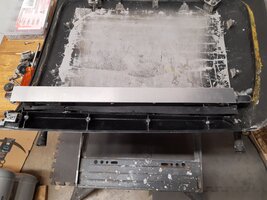
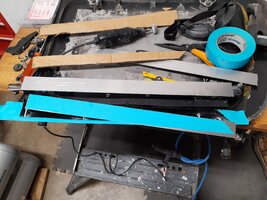
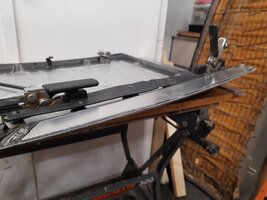
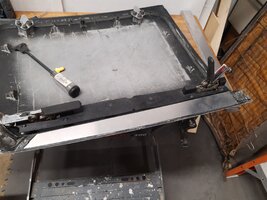
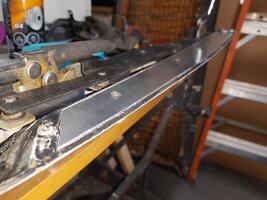
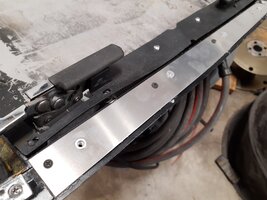
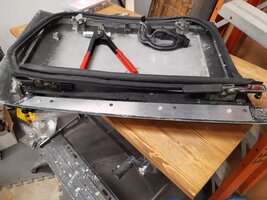
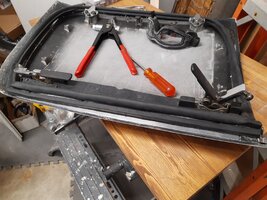
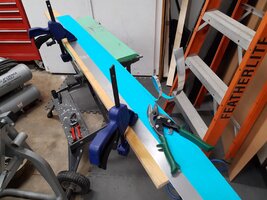
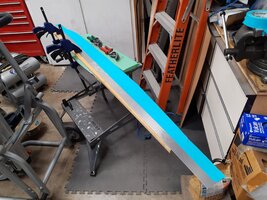
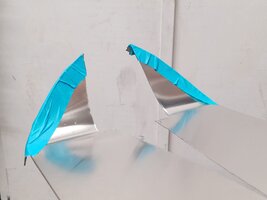
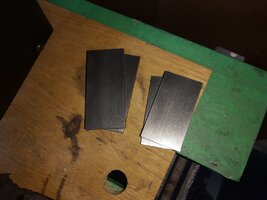
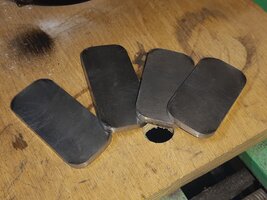
With removing the trim I was left with a little issue as part of that trim wraps underneath and the weather stripping mounts to it. So I had to make some panels to fit in there. I first clearanced some fiberglass to make room for the panel then I laid some tape over the area and used a knife to cut out the shape. Then I just stuck the tape to some 5052 aluminum and cut and filed it to shape. It has a double curve so it took a little time to get the shape but these pieces snap perfectly into place. I then drilled a couple holes for the screws to hold it in place and installed a couple of threaded rivets that the weather stripping will screw into.

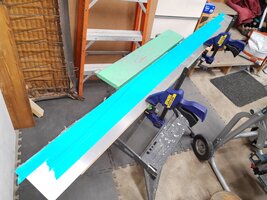
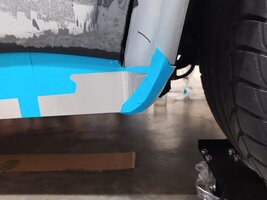
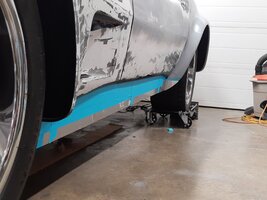
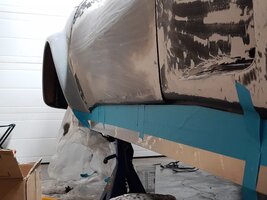
Next up I'll be making some new side skirts out of 5052 aluminum. I can't use the old ones because of the new quarter panels. The new side skirts will be about 2" lower than the factory and I'm going to bend the rear out to the edge of the quarter panel and taper the side skirt so that it matches the front spoiler. I'm debating about bending the front of the side skirt out to the edge of the front fender as well but I think leaving it in like factory will make the side skirt look more arrow like.

I'm also getting my new gas tank filler neck tomorrow so I'll mock that up and take my tank back to make some alterations.
 

Attachments

  • IMG_20201130_193316232.jpg
    IMG_20201130_193316232.jpg
    903.4 KB · Views: 30
  • IMG_20201130_192923590.jpg
    IMG_20201130_192923590.jpg
    922.5 KB · Views: 30
  • IMG_20201128_163218152.jpg
    IMG_20201128_163218152.jpg
    890.6 KB · Views: 31
  • IMG_20201130_144117201.jpg
    IMG_20201130_144117201.jpg
    903.9 KB · Views: 30
  • IMG_20201130_151458200.jpg
    IMG_20201130_151458200.jpg
    842.9 KB · Views: 29
  • IMG_20201130_164804567.jpg
    IMG_20201130_164804567.jpg
    565.6 KB · Views: 27
  • IMG_20201130_164759115.jpg
    IMG_20201130_164759115.jpg
    859.7 KB · Views: 25
  • IMG_20201201_220545115.jpg
    IMG_20201201_220545115.jpg
    614.9 KB · Views: 23
  • IMG_20201202_162108267.jpg
    IMG_20201202_162108267.jpg
    709.3 KB · Views: 23
  • IMG_20201202_163710602.jpg
    IMG_20201202_163710602.jpg
    960.8 KB · Views: 22
  • IMG_20201202_163926654.jpg
    IMG_20201202_163926654.jpg
    966.8 KB · Views: 22
  • IMG_20201202_164529629.jpg
    IMG_20201202_164529629.jpg
    668.4 KB · Views: 21
  • IMG_20201202_174033643.jpg
    IMG_20201202_174033643.jpg
    827 KB · Views: 27
Last edited:
Hey guys,

I've been hard at work these past couple weeks so I skipped my weekly update.

Since my last post I made some side skirts. They turned out really nice and once I had them all shaped, I took them to my fabricator friend to put a 3/8" edge around the perimeter but I had used too thin of aluminum so when he ground down the welds it cracked. So instead I'll spray some foam on the back and contour them, then I'll make some fiberglass skirts using it as the mold.

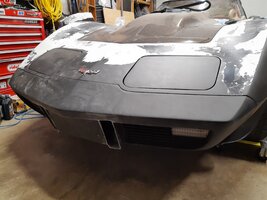
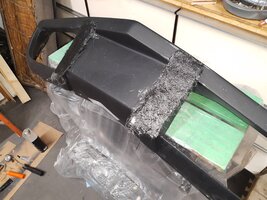
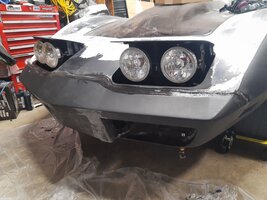
Next, I cut off the bumperettes on the front bumper, then removed the bumper and fiberglassed the holes. In total they are 6 layers thick. I still have to fill them and contour them a little but I love the look. I kept the front license plate there for two reasons. To keep it simple and to retain that 77 look. I didn't want it looking like a 74 bumper. Once the bumper was all done I sanded down the body and bumper's mounting surfaces to fiberglass then used some panel adhesive and bolted it together. I decided to go with a seamless look that is easier for body work, the painting process, and final assembly.

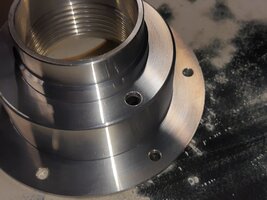
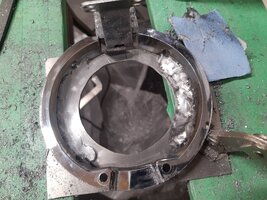
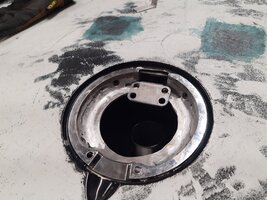
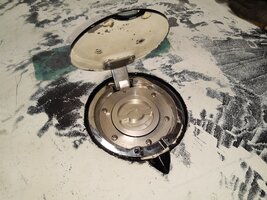
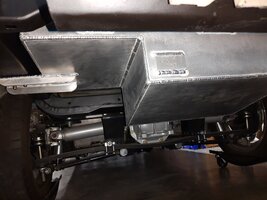
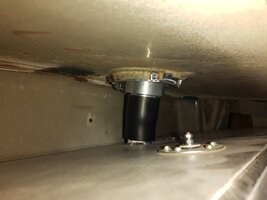
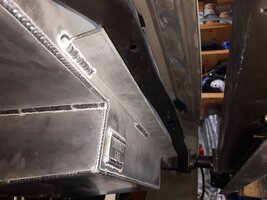
I got the gas tank back after changing a few things and everything lines up now. I got my fabricator friend to quickly weld a plate onto the back of my gas lid but we're still not sure what it's made from. It's not steel and it's not just aluminum, so it made for a funky weld to no error on his part. It took me a while but I got the weld cleaned up, drilled a hole, and modified my fill neck and everything fits great. Once I got everything fitted I took the tank to get power coated!

I also installed some electronic locks for my new viper keyless entry/security system. I won't be putting a power lock button in the car because I don't see a point. I can easily reach both doors if I needed to but when I unlock the car with the fob both doors will unlock so I thought it would be redundant. I'll also be tieing the security system into the factory alarm so the factory horn will go off as well as the lights. The best part being that you won't be able to tell anything is different, it's all hidden. Then if for whatever reason I didn't want to use the viper security system, my factory alarm still functions.

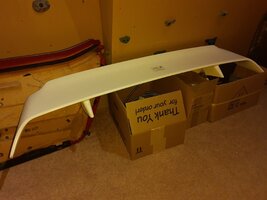
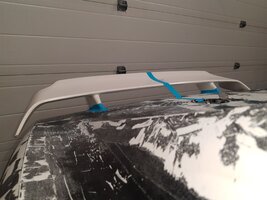
I my new spoiler from ACI. I love how it looks. Not super out there but still agressive.

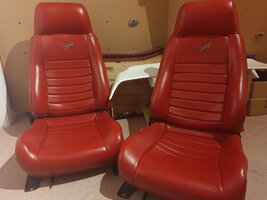
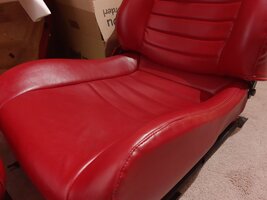
Lastly, I got my seats back from being reupholstered. I had him remove some foam from the bottom of the seat to increase headroom, and I also got him to increase the bolsters. In the end he said he removed two inches of foam in the seats and increased the bolsters. They are still just as comfortable but now the bolsters are huge so you can't slide around. The one seat is perfect but I think the other seat, my seat, needs some time to settle down. You also sit a lot lower in the seats so that should make my taller passengers more comfortable.

Unfortunately, 2 months later I'm still waiting on my new hood and rear bumper. So, in the meantime I have to make a few mounting tabs for the gas tank, and do some fiberglass work on my T-tops and rear quarter. I'm getting a little stuck without that stuff hear so I might have to jump ahead a few steps and start disassembling the rest of the car, then block sanding. Oh, I also have to make those side skirts so those may be done next time I post!

I'll try and make some progress and do one last post before Christmas.

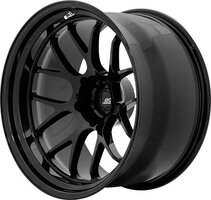
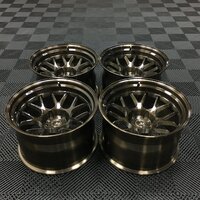
...Oh... I also bought some new wheels! I decided on BC forged wheels in the end. I was really limited by the huge offset, so I only had 6 rims to choose from. I decided to go with TD02 rims in a brushed clear finish. 19x10 for the front and 19x12 for the rear. They'll have the smallest lip possible with the largest concave. I'm still working out some specs with the builders but I'll post some pictures similar to what they look like. I'll also be wrapping them in some Micheline Pilot Sport 4S's. 275 on the front and 325 for the rear.
 

Attachments

  • IMG_20201204_205902070.jpg
    IMG_20201204_205902070.jpg
    775.4 KB · Views: 21
  • IMG_20201204_211046989.jpg
    IMG_20201204_211046989.jpg
    867 KB · Views: 20
  • IMG_20201205_171038090.jpg
    IMG_20201205_171038090.jpg
    419.3 KB · Views: 22
  • IMG_20201204_201602711.jpg
    IMG_20201204_201602711.jpg
    781 KB · Views: 23
  • IMG_20201204_201011304.jpg
    IMG_20201204_201011304.jpg
    528.9 KB · Views: 22
  • IMG_20201204_200855676.jpg
    IMG_20201204_200855676.jpg
    673 KB · Views: 20
  • IMG_20201205_164308889.jpg
    IMG_20201205_164308889.jpg
    667.8 KB · Views: 19
  • IMG_20201206_180503481.jpg
    IMG_20201206_180503481.jpg
    774.4 KB · Views: 20
  • IMG_20201212_181919825.jpg
    IMG_20201212_181919825.jpg
    1,005.2 KB · Views: 20
  • IMG_20201215_212740128.jpg
    IMG_20201215_212740128.jpg
    900.4 KB · Views: 20
  • IMG_20201205_230626499.jpg
    IMG_20201205_230626499.jpg
    516.2 KB · Views: 19
  • IMG_20201216_164404833.jpg
    IMG_20201216_164404833.jpg
    1.1 MB · Views: 18
  • IMG_20201216_185404250.jpg
    IMG_20201216_185404250.jpg
    985.6 KB · Views: 18
  • IMG_20201216_222047569.jpg
    IMG_20201216_222047569.jpg
    1.3 MB · Views: 18
  • IMG_20201216_204314627.jpg
    IMG_20201216_204314627.jpg
    764.1 KB · Views: 18
  • IMG_20201216_203838582.jpg
    IMG_20201216_203838582.jpg
    549.2 KB · Views: 18
  • IMG_20201216_203946569.jpg
    IMG_20201216_203946569.jpg
    686.3 KB · Views: 18
  • IMG_20201215_191026704.jpg
    IMG_20201215_191026704.jpg
    715.9 KB · Views: 18
  • IMG_20201216_201010460.jpg
    IMG_20201216_201010460.jpg
    618.8 KB · Views: 18
  • IMG_20201206_180003356.jpg
    IMG_20201206_180003356.jpg
    630.9 KB · Views: 18
  • IMG_20201214_191752540.jpg
    IMG_20201214_191752540.jpg
    760.8 KB · Views: 17
  • IMG_20201214_190537668.jpg
    IMG_20201214_190537668.jpg
    627.1 KB · Views: 18
  • IMG_20201214_190425789.jpg
    IMG_20201214_190425789.jpg
    698.7 KB · Views: 21
  • TD02-550.jpg
    TD02-550.jpg
    41.2 KB · Views: 18
  • 0210.JPG
    0210.JPG
    973.6 KB · Views: 21
Last edited:
Watching this is a big part of my way for coping thru this current year-end partial shut-down; Covid-isolating; no family Christmas-gathering Winter.
The Final Project ... omg ... I am both smiling at this current work, looking forward to seeing it all post-paint and also
worried about what will keep me inspired during Winter 2021-22 :angelic:

I say it over and over ... Thank you for your many Winters of sharing :thumbs:

... looking forward to the next episode in the Finale
Thank you so much! I really appreciate that and I'm really happy you and others are enjoying my write ups and my projects. You all give me so much support and encouragement for my work that I keep trying more challenging projects with the confidence you all have fostered.

I try not to think about next year too much because I can't bear the thought of not having something to build everyday. I honestly enjoy this part of the car as much if not more than driving it, and it's a blast to drive so that says a lot.
 
Hey guys,

Happy new year! Hope everyone had a great Christmas.

So over the past couple weeks I grooved out my front fenders and glassed in two layers of 1.5oz mat fiberglass on each side. They are one piece layers each 5"x 76". Then I sanded them down to match the contour of the fender. While I was making a mess sanding down the fiberglass I decided to sand down the holes I glassed on the rear deck.

Next I disassembled the majority of the car which included everything from each door and the rear glass. To remove the rear glass I tried some fishing line first but it snapped right away. Then I tried some trimmer wire and it worked like a charm. Once the glass was out I scraped off the old adhesive with a razor blade and got the rest off with some mineral spirits. Fun fact, mineral spirits doesn't hurt window tint!

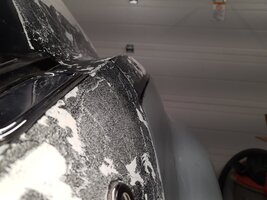
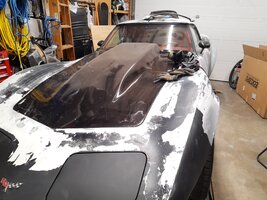
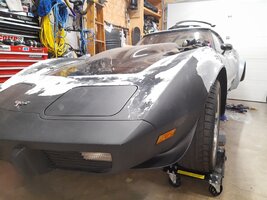
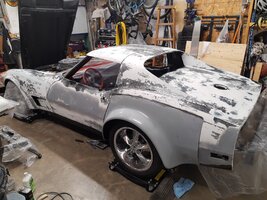
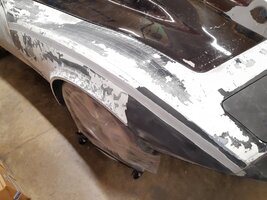
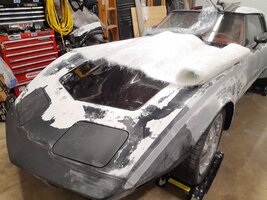
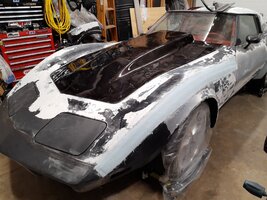
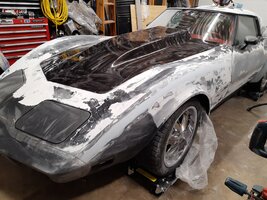
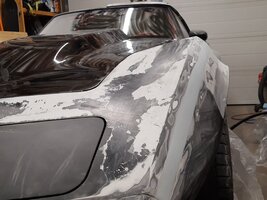
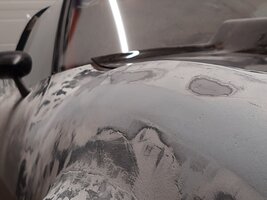
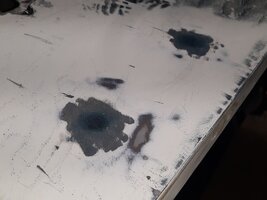
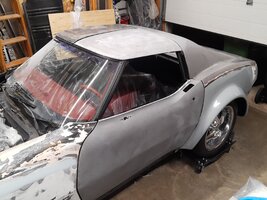
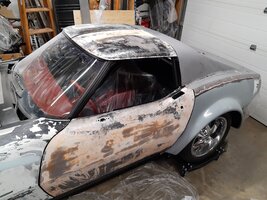
After the car was disassembled I laid out some plastic over the rear frame, the interior, and on the ground, then I started applying the paint stripper. I went with Citris Strip after reading a few forums where guys have used it previously. It costs about $50 on Amazon but you only need two cases to do the entire car (after razor blading of course). This stuff actually says not to use it on fiberglass but I tested it on a spare piece of SMC and polyester and it doesn't hurt it at all. I found it takes about 3-4 applications of this stuff waiting between 7-12 hours per application and any spot I hadn't razor bladed did not come off. Inbetween applications I have to scrape off each panel with a razor blade then reapply the stripper. After all the paint is off I usually have a red layer of factory primer that comes off with some stripper on a red scotch bright pad. After that I clean the panel with mineral spirits. So far the entire rear of the car from the doors back has been stripped down to fiberglass. I have the hood surround on it's last application and the front fenders should be done on Monday. This whole process has been very labor intensive and I'd recommend anyone who is considering doing this to just soda blast your car. All in all I have around 70 hours just stripping paint.

I've also made 4 mounting tabs for the gas tank because I may have measured the rear mounting tab a bit short... I mean, I meant to do that and it'll be easier to install the tank. Ya, that's right :). I bought some 1/4" steal plates and used a grinder to round off the corners so that, in the event of a crash, I don't have anything sharp that could puncture the tank. I definitely ordered the tabs too thick but I wanted to over engineer them to make sure the tank was solid. I still have to drill some holes and paint them but I have to wait for the tank to get back from powder coating. They will mount in the pocket of the rear crossmember and I'll step the tabs so they'll sit flush with the frame. I'll also tap the holes on the tabs so the gas tank bolts can screw into them.

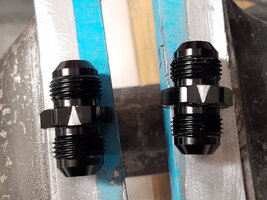
One little thing I did while waiting for the fuel tank to get back from powder coating is I filed a few directional arrows into two of my fuel line fittings. That way if I ever disconnect them I know which line is supply and return.

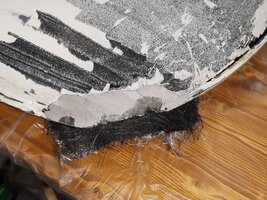
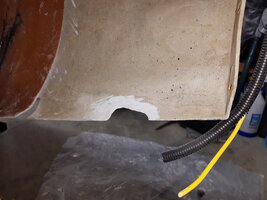
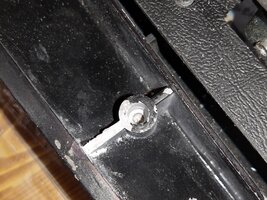
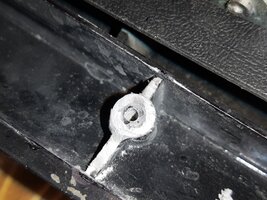
Lastly, I started a few fiberglass repairs. I did a few layers of fiberglass on my rear quarter where a tree branch had wreaked the bottom of the quarter, and I did a few layers on my T-top where I broke the corner removing the trim. I also fixed one of the holes for my T-top weather stripping retainer. I found a good way to repair a screw hole in fiberglass is to drill it out quite a bit bigger than the hole needed then clean the hole. Cut up some fiberglass mat into small pieces. Mix the resin then add a little resin to the hole and grab some chopped fiberglass, wet it, then shove it in the hole. I then took a Q-tip, snapped it in half and used the hard end to pack the hole down. Once it cured I drilled the hole then installed the screw with a quick clockwise then counter clock wise turn to walk it down (because I didn't have a tap that pitch). It worked great and the quality of the threads are amazing.

I should get my hood and bumper this coming week and my rims should be shipping soon as well!

Once I finish stripping the car I'll start to correct any damaged areas, fill the rear quarter panel seams, and I'll start the blend the front bumper to the body.
 

Attachments

  • IMG_20210101_224126536.jpg
    IMG_20210101_224126536.jpg
    819.2 KB · Views: 25
  • IMG_20201230_215945185.jpg
    IMG_20201230_215945185.jpg
    922 KB · Views: 22
  • IMG_20201227_155105503.jpg
    IMG_20201227_155105503.jpg
    976.6 KB · Views: 22
  • IMG_20201226_145827215.jpg
    IMG_20201226_145827215.jpg
    883.9 KB · Views: 21
  • IMG_20201221_171311869.jpg
    IMG_20201221_171311869.jpg
    868.4 KB · Views: 21
  • IMG_20201221_165232876.jpg
    IMG_20201221_165232876.jpg
    905.4 KB · Views: 20
  • IMG_20201221_181514112.jpg
    IMG_20201221_181514112.jpg
    963 KB · Views: 19
  • IMG_20201223_162137996.jpg
    IMG_20201223_162137996.jpg
    941.3 KB · Views: 19
  • IMG_20201223_163238049.jpg
    IMG_20201223_163238049.jpg
    665.5 KB · Views: 18
  • IMG_20201222_171854729.jpg
    IMG_20201222_171854729.jpg
    488.9 KB · Views: 18
  • IMG_20201224_213857744.jpg
    IMG_20201224_213857744.jpg
    499.6 KB · Views: 18
  • IMG_20201221_164658022.jpg
    IMG_20201221_164658022.jpg
    1.1 MB · Views: 18
  • IMG_20201220_181509000.jpg
    IMG_20201220_181509000.jpg
    715.1 KB · Views: 18
  • IMG_20201220_182731299.jpg
    IMG_20201220_182731299.jpg
    864.1 KB · Views: 18
  • IMG_20201221_164148792.jpg
    IMG_20201221_164148792.jpg
    816.8 KB · Views: 18
  • IMG_20201218_145320849.jpg
    IMG_20201218_145320849.jpg
    831.8 KB · Views: 18
  • IMG_20201218_162930658.jpg
    IMG_20201218_162930658.jpg
    776.5 KB · Views: 18
Hey guys,

Happy new year! Hope everyone had a great Christmas.

So over the past couple weeks I grooved out my front fenders and glassed in two layers of 1.5oz mat fiberglass on each side. They are one piece layers each 5"x 76". Then I sanded them down to match the contour of the fender. While I was making a mess sanding down the fiberglass I decided to sand down the holes I glassed on the rear deck.

Next I disassembled the majority of the car which included everything from each door and the rear glass. To remove the rear glass I tried some fishing line first but it snapped right away. Then I tried some trimmer wire and it worked like a charm. Once the glass was out I scraped off the old adhesive with a razor blade and got the rest off with some mineral spirits. Fun fact, mineral spirits doesn't hurt window tint!

After the car was disassembled I laid out some plastic over the rear frame, the interior, and on the ground, then I started applying the paint stripper. I went with Citris Strip after reading a few forums where guys have used it previously. It costs about $50 on Amazon but you only need two cases to do the entire car (after razor blading of course). This stuff actually says not to use it on fiberglass but I tested it on a spare piece of SMC and polyester and it doesn't hurt it at all. I found it takes about 3-4 applications of this stuff waiting between 7-12 hours per application and any spot I hadn't razor bladed did not come off. Inbetween applications I have to scrape off each panel with a razor blade then reapply the stripper. After all the paint is off I usually have a red layer of factory primer that comes off with some stripper on a red scotch bright pad. After that I clean the panel with mineral spirits. So far the entire rear of the car from the doors back has been stripped down to fiberglass. I have the hood surround on it's last application and the front fenders should be done on Monday. This whole process has been very labor intensive and I'd recommend anyone who is considering doing this to just soda blast your car. All in all I have around 70 hours just stripping paint.

I've also made 4 mounting tabs for the gas tank because I may have measured the rear mounting tab a bit short... I mean, I meant to do that and it'll be easier to install the tank. Ya, that's right :). I bought some 1/4" steal plates and used a grinder to round off the corners so that, in the event of a crash, I don't have anything sharp that could puncture the tank. I definitely ordered the tabs too thick but I wanted to over engineer them to make sure the tank was solid. I still have to drill some holes and paint them but I have to wait for the tank to get back from powder coating. They will mount in the pocket of the rear crossmember and I'll step the tabs so they'll sit flush with the frame. I'll also tap the holes on the tabs so the gas tank bolts can screw into them.

One little thing I did while waiting for the fuel tank to get back from powder coating is I filed a few directional arrows into two of my fuel line fittings. That way if I ever disconnect them I know which line is supply and return.

Lastly, I started a few fiberglass repairs. I did a few layers of fiberglass on my rear quarter where a tree branch had wreaked the bottom of the quarter, and I did a few layers on my T-top where I broke the corner removing the trim. I also fixed one of the holes for my T-top weather stripping retainer. I found a good way to repair a screw hole in fiberglass is to drill it out quite a bit bigger than the hole needed then clean the hole. Cut up some fiberglass mat into small pieces. Mix the resin then add a little resin to the hole and grab some chopped fiberglass, wet it, then shove it in the hole. I then took a Q-tip, snapped it in half and used the hard end to pack the hole down. Once it cured I drilled the hole then installed the screw with a quick clockwise then counter clock wise turn to walk it down (because I didn't have a tap that pitch). It worked great and the quality of the threads are amazing.

I should get my hood and bumper this coming week and my rims should be shipping soon as well!

Once I finish stripping the car I'll start to correct any damaged areas, fill the rear quarter panel seams, and I'll start the blend the front bumper to the body.
The word WOW! just doesn't cut it anymore Cody. Total admiration for the work you are putting into your baby. :thumbs: :thumbs:
 
Awesome work Cody! Don't you just hate it waiting for parts? I'm current yl doing some work on my car again and it's funny how while waiting for parts I've found other things to do. Things like taking off the fuse box cover, sanding and color matching it to the car color. That has me going on trying more plastic parts under the hood! Can't wait to the your car in the spring. It;s going to be one sexy beast!
 

Users who are viewing this thread

Back
Top