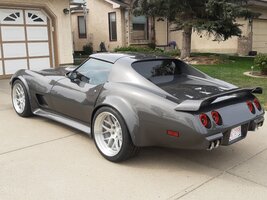
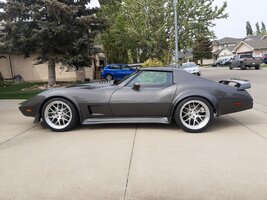
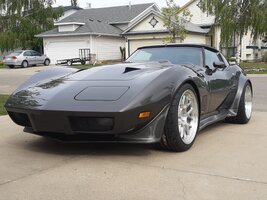
Final Winter Project 2020-2021

Hey guys,

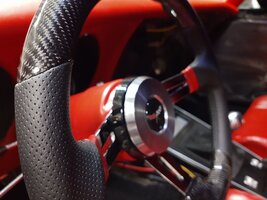
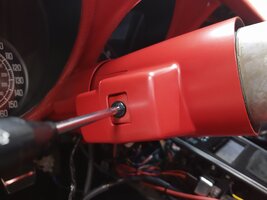
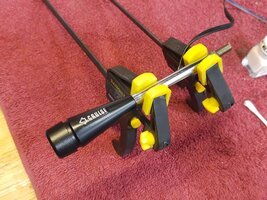
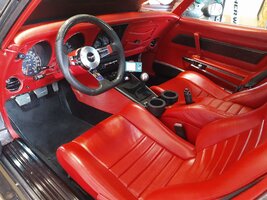
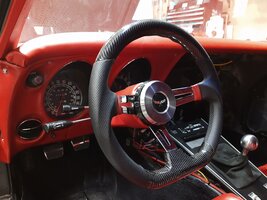
Just wanted to share this quick update. I finished repainting my steering column and installed my new steering wheel. Had to tweak the steering wheel a little to work but it fits perfectly now. Absolutely love it the look and it'll look really nice with the other carbon fiber things I'm doing this year.

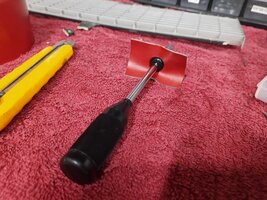
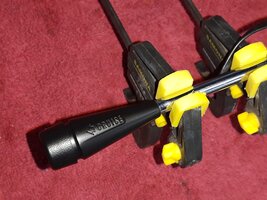
I also made a vinyl boot for my turn signal lever to give it a more finished look than it was from factory. Turn signal, high beams, and wipers are still fully functional with the boot in place.
 

Attachments

  • IMG_20220104_182030857.jpg
    IMG_20220104_182030857.jpg
    1.2 MB · Views: 80
  • IMG_20220104_182132724.jpg
    IMG_20220104_182132724.jpg
    1.1 MB · Views: 73
  • IMG_20220101_181955256.jpg
    IMG_20220101_181955256.jpg
    733.8 KB · Views: 67
  • IMG_20220101_175818461.jpg
    IMG_20220101_175818461.jpg
    1.7 MB · Views: 67
  • IMG_20220102_214937548.jpg
    IMG_20220102_214937548.jpg
    803.4 KB · Views: 64
  • IMG_20220103_011652501.jpg
    IMG_20220103_011652501.jpg
    1.2 MB · Views: 67
Hey guys,

Just wanted to share this quick update. I finished repainting my steering column and installed my new steering wheel. Had to tweak the steering wheel a little to work but it fits perfectly now. Absolutely love it the look and it'll look really nice with the other carbon fiber things I'm doing this year.

I also made a vinyl boot for my turn signal lever to give it a more finished look than it was from factory. Turn signal, high beams, and wipers are still fully functional with the boot in place.
You are definitely a master. Always finding something else to tweak to perfection. Soon you will run out of things to improve, but fantastic job, could be a contender in "The Ridler" competition in Detroit. Too bad you are so far away, I would love to see your "perfect project" in person. Just enjoy it this summer.
 
Hey guys,

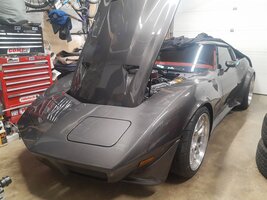
Been a little while since I posted but I'm getting close to finishing the car.

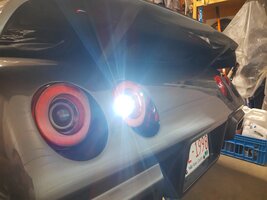
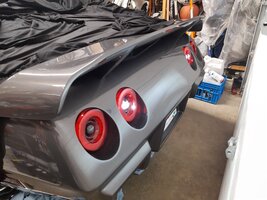
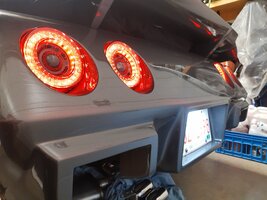
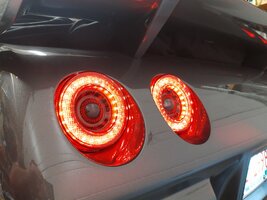
The first exciting thing is that I tested the tail lights and they worked perfectly! I'm so happy about that because I made over 100 connections when I made all the harnesses and control boxes. Some of you may remember I burned out 8 LED's when I first tested a light and I had to open up one of the lights, identify and order the correct LED's, de-solder the old LED's and solder on 8 new ones. Each LED was 0.5cm² and had 4 connections on them. Here's a YouTube link to the tail lights: Custom Morimoto tail lights in C3 corvette.

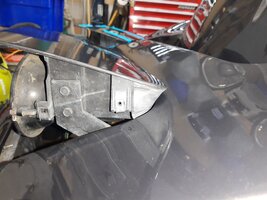
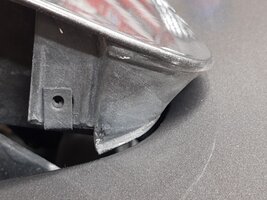
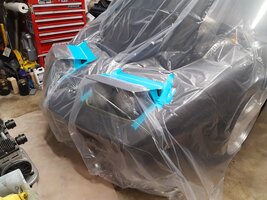
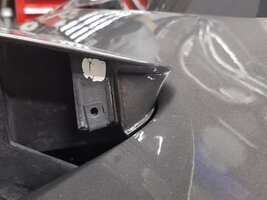
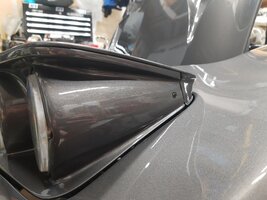
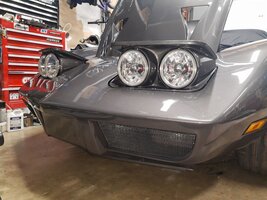
Then I started work assembling the headlights. I found out that the body shop never repaired the one headlight that was cracked by the prop when I asked them to fix it. There was lots of metal around that prop so I simply cleaned and epoxied the crack for insurance. I then found a small section that was missed when they painted. Unfortunately this area was missed when they painted the car but ironically it was never painted when they removed the headlights to paint them again. So I masked off the car and spray them body color and applied a 2k clear over top.

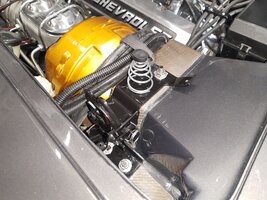
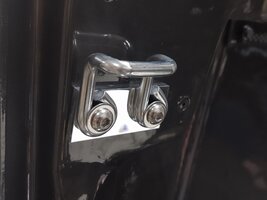
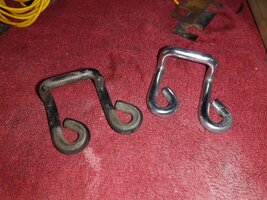
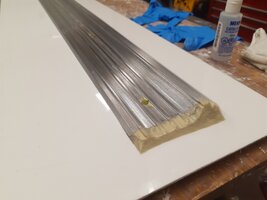
After I finished assembling the headlights I repainted the hood latches, and wiper arms gloss black with a 2k clear to match the rest of the gloss black trim on the car. I've been having a lot of fun electroplating recently so I zinc plated the hood latch springs and the hood strikers. I also made some aluminum hood striker spacers and polished them.

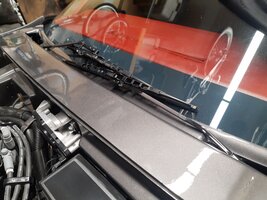
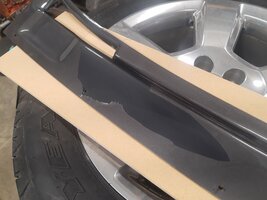
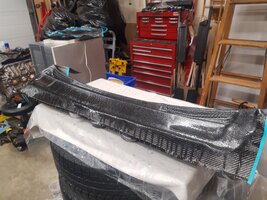
I started to install the wiper cover but ran into some problems. I was going to use velcro to mount the cover however it cause it to sit up to high and contacted the hood. So I marked and drilled holes in the wiper cover and hood surround. I used masking tape in order to protect the paint and provide an area to mark. When I removed the tape it removed a few chunks of paint from the wiper cover. I touched them up and then decided to apply PPF on the cover to protect it. It was second time applying PPF and unfortunately I got some pull marks in it so I decided to remove it. When I removed it huge chunks of paint came off. I reach out to the paint shop and they said it was a delamination due to the wiper cover being primed from the manufacturer and as such they wouldn't warranty the panel. So in addition to the carbon fiber parts I'm making, I will also be making a carbon fiber wiper cover.

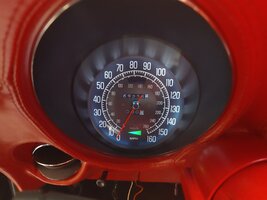
I also had the chance to test my electronics all of which work great especially the new stereo. The new speaker box also sounds great and with amplifier I'm getting decent bass out of it. I also tested the speedometer lights since I've painted the insides with duplicolor chrome. I think it gave it a much nicer white look and smoothed the lighting out around the gauges.

I reinstalled the front left and right spoiler.

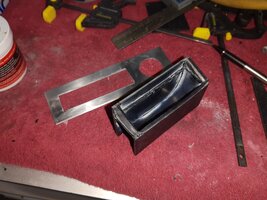
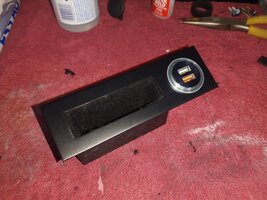
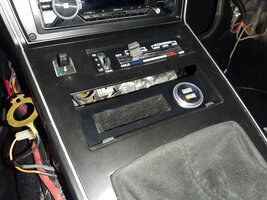
Lastly, I made an insert for the center console where the cigarette lighter and ashtray are. I made an aluminum panel and I made a small curved box out of plastic and carpeted the inside of the box to hold my phone. I drilled a hole in the other side of the aluminum panel and bought a generic dual USB socket. The socket is made in China so it had some weird brand etched into the aluminum face so I wet sanded and polished the face to give it a custom finish. I then had to take a Dremel and cut out some of the plastic in the center console to fit the new phone holder/USB insert. I am so happy with how this turned out and the phone fits nice and snug in the holder. I just have to repaint the lid for the center console, and run some leads for the USB charger and then this part of the project will be complete.

Coming up I will be testing my alarm system and electric door locks. Provided they work I can finish installing the dash and center console side panels. I'm waiting on some epoxy to start making my carbon fiber parts but I will likely make the molds for the parts this weekend. I'm also waiting on some steering components that are on back order. I'm upgrading the tie rod sleeves for safety and rebuilding the control valve ball stud. I'm also waiting for some new 31 spline rear spindles from Tom's Differentials. I'm going to get the 1/2 studs for added security and will be converting the front wheels to 1/2 studs as well.

Once that all complete homefully I can reinstall my exhaust and see how the exhaust sounds! Then I can get it towed to get fully wrapped in PPF.
 

Attachments

  • IMG_20220107_221939888.jpg
    IMG_20220107_221939888.jpg
    511.7 KB · Views: 45
  • IMG_20220108_152526673.jpg
    IMG_20220108_152526673.jpg
    1.2 MB · Views: 44
  • IMG_20220108_152544263.jpg
    IMG_20220108_152544263.jpg
    1.4 MB · Views: 42
  • IMG_20220107_214909920.jpg
    IMG_20220107_214909920.jpg
    1.5 MB · Views: 45
  • IMG_20220107_214859921.jpg
    IMG_20220107_214859921.jpg
    1.6 MB · Views: 42
  • IMG_20220115_151621441.jpg
    IMG_20220115_151621441.jpg
    1.2 MB · Views: 41
  • IMG_20220115_154854086.jpg
    IMG_20220115_154854086.jpg
    897.2 KB · Views: 39
  • IMG_20220120_164424260.jpg
    IMG_20220120_164424260.jpg
    1.3 MB · Views: 41
  • IMG_20220121_150843240.jpg
    IMG_20220121_150843240.jpg
    951.6 KB · Views: 39
  • IMG_20220121_161042015.jpg
    IMG_20220121_161042015.jpg
    1.7 MB · Views: 38
  • IMG_20220121_161022610.jpg
    IMG_20220121_161022610.jpg
    1.6 MB · Views: 40
  • IMG_20220123_212306171.jpg
    IMG_20220123_212306171.jpg
    1.8 MB · Views: 38
  • IMG_20220121_150818280.jpg
    IMG_20220121_150818280.jpg
    683.6 KB · Views: 37
  • IMG_20220118_234652406.jpg
    IMG_20220118_234652406.jpg
    1.7 MB · Views: 39
  • IMG_20220124_211458029.jpg
    IMG_20220124_211458029.jpg
    1.7 MB · Views: 39
  • IMG_20220202_183524215.jpg
    IMG_20220202_183524215.jpg
    1 MB · Views: 40
  • IMG_20220202_183853462.jpg
    IMG_20220202_183853462.jpg
    1.4 MB · Views: 39
  • IMG_20220207_180711013.jpg
    IMG_20220207_180711013.jpg
    1.1 MB · Views: 38
  • IMG_20220209_192005612.jpg
    IMG_20220209_192005612.jpg
    1.6 MB · Views: 38
  • IMG_20220209_210307735.jpg
    IMG_20220209_210307735.jpg
    1.9 MB · Views: 43
Hey guys,

Just wanted to share this quick update. I finished repainting my steering column and installed my new steering wheel. Had to tweak the steering wheel a little to work but it fits perfectly now. Absolutely love it the look and it'll look really nice with the other carbon fiber things I'm doing this year.

I also made a vinyl boot for my turn signal lever to give it a more finished look than it was from factory. Turn signal, high beams, and wipers are still fully functional with the boot in place.
Simply amazing! 👍
 
Hey Guys!

Man it's been a minute since I've last posted. Feels like I fell into a hole with this carbon fiber project and I've finally crawled out of it.

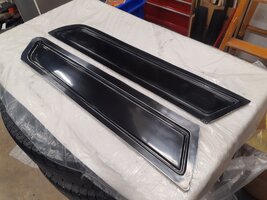
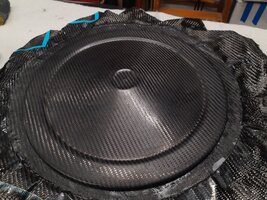
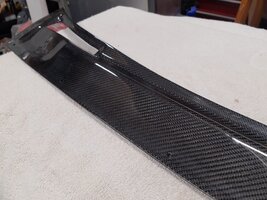
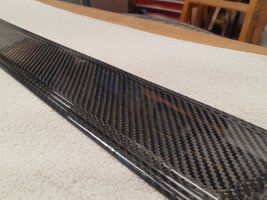
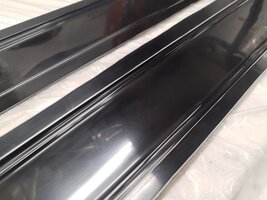
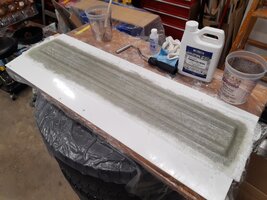
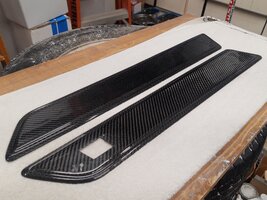
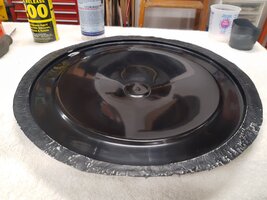
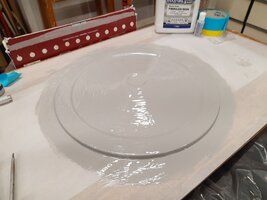
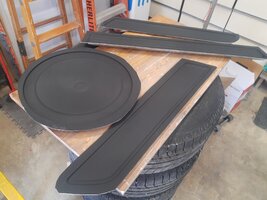
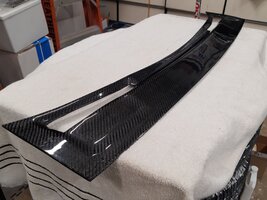
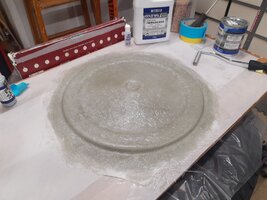
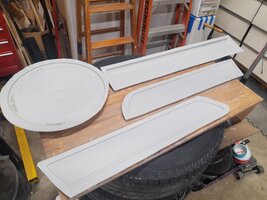
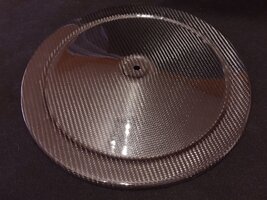
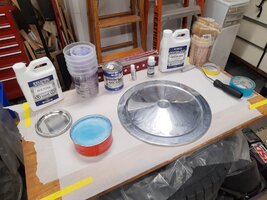
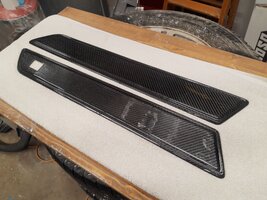
After nearly 8 weeks I have finished my carbon fiber project. I spent 4 of those weeks making the molds and perfecting them, then the other 4 weeks making the carbon fiber parts. I had some issues with the mold making and had to experiment with different combinations of mold release agents. I also had some issues with the gel coat while making the molds. Lay the gelcoat over a painted part and it'll strip the paint, brush on the second layer of gel coat either too early or late and it'll wrinkle up. I spent a good couple weeks just fixing issues with the gel coat because of the wrinkle issue and it wasn't until my last two molds that I figured out the perfect method. I had a few issues with vacuum during the carbon fiber process which resulted in some air voids which had to be corrected. I also destroyed my door sill mold due to a failure of the mold release agent. I can fix it but it will be a project for another time. In the mean time I just had the aluminum door sills powder coated in gloss black.

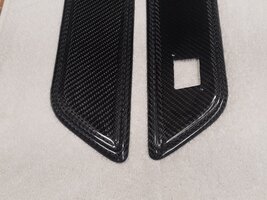
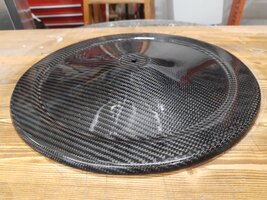
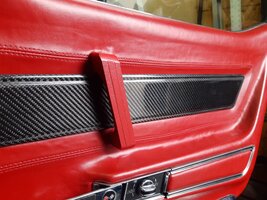
I made two air filter tops (one for me and one for a friend's 73 racing Corvette). Two door panel inserts, and skinned my wiper cover in carbon fiber. I will list some of the weight saving below:

Steel Lid - 520g
Carbon Lid - 164g

Steel LH door insert - 636g
Carbon LH door insert - 70g

Steel RH door insert - 642g
Carbon RH door insert - 78g

Total weight savings on door inserts - 1130g

Total weight savings on carbon fiber lid - 356g

Total weight savings - 1.486kg or 3.276lbs

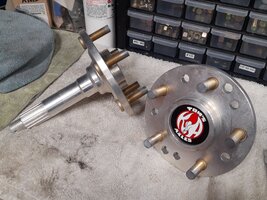
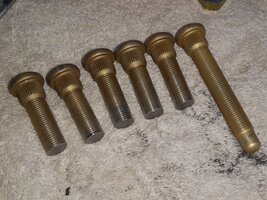
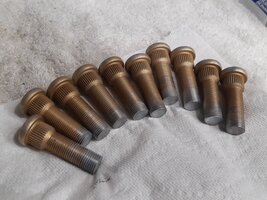
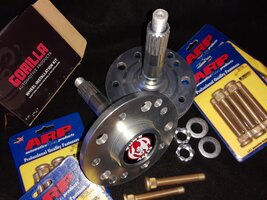
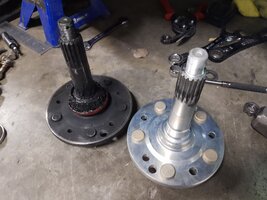
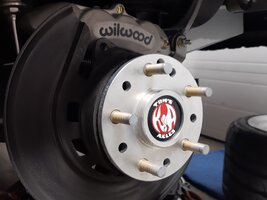
Now I'm moving on to upgrading the rear outer axles from my import 'made in China' axles, to Tom's 1541 17 spline axles. I took them by a local plating shop and had them Cadmium coated. I'm also upgrading all of the wheel studs to 1/2" ARP as a safety precaution, especially considering the 275's on the front and 325's on the rear. I've cut down two sets of the wheel studs and zinc plated the tips of the studs to protect them from rust. I should finish up the axles tomorrow and then I can do a rear alignment, and install the exhaust. From there I can finish assembling the interior, then I can get the car appraised, then trailer it to get it wrapped with a PPF. I will work on upgrading the front steering some time in between there but at least it will be drivable by the end of the month!
PS. Sorry the pictures are not in order for some reason.
 

Attachments

  • IMG_20220408_161059899.jpg
    IMG_20220408_161059899.jpg
    1.1 MB · Views: 26
  • IMG_20220508_165817532.jpg
    IMG_20220508_165817532.jpg
    1.6 MB · Views: 25
  • IMG_20220306_151330610.jpg
    IMG_20220306_151330610.jpg
    773.3 KB · Views: 26
  • IMG_20220507_123804853.jpg
    IMG_20220507_123804853.jpg
    1,013.4 KB · Views: 27
  • IMG_20220407_170826320.jpg
    IMG_20220407_170826320.jpg
    1.6 MB · Views: 25
  • IMG_20220501_183124319.jpg
    IMG_20220501_183124319.jpg
    1.6 MB · Views: 23
  • IMG_20220406_172640806.jpg
    IMG_20220406_172640806.jpg
    1.6 MB · Views: 22
  • IMG_20220428_144612293.jpg
    IMG_20220428_144612293.jpg
    1.4 MB · Views: 22
  • IMG_20220219_153329141.jpg
    IMG_20220219_153329141.jpg
    1.3 MB · Views: 22
  • IMG_20220503_215210158.jpg
    IMG_20220503_215210158.jpg
    1.2 MB · Views: 21
  • IMG_20220506_213945007.jpg
    IMG_20220506_213945007.jpg
    957.5 KB · Views: 21
  • IMG_20220507_123643261.jpg
    IMG_20220507_123643261.jpg
    1.6 MB · Views: 22
  • IMG_20220508_143649630.jpg
    IMG_20220508_143649630.jpg
    1.3 MB · Views: 22
  • IMG_20220408_161123289.jpg
    IMG_20220408_161123289.jpg
    901.8 KB · Views: 22
  • IMG_20220306_181118105.jpg
    IMG_20220306_181118105.jpg
    1.2 MB · Views: 21
  • IMG_20220507_123816804.jpg
    IMG_20220507_123816804.jpg
    1.3 MB · Views: 21
  • IMG_20220405_132357730.jpg
    IMG_20220405_132357730.jpg
    1,021.2 KB · Views: 20
  • IMG_20220219_170856455.jpg
    IMG_20220219_170856455.jpg
    714.6 KB · Views: 18
  • IMG_20220508_155802182.jpg
    IMG_20220508_155802182.jpg
    1.2 MB · Views: 18
  • IMG_20220401_110324853.jpg
    IMG_20220401_110324853.jpg
    1 MB · Views: 15
  • IMG_20220503_215144084.jpg
    IMG_20220503_215144084.jpg
    1.2 MB · Views: 16
  • IMG_20220219_185914545.jpg
    IMG_20220219_185914545.jpg
    1.2 MB · Views: 17
  • IMG_20220405_161053879.jpg
    IMG_20220405_161053879.jpg
    1.2 MB · Views: 17
  • IMG_20220331_145258189.jpg
    IMG_20220331_145258189.jpg
    1 MB · Views: 26
Hey Guys!

Man it's been a minute since I've last posted. Feels like I fell into a hole with this carbon fiber project and I've finally crawled out of it.

After nearly 8 weeks I have finished my carbon fiber project. I spent 4 of those weeks making the molds and perfecting them, then the other 4 weeks making the carbon fiber parts. I had some issues with the mold making and had to experiment with different combinations of mold release agents. I also had some issues with the gel coat while making the molds. Lay the gelcoat over a painted part and it'll strip the paint, brush on the second layer of gel coat either too early or late and it'll wrinkle up. I spent a good couple weeks just fixing issues with the gel coat because of the wrinkle issue and it wasn't until my last two molds that I figured out the perfect method. I had a few issues with vacuum during the carbon fiber process which resulted in some air voids which had to be corrected. I also destroyed my door sill mold due to a failure of the mold release agent. I can fix it but it will be a project for another time. In the mean time I just had the aluminum door sills powder coated in gloss black.

I made two air filter tops (one for me and one for a friend's 73 racing Corvette). Two door panel inserts, and skinned my wiper cover in carbon fiber. I will list some of the weight saving below:

Steel Lid - 520g
Carbon Lid - 164g

Steel LH door insert - 636g
Carbon LH door insert - 70g

Steel RH door insert - 642g
Carbon RH door insert - 78g

Total weight savings on door inserts - 1130g

Total weight savings on carbon fiber lid - 356g

Total weight savings - 1.486kg or 3.276lbs

Now I'm moving on to upgrading the rear outer axles from my import 'made in China' axles, to Tom's 1541 17 spline axles. I took them by a local plating shop and had them Cadmium coated. I'm also upgrading all of the wheel studs to 1/2" ARP as a safety precaution, especially considering the 275's on the front and 325's on the rear. I've cut down two sets of the wheel studs and zinc plated the tips of the studs to protect them from rust. I should finish up the axles tomorrow and then I can do a rear alignment, and install the exhaust. From there I can finish assembling the interior, then I can get the car appraised, then trailer it to get it wrapped with a PPF. I will work on upgrading the front steering some time in between there but at least it will be drivable by the end of the month!
PS. Sorry the pictures are not in order for some reason.
What a jewel you have here! I have built many cars, including a five year, 6000 hour build-it-all-myself, show winning 1928 closed cab pickup truck, but NEVER had the kind of patience you have displayed here. It is the detail that makes your car truly stand out. What will you do when there are no more fiddly bits to correct or improve?
 
Hey guys,

Thank you for all the kind words.

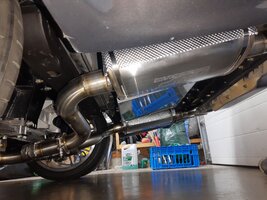
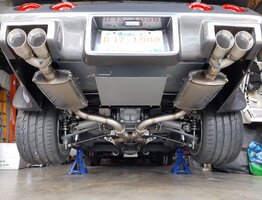
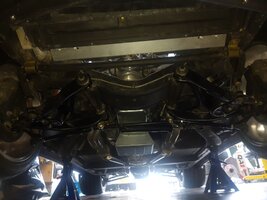
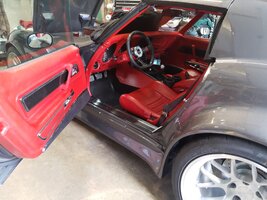
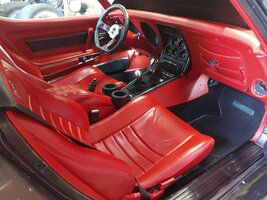
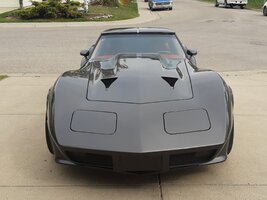
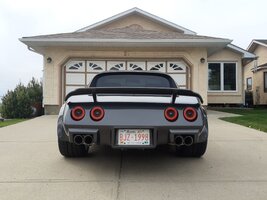
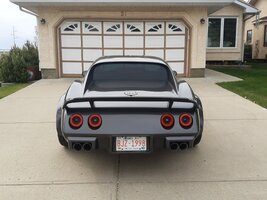
I finally finished assembling the car yesterday after almost 2 years. I installed the new Tom's 1541 rear axles that I had cadmium coated, performed a rear alignment, reinstalled the exhaust, and installed some heat shielding on the tops of the mufflers and by the leaf spring. I finished installing the interior along with the carbon fiber door inserts and custom door pulls that I made.

I added some heavy duty tie rod sleeves up front, replacement my old idler arm, then performed a front alignment.

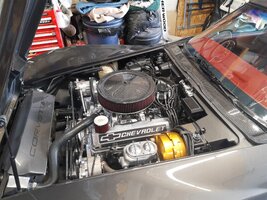
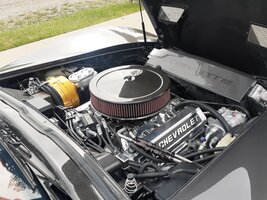
I also finished up the engine bay and reinstalled my Lokar dip stick, carbon fiber air filter lid, and had to modify my wiper cover that I skinned in carbon fiber. Personally I like it more this way as I added weatherstripping to the front and sides of the wiper cover. It kind of seals up the area better this way and looks like a standard part.

I also got to start the car again again and it sounds amazing with the new exhaust that my buddy fabricated for me. Fairly subdue while idling but if you open the throttle it roars. Not super bassy and booming like my old exhaust that had cambered mufflers. I have a video on Facebook or Instagram if anyone wants to check it out:

I have a few little issues to sort out and it still needs to go for paint correction and have the PPF applied.

I really appreciate all of the support over the years. I hope everyone has enjoyed following along on this project.

Till next time

Jr. Corvette
Cody Allen
 

Attachments

  • IMG_20220509_194459859.jpg
    IMG_20220509_194459859.jpg
    1.3 MB · Views: 15
  • IMG_20220511_212257765.jpg
    IMG_20220511_212257765.jpg
    803.5 KB · Views: 15
  • IMG_20220521_212146686.jpg
    IMG_20220521_212146686.jpg
    1.4 MB · Views: 14
  • IMG_20220521_185914_293.jpg
    IMG_20220521_185914_293.jpg
    1.3 MB · Views: 16
  • IMG_20220522_170750655.jpg
    IMG_20220522_170750655.jpg
    991 KB · Views: 14
  • IMG_20220602_172925309.jpg
    IMG_20220602_172925309.jpg
    1.3 MB · Views: 15
  • IMG_20220602_172914877.jpg
    IMG_20220602_172914877.jpg
    1.7 MB · Views: 13
  • IMG_20220602_172838258.jpg
    IMG_20220602_172838258.jpg
    1.5 MB · Views: 13
  • IMG_20220602_161029547.jpg
    IMG_20220602_161029547.jpg
    1.4 MB · Views: 15
  • IMG_20220602_173328257.jpg
    IMG_20220602_173328257.jpg
    1.8 MB · Views: 13
  • IMG_20220603_165923775.jpg
    IMG_20220603_165923775.jpg
    1.4 MB · Views: 14
  • IMG_20220603_165315880.jpg
    IMG_20220603_165315880.jpg
    1.2 MB · Views: 14
  • IMG_20220603_165454878.jpg
    IMG_20220603_165454878.jpg
    1.2 MB · Views: 14
  • IMG_20220603_165450947.jpg
    IMG_20220603_165450947.jpg
    1.4 MB · Views: 14
  • IMG_20220603_165535971.jpg
    IMG_20220603_165535971.jpg
    1.4 MB · Views: 15
  • IMG_20220603_165559695.jpg
    IMG_20220603_165559695.jpg
    1.8 MB · Views: 16
  • IMG_20220603_165332607.jpg
    IMG_20220603_165332607.jpg
    1.4 MB · Views: 15
Hey guys,

Thank you for all the kind words.

I finally finished assembling the car yesterday after almost 2 years. I installed the new Tom's 1541 rear axles that I had cadmium coated, performed a rear alignment, reinstalled the exhaust, and installed some heat shielding on the tops of the mufflers and by the leaf spring. I finished installing the interior along with the carbon fiber door inserts and custom door pulls that I made.

I added some heavy duty tie rod sleeves up front, replacement my old idler arm, then performed a front alignment.

I also finished up the engine bay and reinstalled my Lokar dip stick, carbon fiber air filter lid, and had to modify my wiper cover that I skinned in carbon fiber. Personally I like it more this way as I added weatherstripping to the front and sides of the wiper cover. It kind of seals up the area better this way and looks like a standard part.

I also got to start the car again again and it sounds amazing with the new exhaust that my buddy fabricated for me. Fairly subdue while idling but if you open the throttle it roars. Not super bassy and booming like my old exhaust that had cambered mufflers. I have a video on Facebook or Instagram if anyone wants to check it out:

I have a few little issues to sort out and it still needs to go for paint correction and have the PPF applied.

I really appreciate all of the support over the years. I hope everyone has enjoyed following along on this project.

Till next time

Jr. Corvette
Cody Allen

Sweet Cody and sounds great. :thumbs:
 
Congratulations Cody. All your time, efforts and cash appears to have paid off for you. Your commitment and dedication is simply inspiring. I hope you get never ending smiles per gallon of enjoyment out of your creation. I am looking for to seeing soon.
 

Users who are viewing this thread

Back
Top