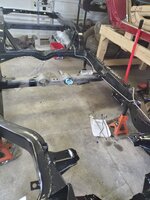
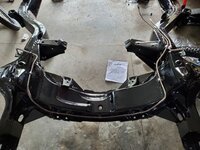
Featured 79 frame off!

Featured Thread
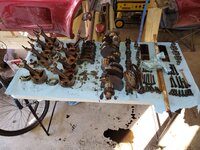
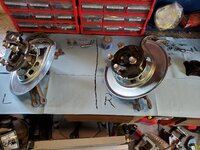
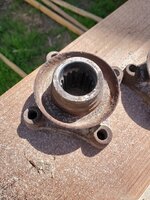
Today was all about dismantling all of the little parts that ill be sending for blasting with the frame. Slavaging as much original gear as i go so i can spend more on building vs. Replacing salvagable components.

I have a ton of stuff on the way, offset trailing arms and a 1 1/4 swaybar kit are on back order.

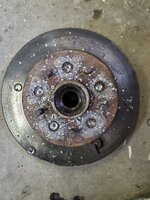
For anyone drilling original rotors. Center punch, hit with a 1/4 bit for about 1/2 " and then change up to a larger one. I used a 5/8 cobalt tip and it destroyed the rivet heads fast. 1/4 punch and a few wacks with a hammer and they were seperated!

More going down tomorrow!
 

Attachments

  • 20200422_174537.jpg
    20200422_174537.jpg
    532.2 KB · Views: 53
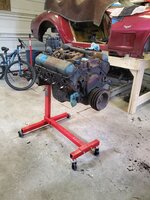
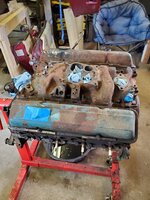
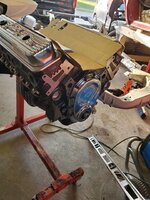
The frame and the everything else bound for blasting is off to the shop for blasting, welding and epoxy coating. So, using the time wisely to start the mechanical. Today was getting the engine onto its stand, cleaning up all the unecessary crap and preparing to build the top end.

Stripping the control arms was a nightmare and no luck with the bushings in the diff crossmember!

More tomorrow!
 

Attachments

  • 20200423_170800.jpg
    20200423_170800.jpg
    548.4 KB · Views: 47
  • 20200423_173933.jpg
    20200423_173933.jpg
    563.1 KB · Views: 42
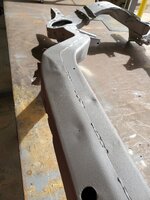
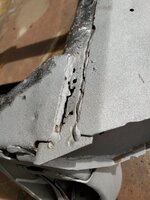
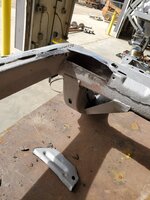
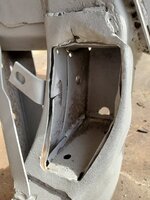
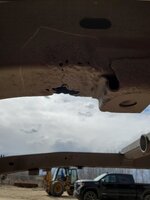
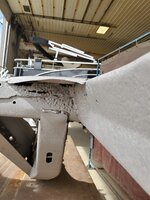
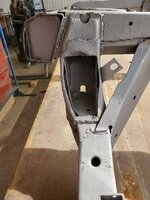
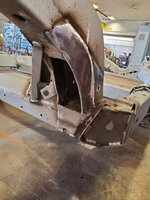
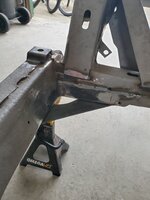
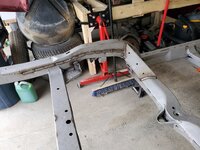
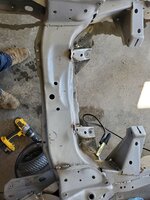
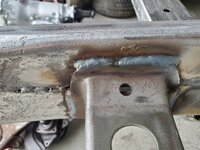
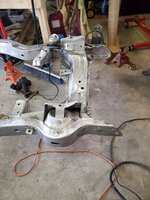
Frame resto not going smoothly at all! But, still progressing. Pictures are upside down as it is on their welding table right now. Some expected, some surprises. Not happy with the level of repair required, but what can you do! More progress coming!!
 

Attachments

  • 20200427_140713.jpg
    20200427_140713.jpg
    481.1 KB · Views: 38
  • 20200427_140444.jpg
    20200427_140444.jpg
    682.8 KB · Views: 38
  • 20200427_140411.jpg
    20200427_140411.jpg
    517.7 KB · Views: 35
  • 20200427_140353.jpg
    20200427_140353.jpg
    472.1 KB · Views: 37
  • 20200427_140609.jpg
    20200427_140609.jpg
    211.1 KB · Views: 34
  • 20200427_140433.jpg
    20200427_140433.jpg
    414.2 KB · Views: 29
  • 20200427_140424.jpg
    20200427_140424.jpg
    553.8 KB · Views: 32
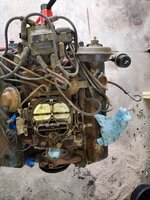
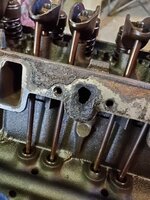
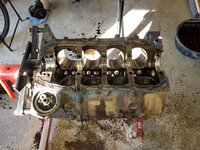
Waiting for the frame an a ton of parts, so i thought i would take a little deep dive into the engine!
 

Attachments

  • 20200501_161700.jpg
    20200501_161700.jpg
    485.5 KB · Views: 30
  • 20200501_163058.jpg
    20200501_163058.jpg
    559.6 KB · Views: 32
  • 20200501_180134.jpg
    20200501_180134.jpg
    643.7 KB · Views: 31
  • 20200501_180130.jpg
    20200501_180130.jpg
    519.8 KB · Views: 35
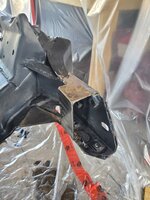
Deep dive = 350 HO short block crate motor, comp cam, holly 750 cfm and a laundry list of engine toolery to come. Frame should be back from fabrication soon. Designed a corner gusset and weld at the kick up that will stop dirt and water accumulation, as well as a series of fins on the bottom to deflect road debris.

Transmissiom should be ready by friday and i havent sorted exhaust out yet.

Lots of things happening!!!
 
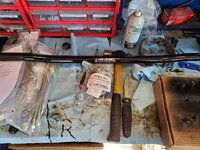
Progress has been a bit slow. Waiting for the frame and a ton of parts to arrive. Just received all new stainless steel lines and brake equipment. Major pieces still on the way.

My welder finished up this aft on the heavy welding and fabrication part of the frame abd it will be back on my garage tomorrow for some power book webbing! Transmission may be ready tomorrow

More pics tomorrow!
 

Attachments

  • 20200507_085441.jpg
    20200507_085441.jpg
    449.5 KB · Views: 29
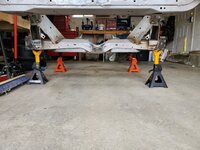
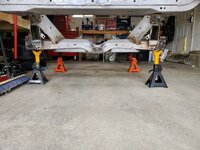
Frame is back from the welder. If anyone in the edmonton area needs welding on their frame, i highly reccomend Craigs welding in Morinville. The did an excellent job blasting the frame, fabricating all new trailing arm pockets and reinforcements for both kick ups out of steel actually strong enough for the task, as well as repairing the rust damage and welding in all 8 body mount points.

Welding phase 2 is underway with the GM powerbook gusseting and then it wi be epoxy time!!

The time to build is meow!
 

Attachments

  • 20200508_111508.jpg
    20200508_111508.jpg
    415.8 KB · Views: 28
  • 20200508_111527.jpg
    20200508_111527.jpg
    393.1 KB · Views: 27
  • 20200508_111545.jpg
    20200508_111545.jpg
    475.7 KB · Views: 25
  • 20200508_111556.jpg
    20200508_111556.jpg
    569.7 KB · Views: 24
  • 20200508_163939.jpg
    20200508_163939.jpg
    509.3 KB · Views: 29
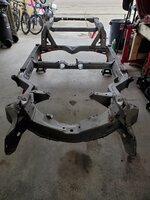
Still moving along! Frame is now 100% welded, new body mounts, weak spots have been cut out and repaired, blasted, disked and now prepping for paint!

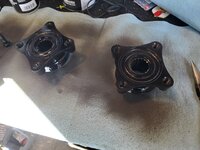
New crate engine, custom build 700R4 transmission and new rear hubs have all arrived.

Turning the garage into a paint booth tomorrow so I can get this frame painted and get busy building.
 

Attachments

  • 20200606_160454.jpg
    20200606_160454.jpg
    445.3 KB · Views: 21
  • 20200606_160529.jpg
    20200606_160529.jpg
    527.9 KB · Views: 21
  • 20200601_160439.jpg
    20200601_160439.jpg
    481.9 KB · Views: 22
  • 20200521_155015.jpg
    20200521_155015.jpg
    487.3 KB · Views: 25
  • 20200514_200836.jpg
    20200514_200836.jpg
    470.3 KB · Views: 25
  • 20200508_111545.jpg
    20200508_111545.jpg
    475.7 KB · Views: 27
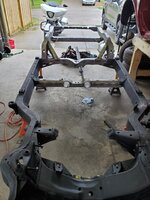
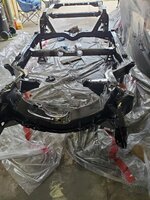
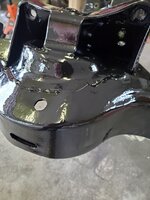
The frame is done!! 100% welded, power book welding complete, primed, sealed and coated in KBS Blacktop. Letting things rest for a day or two and it will be time to build!
 

Attachments

  • 20200613_155910.jpg
    20200613_155910.jpg
    553.7 KB · Views: 27
  • 20200613_121107.jpg
    20200613_121107.jpg
    370 KB · Views: 27
  • 20200613_162621.jpg
    20200613_162621.jpg
    324.3 KB · Views: 28
The frame is done!! 100% welded, power book welding complete, primed, sealed and coated in KBS Blacktop. Letting things rest for a day or two and it will be time to build!
Looking great.Now the progress will really start to show. :thumbs:
 
Cleaning and painting parts is underway! New 1 1/4" sway bar kit arrived and i outsourced the removal and replacement of the u joints and control arm bushings. Full day of sandblasting and painting tomorrow.

Where possible, im replacing hardware with stainless steel or chromed finish to shut down rust!
 

Attachments

  • 20200619_170158.jpg
    20200619_170158.jpg
    561.3 KB · Views: 24
  • 20200619_165825.jpg
    20200619_165825.jpg
    451.5 KB · Views: 23
  • 20200619_153911.jpg
    20200619_153911.jpg
    644.9 KB · Views: 21
  • 20200619_153909.jpg
    20200619_153909.jpg
    704.1 KB · Views: 25
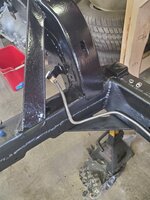
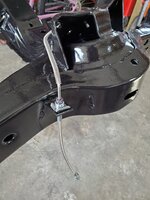
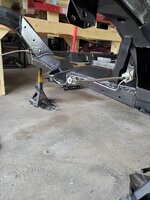
A little more progress! Brake lines installed pretty easily. Still waiting for quite a few parts to arrive to really start making some progress, but ill just keep plugging away at it until they arrive!

A note on the stainless lines, the fit is not exact, but pretty darn close! Also a good idea to tighten and loosen a few times to ensure a good seal on the flares. Just something ive always done, neve had a leak yet... lol
 

Attachments

  • 20200621_172231.jpg
    20200621_172231.jpg
    515.4 KB · Views: 21
  • 20200622_191142.jpg
    20200622_191142.jpg
    466.2 KB · Views: 21
  • 20200622_191151.jpg
    20200622_191151.jpg
    394.9 KB · Views: 21
  • 20200623_154039.jpg
    20200623_154039.jpg
    419.6 KB · Views: 21
  • 20200623_154050.jpg
    20200623_154050.jpg
    492 KB · Views: 22
  • 20200623_160406.jpg
    20200623_160406.jpg
    550.4 KB · Views: 20
Today was all about blasting and coating! More suspension parts cleaned up and painted while I wait for more new parts to arrive and for my local shop to finish up with a few others!

Used my dump bound tent to blast in, since i do not have a new blasting box just yet.

Moving along well now!
 

Attachments

  • 20200627_170036.jpg
    20200627_170036.jpg
    290.2 KB · Views: 19
  • 20200627_114039.jpg
    20200627_114039.jpg
    251.5 KB · Views: 18
  • 20200627_131323.jpg
    20200627_131323.jpg
    389.8 KB · Views: 21
  • 20200627_184829.jpg
    20200627_184829.jpg
    326.4 KB · Views: 26
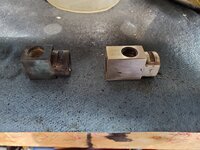
While waiting for parts to arrive, I decided to take a lil peak inside the diff. Not good! It would appear that a full rebuild will happen! What models of carrier are interchangeable to the 79 diff? Say, different vehicles? Everything else seems pretty solid, no gear damage, case is good. Everything is within spec. just the carrier housing.
A little setback, but it would appear that i am going to learn how to rebuild a diff! Lol
 

Attachments

  • 20200630_182728.jpg
    20200630_182728.jpg
    282.8 KB · Views: 22
  • 20200630_182558.jpg
    20200630_182558.jpg
    249 KB · Views: 21

Users who are viewing this thread

Back
Top