So a week ago i was washing the car and pivoted my passenger side mirror to let the water drain out of the housing better and something "popped" as i was pivoting the mirror and the mirror would not stay in place and swiveled around freely. My heart sank.
My resources were one on removing the side mirror http://content.mamotorworks.com/pdf/632007.pdf
and a post on another corvette forum that i used as the basis for my fix How to fix a floppy side mirror - Corvette Forum
I'm not sure how many of you have had this problem but i was not about to spend $300 for a new side mirror housing so here is a $15 fix that the mechnically inclined can attempt. well $7.50 fix since $15 will provide enough parts for both mirrors. All the parts can be found at your local home depot.
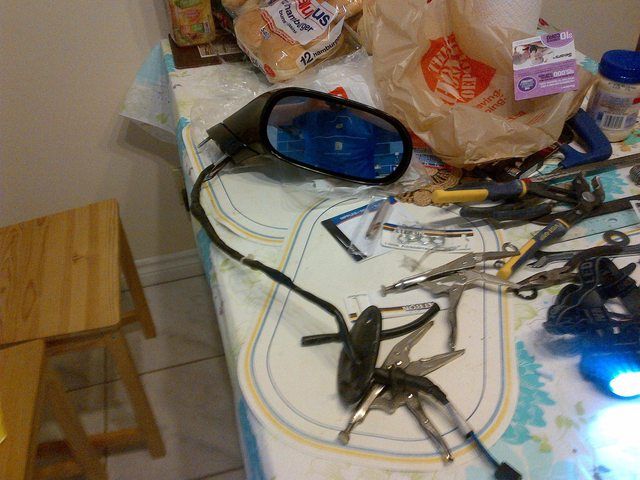
Here are some tools you need
- assorted wrenches depending on size of lock nuts (i used an 18mm wrench)
- long nosed locking pliers (i found it easier to work with)
- saw
- electrical tape
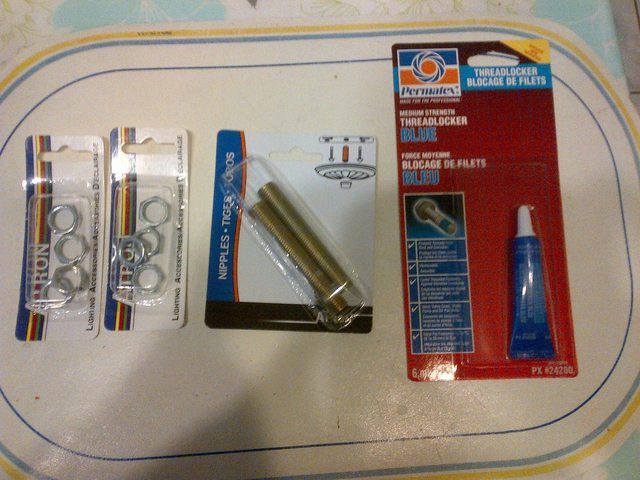
Here is what you need from home depot
- *1/4" nipple *snickers*
- 1/4" locking nuts (2 or 4 to be safe)
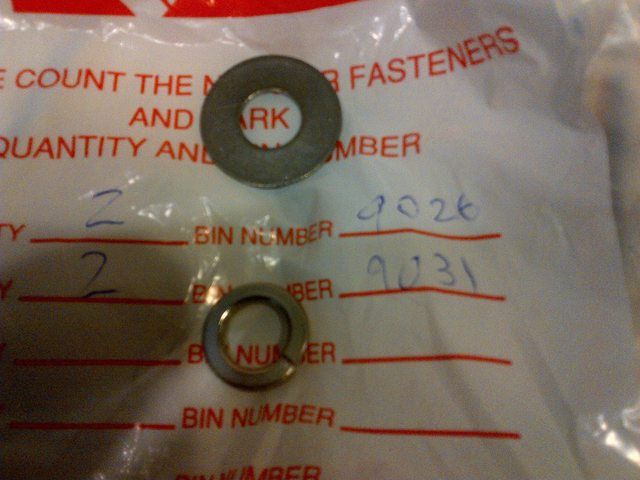
- 1/2" flat stainless steel washer (washer should cover diameter of spring)
- 1/2" stainless steel locking washer
OPTIONAL: Thread locker
Double up the quantities if you are doing both mirrors (or do what i did and just buy all the stuff so you have it on hand should the other one fail).
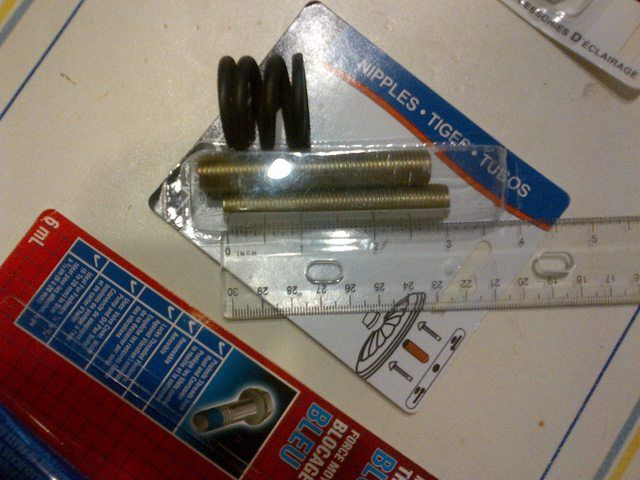
* a quick check on the home depot website shows a bunch of different nipples, i went with 3" long ones that worked well for me, but they can be shorter as i had a lot of thread on either end left. if you end up with longer ones you can always cut them. To be safe just bring the base and spring with you to home depot to check sizing and fitment. Also...I had a hell of a time with the home depot employees...all incompetent...the nipples will be found in the lighting area.
I will skip the removal of the side mirror process and the tools required for it and jump right into the fix. For instructions on removal, please view the links i included above or contact me for the pdf version should the links fail.
Once you have the side mirror off bring it inside or to your designated work area, make sure the area is clean and be very careful to avoid any scratches or marks on your side mirror, have some micro fibre towels to help handle the mirror and protect it when you set it aside.
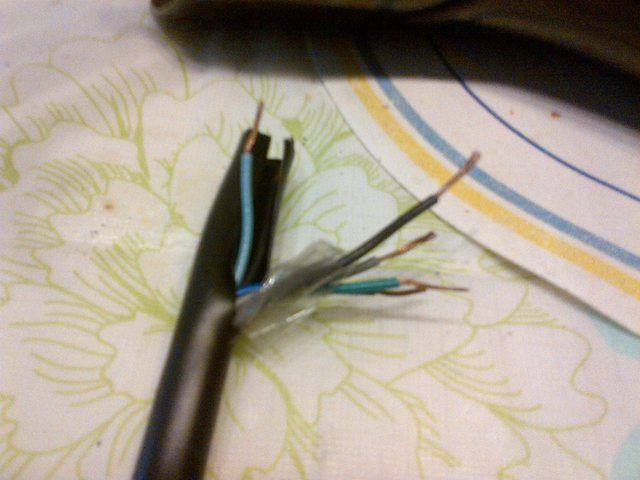
you can try to take apart the entire mirror to disconnect the wires or do what i did and just cut them (we'll reattach them later). make sure to leave enough length from the mirror housing to work with when reattaching. and then remove the side mirror housing from the base which bolts down to the door
also 2 wires are the same colour for the heated mirrors, i'm not sure if it makes a difference so mark one of the wires just to be safe, the rest are colour coded

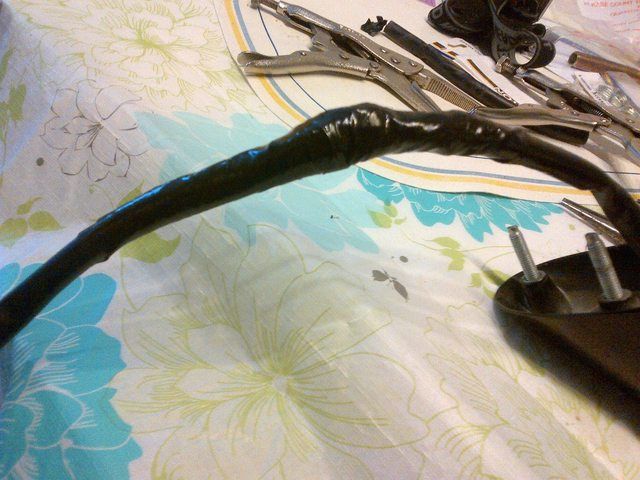
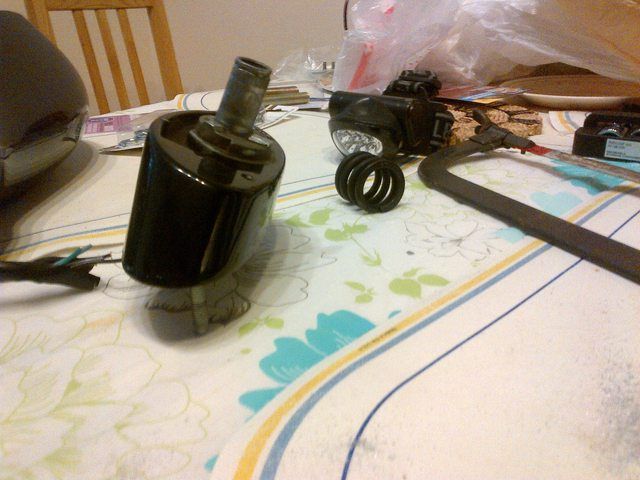
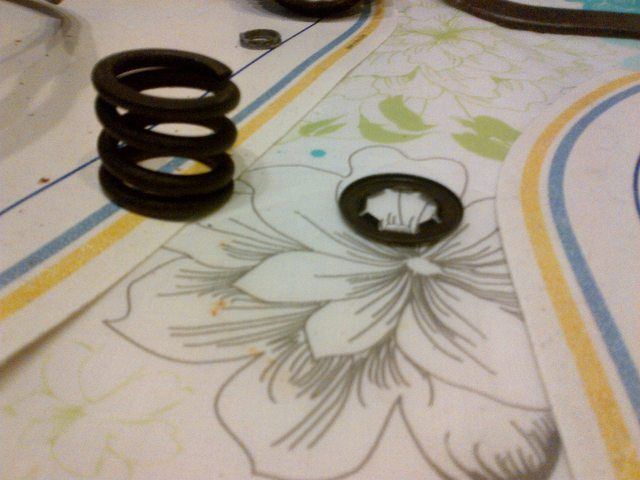
This is the base of the side mirror as well as a picture of the spring and the locking ring with teeth that grab onto the lip that you see at the top of the base. As you can imagine it's only a matter of time before one of these will pop off eventually....and don't try to compress the spring to push the ring back down...doesn't work lol
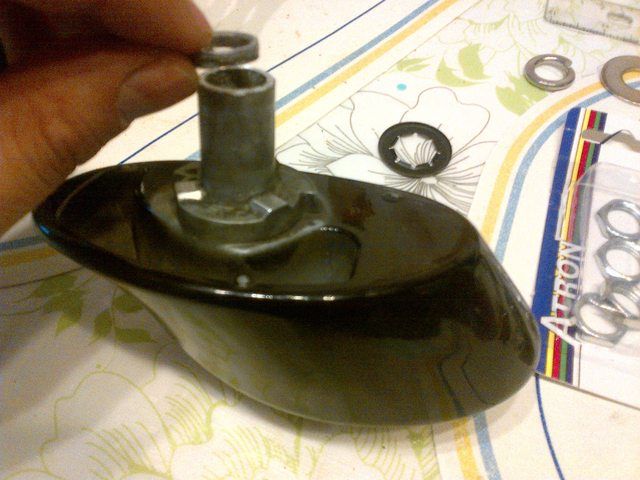
take your saw and saw of the lip of the base where the ring normally would sit
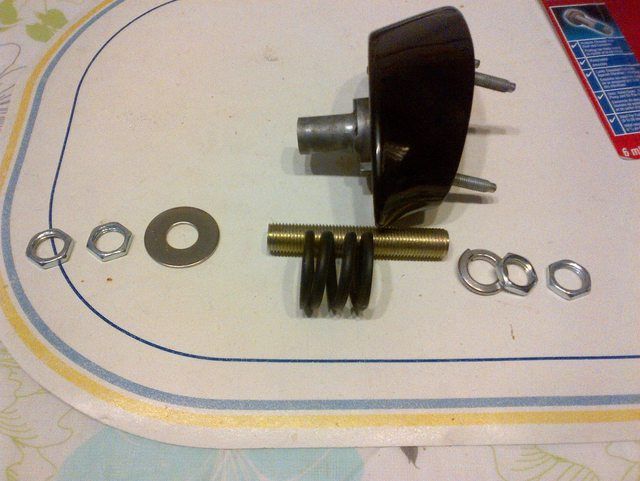
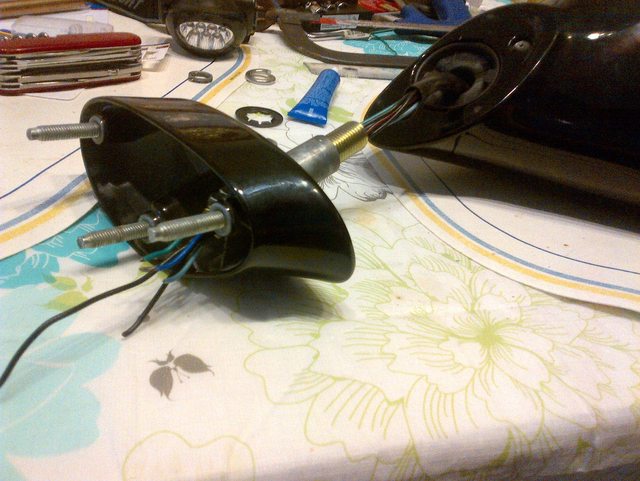
here is a shot of how all the parts should fit together through the base of the mirror
thread the wires from the mirror housing through the locking nut, washer and spring
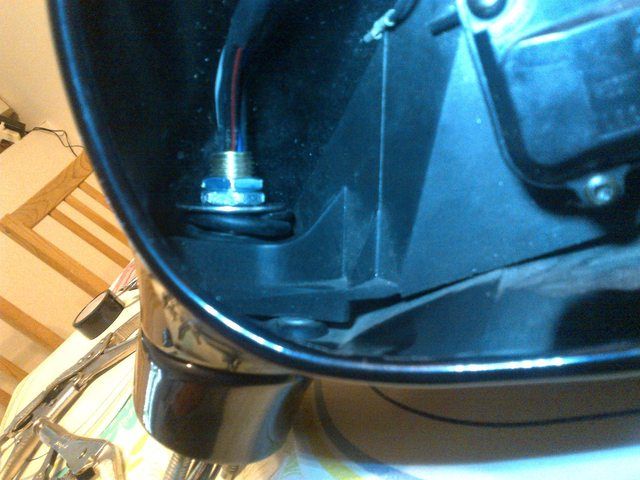
thread the nipple through the hole of the base until thread is visible on both ends, check with the mirror housing to make sure you have enough clearance in the housing, now place the locking washer on the bottom (underside) of the mirror base and put a washer in place then tighten a locking nut (use thread locker if desired) then put the second locking nut on. Then run the wire from the housing through the hole and then through the nipple. i found that the black electical tubing made things a tight squeeze so i removed it but you can keep it if you can make it work
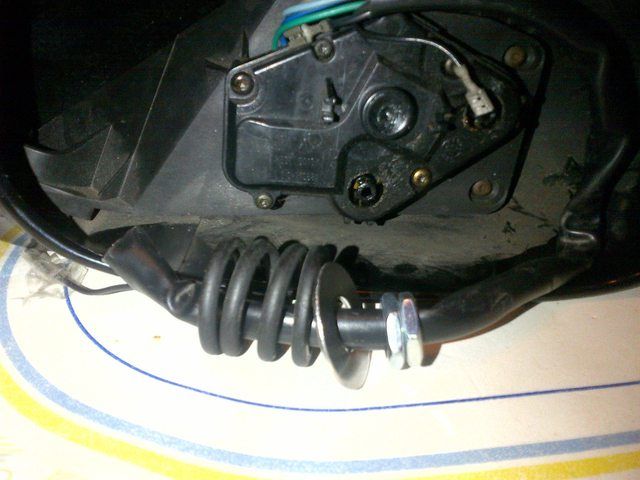
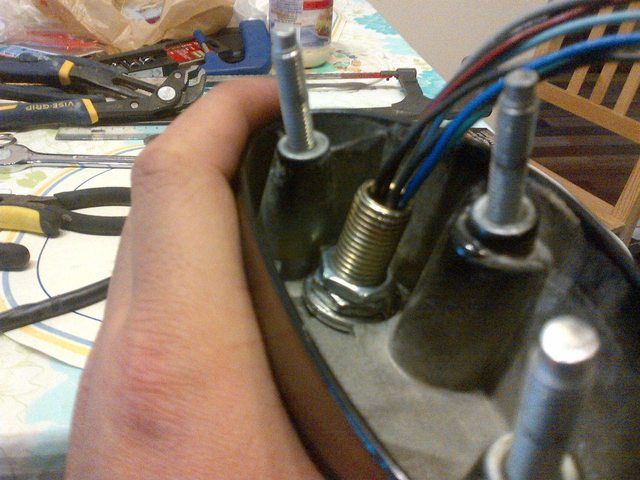
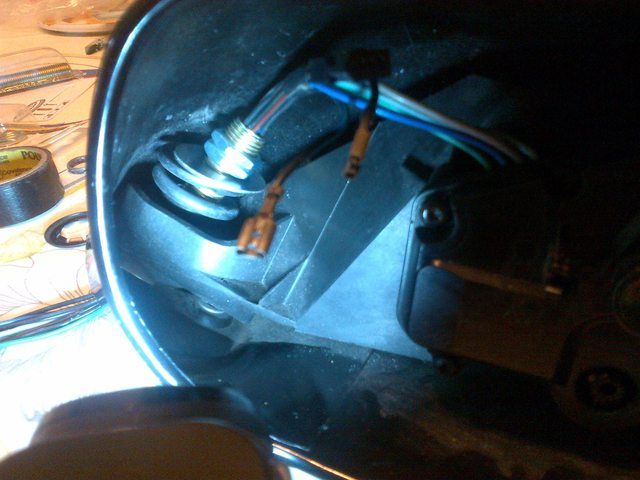
shot from of the bottom of the base after everything is loosely assembled and the inside of the mirror housing. it's tricky and this is where long nosed locking pliers helped for tightening the locking nuts (do them one at a time or else it won't work out that well) and have locking pliers on both ends or else it will just spin and not tighten
My resources were one on removing the side mirror http://content.mamotorworks.com/pdf/632007.pdf
and a post on another corvette forum that i used as the basis for my fix How to fix a floppy side mirror - Corvette Forum
I'm not sure how many of you have had this problem but i was not about to spend $300 for a new side mirror housing so here is a $15 fix that the mechnically inclined can attempt. well $7.50 fix since $15 will provide enough parts for both mirrors. All the parts can be found at your local home depot.
Here are some tools you need
- assorted wrenches depending on size of lock nuts (i used an 18mm wrench)
- long nosed locking pliers (i found it easier to work with)
- saw
- electrical tape
Here is what you need from home depot
- *1/4" nipple *snickers*
- 1/4" locking nuts (2 or 4 to be safe)
- 1/2" flat stainless steel washer (washer should cover diameter of spring)
- 1/2" stainless steel locking washer
OPTIONAL: Thread locker
Double up the quantities if you are doing both mirrors (or do what i did and just buy all the stuff so you have it on hand should the other one fail).
* a quick check on the home depot website shows a bunch of different nipples, i went with 3" long ones that worked well for me, but they can be shorter as i had a lot of thread on either end left. if you end up with longer ones you can always cut them. To be safe just bring the base and spring with you to home depot to check sizing and fitment. Also...I had a hell of a time with the home depot employees...all incompetent...the nipples will be found in the lighting area.
I will skip the removal of the side mirror process and the tools required for it and jump right into the fix. For instructions on removal, please view the links i included above or contact me for the pdf version should the links fail.
Once you have the side mirror off bring it inside or to your designated work area, make sure the area is clean and be very careful to avoid any scratches or marks on your side mirror, have some micro fibre towels to help handle the mirror and protect it when you set it aside.
you can try to take apart the entire mirror to disconnect the wires or do what i did and just cut them (we'll reattach them later). make sure to leave enough length from the mirror housing to work with when reattaching. and then remove the side mirror housing from the base which bolts down to the door
also 2 wires are the same colour for the heated mirrors, i'm not sure if it makes a difference so mark one of the wires just to be safe, the rest are colour coded
This is the base of the side mirror as well as a picture of the spring and the locking ring with teeth that grab onto the lip that you see at the top of the base. As you can imagine it's only a matter of time before one of these will pop off eventually....and don't try to compress the spring to push the ring back down...doesn't work lol
take your saw and saw of the lip of the base where the ring normally would sit
here is a shot of how all the parts should fit together through the base of the mirror
thread the wires from the mirror housing through the locking nut, washer and spring
thread the nipple through the hole of the base until thread is visible on both ends, check with the mirror housing to make sure you have enough clearance in the housing, now place the locking washer on the bottom (underside) of the mirror base and put a washer in place then tighten a locking nut (use thread locker if desired) then put the second locking nut on. Then run the wire from the housing through the hole and then through the nipple. i found that the black electical tubing made things a tight squeeze so i removed it but you can keep it if you can make it work
shot from of the bottom of the base after everything is loosely assembled and the inside of the mirror housing. it's tricky and this is where long nosed locking pliers helped for tightening the locking nuts (do them one at a time or else it won't work out that well) and have locking pliers on both ends or else it will just spin and not tighten