I spent some time last week on this headlight project and tried to document everything. I hope this helps someone or at the very least you'll enjoy the process. I figure I would combine these into one thread rather than have separate threads for each mod. There's some overlap in the steps and it's much easier if you're doing everything at once.
It should also be noted that I own a 1997 C5 and the earlier model C5's differ slightly from the later models so you may need different tools and sizes for screwdrivers/sockets etc
Headlight Replacement
Parts Needed
- ACA headlights (or any replacement headlights, the ones I got were the Radioflyer bi-xenon ACA headlights)
- OPTIONAL: XPEL Headlight protective clear film (part# H0603)
Tools Needed
- torx 15 and 20 screwdriver (i would recommend also having torx bits that you can fit into a small socket wrench)
- philips screwdriver
- socket wrench (10mm socket, socket extensions)
- 8mm box wrench
- OPTIONAL: PB Blaster (highly recommended)
- OPTIONAL: anti-seize
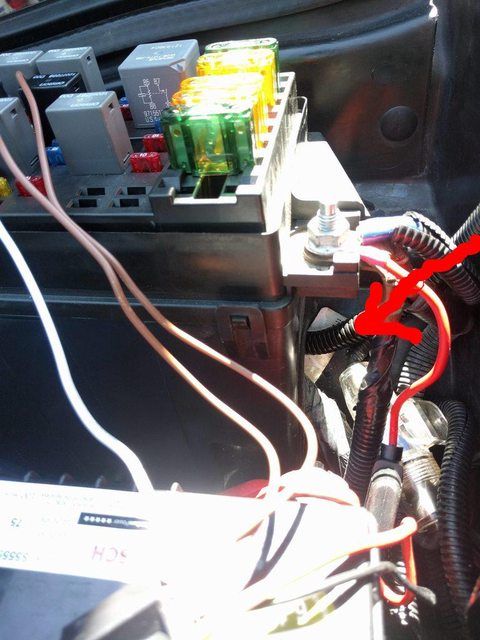
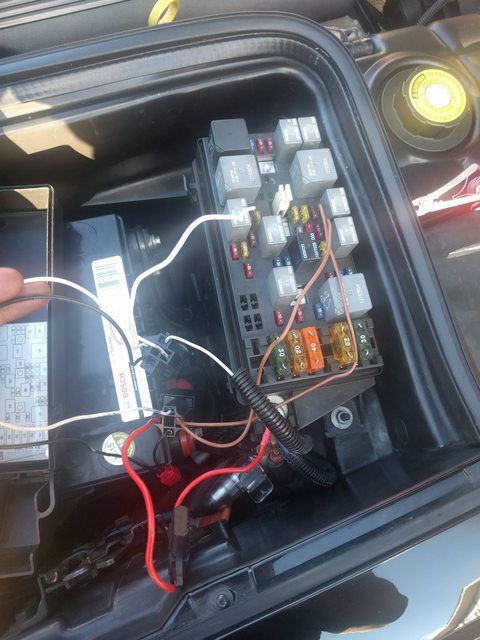
Before starting I would recommend applying the clear film before hand on another day. It will save you time and you'll get the enjoy the full beauty of your new headlights right away rather than have to wait for the little bubbles from applying the clear film to disappear. I didn't do this beforehand and in hindsight I wish i did. Also, I did one headlight at a time just in case i needed to use the other side as a reference for any reason but you could do both at the same time if you wish although i would not recommend it. Better to be safe. Speaking of safe, you might want to disconnect the battery or pull the fuses to stop the headlight motors from receiving power
1. Turn the knob on the headlight motor to manually get the headlight to come up and start by removing the headlight trim held together by 3 philips screws (2 on the inside and 1 on the outside). If you have trouble with one of the screws because the hood hinge gets in the way of your screwdriver, try a short screwdriver or alternatively close your hood and you should be able to unscrew it fairly easily
2. Remove the headlight cover, it's held down by 4 torx screws, 1 on each side and 2 at the back, be careful as you don't want to scratch the paint. Put them aside in a safe place.
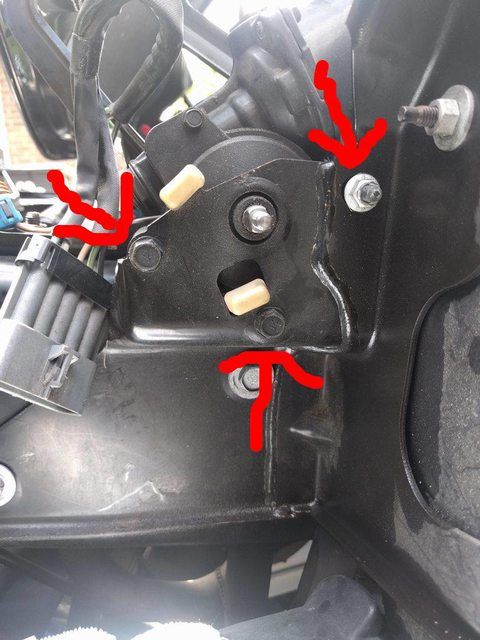
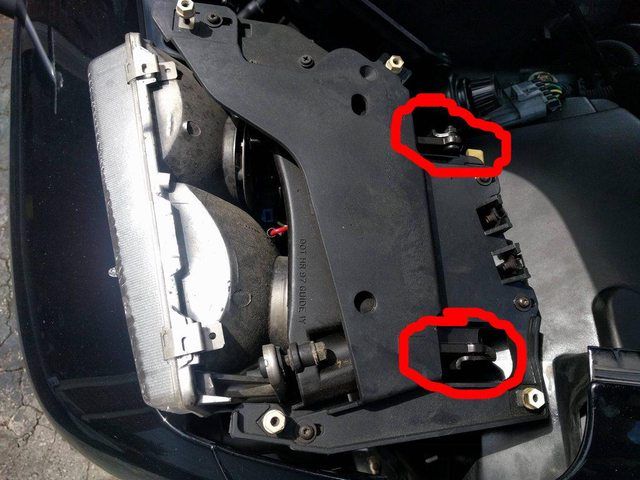
3. Remove the 2 hinge joints with a torx bit/screwdriver and 8mm box wrench. These screws have loctite so go slow and be careful. I would recommend hitting these with some PB blaster. I found the screwdriver ineffective and went with the torx bit in a socket wrench approach. Also it was easier to use the box wrench to loosen the nut rather than using the socket wrench to loosen the torx screw. The screw also has a plastic piece to it so make sure you don't lose that!
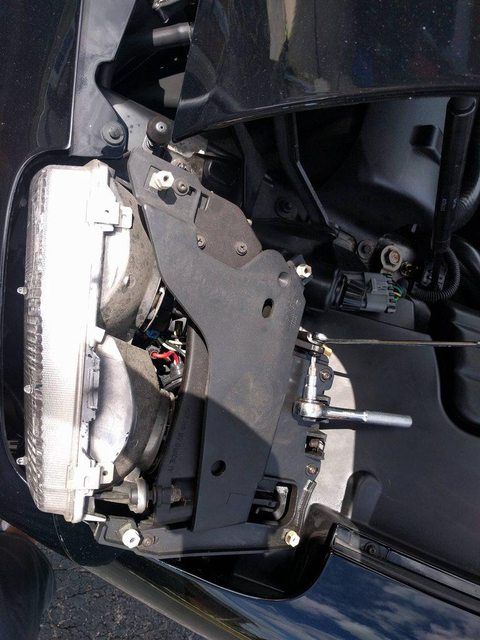
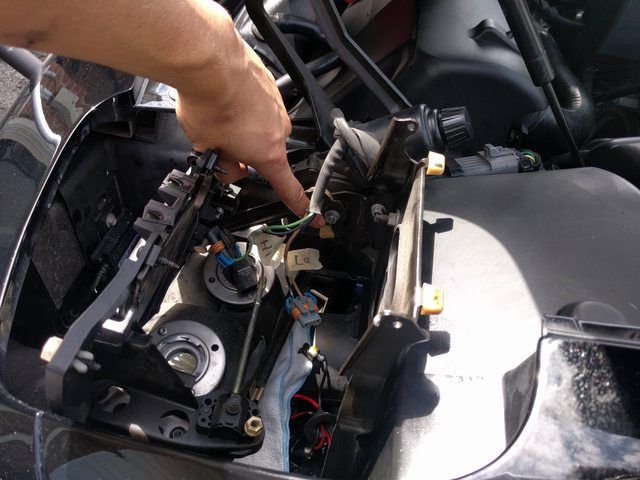
4. Once the second hinge joint is out the headlight will fall into the headlight area so hold onto it and set it down gently. Place a towel over the brake vent where you can rest the headlight then loosen the 10mm nut holding the pivot arm to the headlight motor. If the pivot arm does not come off easily after the nut is off, gently pry it a little bit and it should slide off. Disconnect the hi and low beam connects from your headlights and label them so you don't get forget.
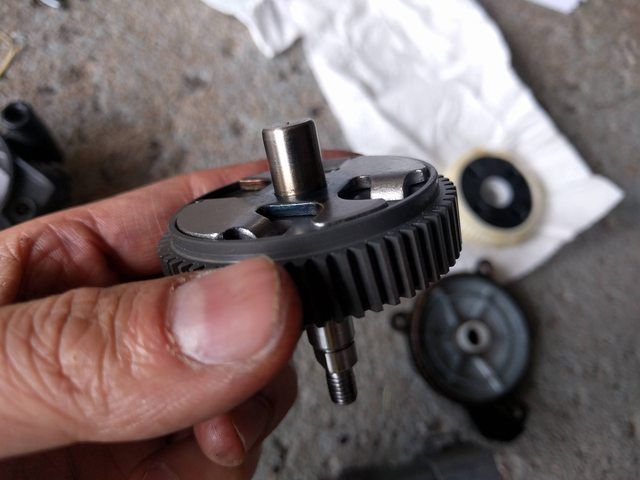
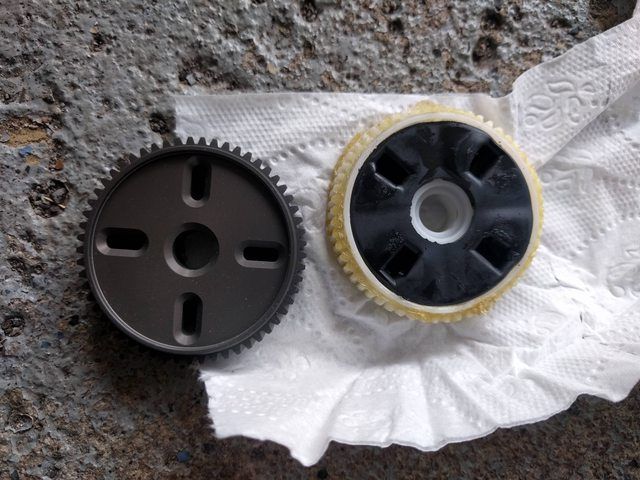
5. See below for HEADLIGHT GEAR FIX otherwise skip this step and go to next step.
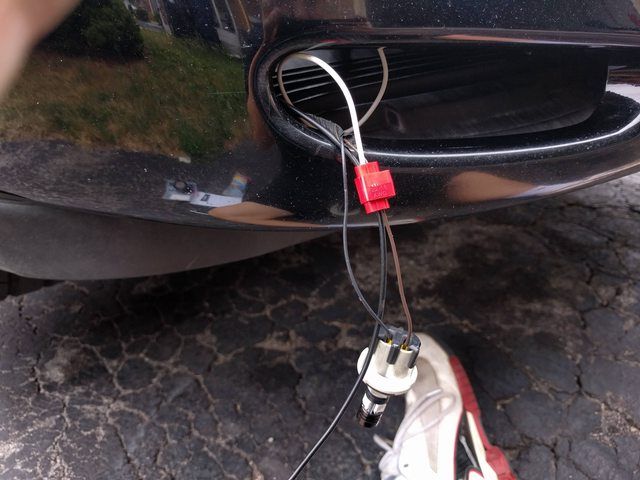
6. Take the headlight somewhere you can work on it. With the headlight out of the way, now would also be a good time if you want to change the corner lights (which i did, it's pretty easy) that are just held down by a 10mm (inside, close to air intake) and 7mm (outside by the side marker light) nut on the underside and a spring on top.
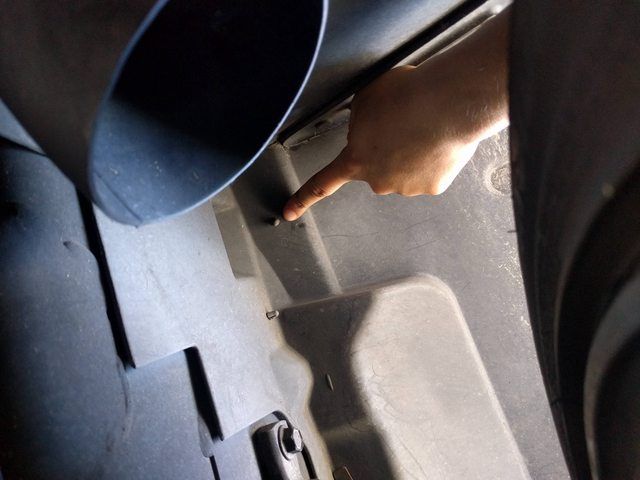
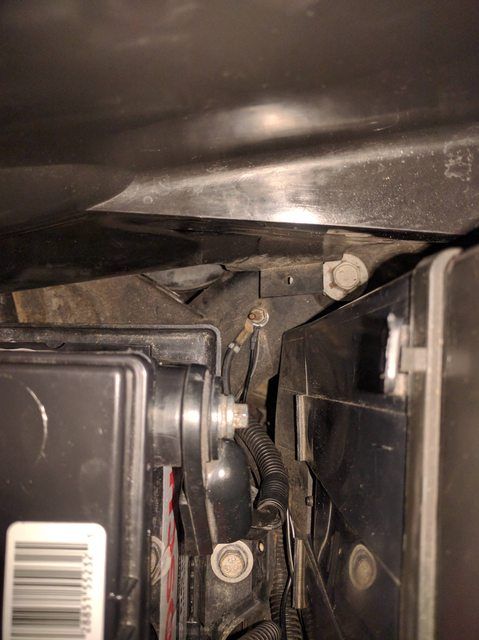
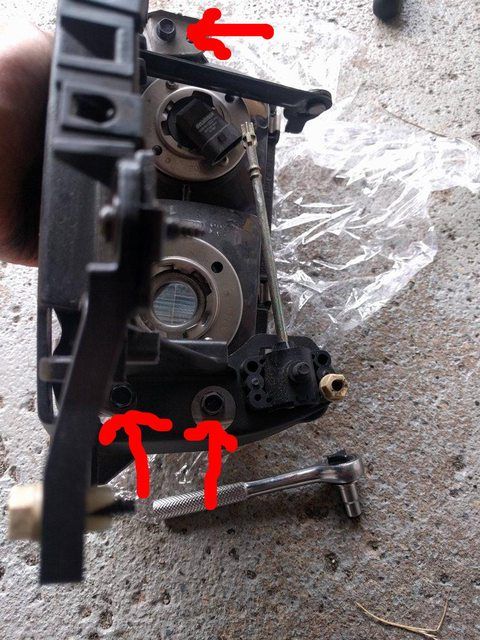
Remove the 3 bolts (10mm) holding the headlight to the headlight bracket, you may need a socket extension for this part to make things easier, i think a box wrench could work as well
7. Now is a good time to hit the headlight adjusters with some PB Blaster as well and loosen them and make sure they work, you'll need them to aim your new headlights.
If you're working on the passenger side and plan on doing the HI-4 MOD (or my modified version) now is a good time while you wait for the PB Blaster to work its magic on your adjuster knobs. Test to make sure they work before putting everything back together.
8. Basically reverse the steps apply anti-seize to anything you see fit, tighten the 3 bolts to your new headlights, reattach the pivot arm, install the HIDs, they should be more or less plug and play if you have 55w HIDs, for standard 35w HIDs you'll need an inline resistor but it's not too difficult so for brevity I will skip over these steps, there are different ways to mount the ballasts. I'll let you decide what you think works best, but for reference, I simply used double sided tape to tape the ballast to wheel well. It's easiest to reattach the hinge joints last to allow yourself more room to install the HIDs but it's possible to do it after. Do the other side and then wait for it to get dark to aim your headlights
9. Find a level spot where you can aim your headlights at a wall. I'm no expert at aiming HIDs but i've read that the lower portion of the cut off shield should be 22"-24" high with the car parked 15-20 feet away
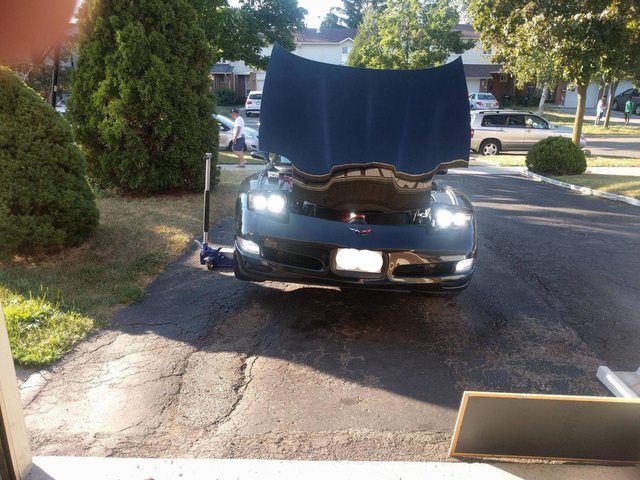
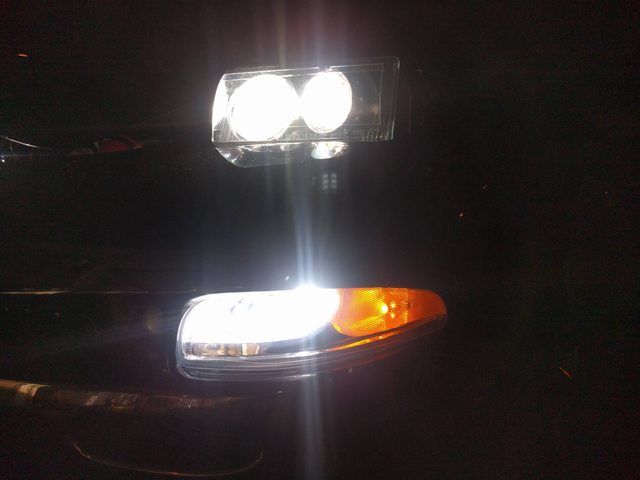
Here's the some shots of the headlights installed as well as some night shots of the high and low beams as viewed from various driving distances i tried to replicate in the rearview mirror from another car
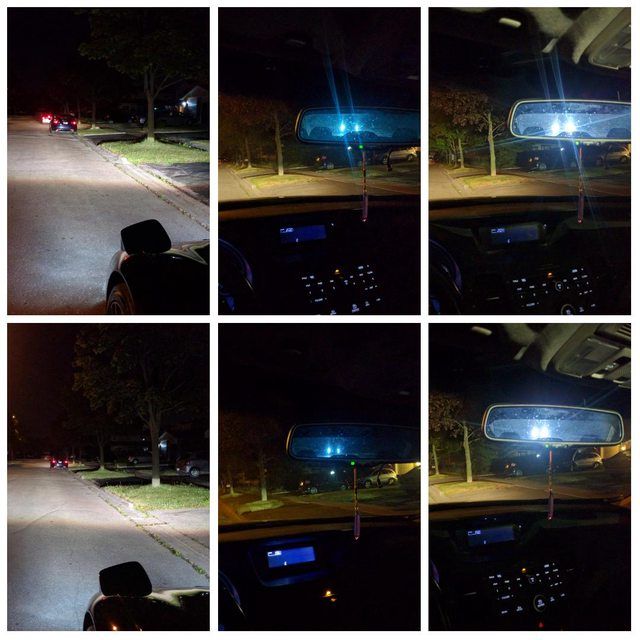
Close and far highway distances, middle is low beam and right is high beam
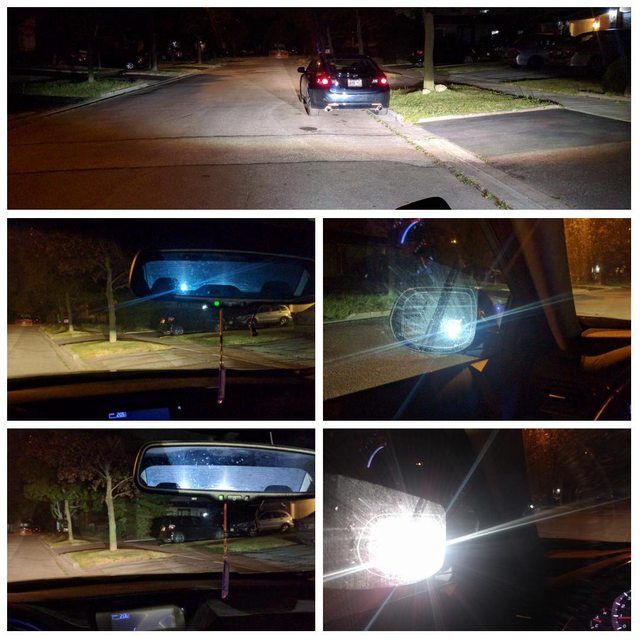
City driving distance from rear view and side mirror. Top is low and bottom is high
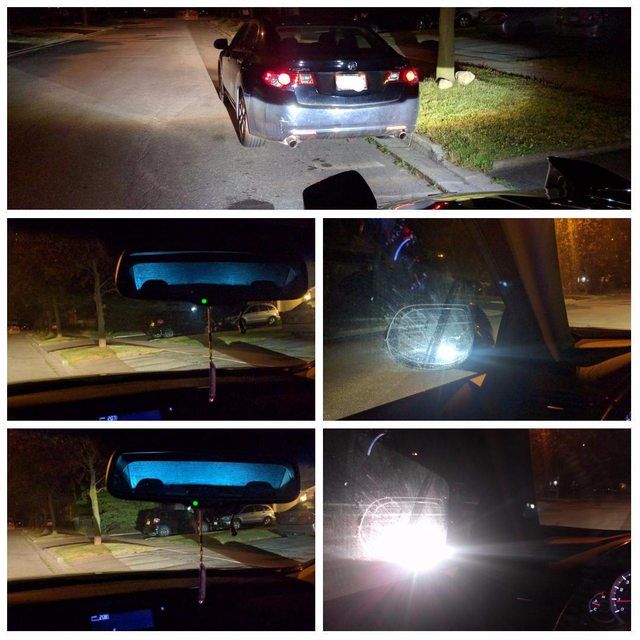
Traffic stop distance. Top is low and bottom is high
It should also be noted that I own a 1997 C5 and the earlier model C5's differ slightly from the later models so you may need different tools and sizes for screwdrivers/sockets etc
Headlight Replacement
Parts Needed
- ACA headlights (or any replacement headlights, the ones I got were the Radioflyer bi-xenon ACA headlights)
- OPTIONAL: XPEL Headlight protective clear film (part# H0603)
Tools Needed
- torx 15 and 20 screwdriver (i would recommend also having torx bits that you can fit into a small socket wrench)
- philips screwdriver
- socket wrench (10mm socket, socket extensions)
- 8mm box wrench
- OPTIONAL: PB Blaster (highly recommended)
- OPTIONAL: anti-seize
Before starting I would recommend applying the clear film before hand on another day. It will save you time and you'll get the enjoy the full beauty of your new headlights right away rather than have to wait for the little bubbles from applying the clear film to disappear. I didn't do this beforehand and in hindsight I wish i did. Also, I did one headlight at a time just in case i needed to use the other side as a reference for any reason but you could do both at the same time if you wish although i would not recommend it. Better to be safe. Speaking of safe, you might want to disconnect the battery or pull the fuses to stop the headlight motors from receiving power
1. Turn the knob on the headlight motor to manually get the headlight to come up and start by removing the headlight trim held together by 3 philips screws (2 on the inside and 1 on the outside). If you have trouble with one of the screws because the hood hinge gets in the way of your screwdriver, try a short screwdriver or alternatively close your hood and you should be able to unscrew it fairly easily
2. Remove the headlight cover, it's held down by 4 torx screws, 1 on each side and 2 at the back, be careful as you don't want to scratch the paint. Put them aside in a safe place.
3. Remove the 2 hinge joints with a torx bit/screwdriver and 8mm box wrench. These screws have loctite so go slow and be careful. I would recommend hitting these with some PB blaster. I found the screwdriver ineffective and went with the torx bit in a socket wrench approach. Also it was easier to use the box wrench to loosen the nut rather than using the socket wrench to loosen the torx screw. The screw also has a plastic piece to it so make sure you don't lose that!
4. Once the second hinge joint is out the headlight will fall into the headlight area so hold onto it and set it down gently. Place a towel over the brake vent where you can rest the headlight then loosen the 10mm nut holding the pivot arm to the headlight motor. If the pivot arm does not come off easily after the nut is off, gently pry it a little bit and it should slide off. Disconnect the hi and low beam connects from your headlights and label them so you don't get forget.
5. See below for HEADLIGHT GEAR FIX otherwise skip this step and go to next step.
6. Take the headlight somewhere you can work on it. With the headlight out of the way, now would also be a good time if you want to change the corner lights (which i did, it's pretty easy) that are just held down by a 10mm (inside, close to air intake) and 7mm (outside by the side marker light) nut on the underside and a spring on top.
Remove the 3 bolts (10mm) holding the headlight to the headlight bracket, you may need a socket extension for this part to make things easier, i think a box wrench could work as well
7. Now is a good time to hit the headlight adjusters with some PB Blaster as well and loosen them and make sure they work, you'll need them to aim your new headlights.
If you're working on the passenger side and plan on doing the HI-4 MOD (or my modified version) now is a good time while you wait for the PB Blaster to work its magic on your adjuster knobs. Test to make sure they work before putting everything back together.
8. Basically reverse the steps apply anti-seize to anything you see fit, tighten the 3 bolts to your new headlights, reattach the pivot arm, install the HIDs, they should be more or less plug and play if you have 55w HIDs, for standard 35w HIDs you'll need an inline resistor but it's not too difficult so for brevity I will skip over these steps, there are different ways to mount the ballasts. I'll let you decide what you think works best, but for reference, I simply used double sided tape to tape the ballast to wheel well. It's easiest to reattach the hinge joints last to allow yourself more room to install the HIDs but it's possible to do it after. Do the other side and then wait for it to get dark to aim your headlights
9. Find a level spot where you can aim your headlights at a wall. I'm no expert at aiming HIDs but i've read that the lower portion of the cut off shield should be 22"-24" high with the car parked 15-20 feet away
Here's the some shots of the headlights installed as well as some night shots of the high and low beams as viewed from various driving distances i tried to replicate in the rearview mirror from another car
Close and far highway distances, middle is low beam and right is high beam
City driving distance from rear view and side mirror. Top is low and bottom is high
Traffic stop distance. Top is low and bottom is high