Featured Thread
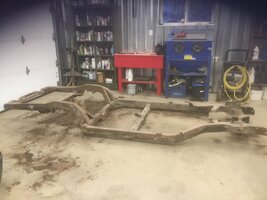
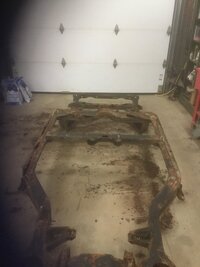
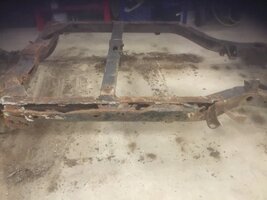
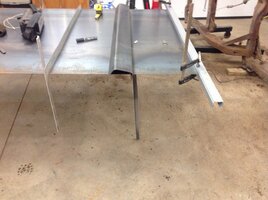
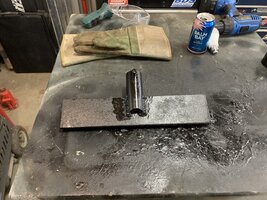
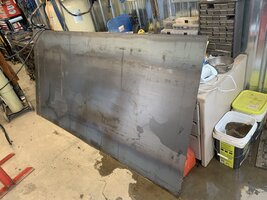
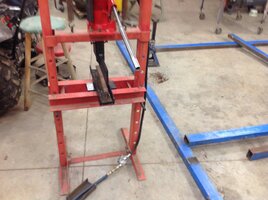
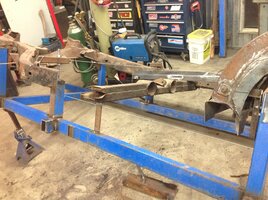
After a couple of diesel engine rebuilt, the complete restoration of a travel trailer for my wife, some no fun lawyer stuff with my exexex crazy ex wife, a lot of motorcycling, a new sbc for the camaro and a pile of other activities i am focusing on the corvette resto once again, took the rest of the frame appart. Lost about 20 pound of rust from it, found some surprise hole and some old repair not to my taste. Feel good to work on her again, next is sandblasting to see what’s left and then a whole lot of repairing to do... stay tuned
 

Attachments

  • 95599EB5-097F-4B6A-B7B9-87DF56DEB57C.jpeg
    95599EB5-097F-4B6A-B7B9-87DF56DEB57C.jpeg
    664.2 KB · Views: 36
  • 52266747-C29A-46A9-AB1C-98971B28C436.jpeg
    52266747-C29A-46A9-AB1C-98971B28C436.jpeg
    389.8 KB · Views: 31
  • E8C9FF4E-47DF-4879-B4D7-23A806CF4082.jpeg
    E8C9FF4E-47DF-4879-B4D7-23A806CF4082.jpeg
    679.6 KB · Views: 37
Put some more time on my project , got myself a sheet of steel plate. I mesured all the angles of the old frame and length of replacement pieces i need to replicate. I took time to make myself a press jig to bend my new frame to shape. Figured i migth as well try and see if it would be doable. I plasma cutted and press my first peice last nigth and it turned out perfect! Ibended it a small bit a a time, now the more challenging part will be to burn it in and keeping te frame squared, thank god for my laser and transit!
 

Attachments

  • DBC95D4E-D51A-4A6E-A906-E8636773CB15.jpeg
    DBC95D4E-D51A-4A6E-A906-E8636773CB15.jpeg
    545.2 KB · Views: 28
  • 2D37DC13-910E-43D9-A9AC-C3AA0EDA5340.jpeg
    2D37DC13-910E-43D9-A9AC-C3AA0EDA5340.jpeg
    1.3 MB · Views: 26
  • 34393DD0-D934-4DE5-911B-D2EE945BE863.jpeg
    34393DD0-D934-4DE5-911B-D2EE945BE863.jpeg
    685.2 KB · Views: 26
  • 691A47F3-B6CD-47C7-9DC4-EB0A7ACCF3AC.jpeg
    691A47F3-B6CD-47C7-9DC4-EB0A7ACCF3AC.jpeg
    551.1 KB · Views: 27
Nice work. Glad to see your back at it. Ironically I am trying to get back into my rebuild after rebuilding a travel trailer last winter too!

Hopefully I can get to it over Christmas.

Good luck, although doesn't seem like you need it!

T
 
After looking at it carefully , i decided to peel it back peace by peace. It is the only way to fix all the issues i am seeing, so i removed a bunch of part and i am now starting to rebuild it peace by peace, any thin metal is replaced by new metal. The miller 215 welder has good penetration and i weld both side. I know a lot of people who wold replace it, i will however fix it ....
58A92071-ED6B-4F69-A0C3-01924E96BAAA.jpeg
6146BA09-00D6-4B8D-878E-8BBF911701D9.jpeg
3A4103E1-5418-4D08-A098-9F67F41FA906.jpeg
 
  • Like
Reactions: 12cents
So while trying to mesure and make sure everything is in the rigth place i figured a frame jig would make the job much easier.
B5A31CAA-8794-4427-A789-0B0D66895082.jpeg
7F03DA59-0493-4795-BBF5-7D30F480350F.jpeg
FDD33406-AC3E-42BE-918E-291F9BADB502.jpeg
So out came some steel i had from a project and i started cutting and making a frame jig, i got everything level and mesured with a transit laser. Almost done frame is done and the front is situated and ajustable.
 
Well pictures did not upload yesterday, so here they are with some of today. The jig is done! My frame was out of wack quite a bit, so after some jacking and pulling is is now acceptable. I am happy i took the time to do the jig, this will give me the opportunity to make something straight instead of all crooked like it was. I dont know what had happened to it in the past, there was a racing sticker on her that could explain why the rear control arm pocket where one inch higher than i should have been, the front was a bit out of square too so maby it was in some sort of collision. I also fixed and remounted the corner brace...
38970552-D3A8-4C27-BF74-8B8A5ADF3A22.jpeg
8312F8FE-620E-4E56-A484-077364FD6697.jpeg
535805CD-25D5-4980-B21A-360CBAF93976.jpeg
135205EC-3A14-4AAE-82EC-3305F97C809C.jpeg
 
Today i made a tool to air bend my flat stock at more than 90 degree. Managed to fab up my inner frame rail with the huge relief pocket in it. It was quite the chalenge but very enjoyable and i learned a few trick going at it. Pleased that i saved the 545$ these peaces would have costed! Started on the removal of the inner rail. I have now 65 hours of labor in the car.
A0E198BE-DD3D-4D87-AE26-A727FCB35F6E.jpeg
42AAF40A-472E-4434-B702-65328D44F43B.jpeg
D7E287D1-A734-4304-B27E-09CB93D6753D.jpeg
C0E8F5A7-460F-4740-AE7E-3FC60FFB2E91.jpeg
C214A0A3-5CFF-4944-B99D-D3ABF934CCAF.jpeg
 
A very satisfying day today, lot of little details to get there but today is the day it all came together. Fixing all the rust on that frame is a big job only if you look at all of the work to do. I prefer to look at a bunch of small job that are interrelated. More wins, and you end up with a big win in the end. Made the brace and recess and welded the top front to back a little at a time to keep heat distortion at bay. Now tomorrow ill install the body mount and finish welding the bottom. Cheer!
5946FA26-FA7B-4188-B4FE-DA9A5AAB6C69.jpeg
4B8D2479-A261-45B7-B745-146DBF93BC82.jpeg
F6F45782-9FC7-4DE2-AC9D-576B52BC1F6E.jpeg
E585A7A4-1A0D-48A2-BE85-00D7FA0C65F3.jpeg
D99DFF91-38CD-4CBC-9A01-724F151BDD0C.jpeg
 
Old Thread: Hello . There have been no replies in this thread for 100 days.
Content in this thread may no longer be relevant.
Perhaps it would be better to start a new thread instead.

Users who are viewing this thread