Hey Guys,
Hope everyone is staying safe!
I've been posting my winter projects on another thread but I thought this project deserved it's own thread incase anybody wants to do this to their car.
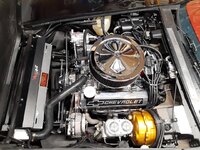
I'm installing a brand new AC system into my car this winter. I removed the evaporator case and I saw quiet a lot of dust in the vents. A lot considering I had just cleaned all of the vents last year. It got me thinking about an idea I had a few years ago of making a custom cabin air filter. I decided I had the time... Quite a lot of time in fact, so I took a stab at it.
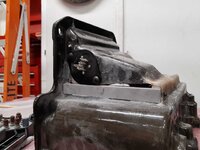
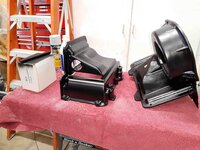
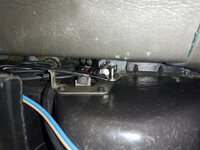
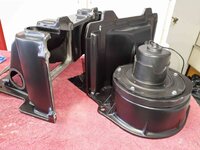
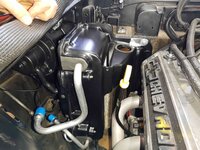
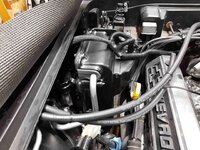
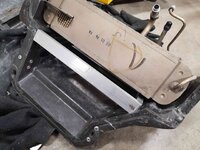
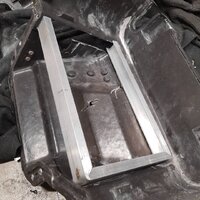
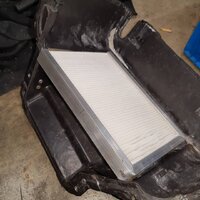
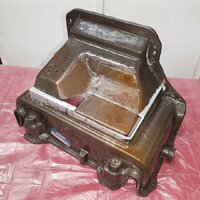
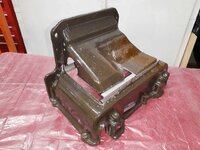
I decided to install the filter in the engine bay behind the evaporator. I choose that location because it filter's all of the air. You could probably source a smaller filter and put it in the main vent but if you're using the heater it's possible for unfiltered air to pass into the cabin. I also choose that location because if it got wet there is a drain whole for the evaporator so it should dry up and not get moldy.
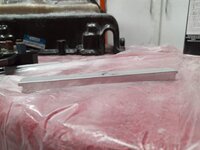
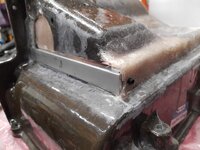
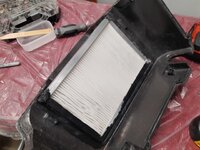
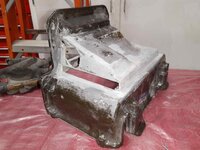
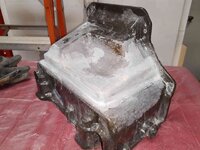
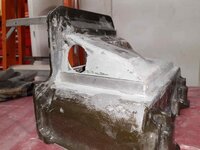
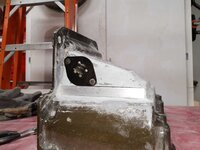
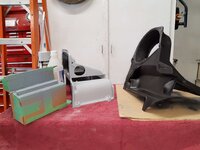
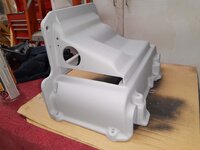
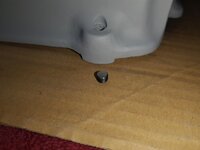
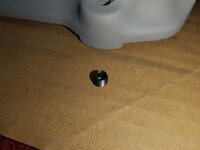
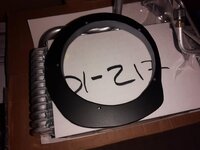
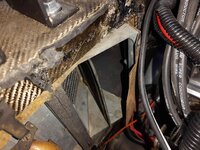
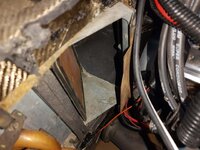
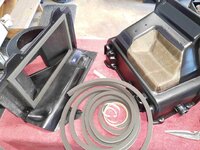
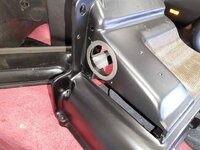
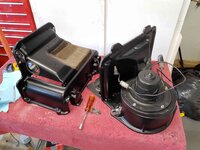
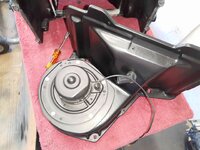
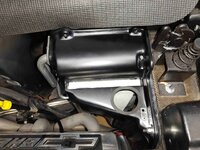
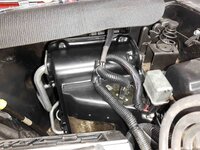
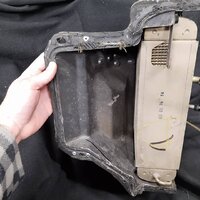
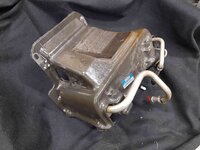
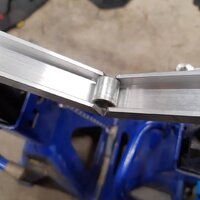
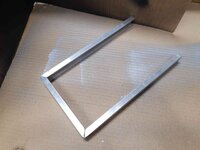
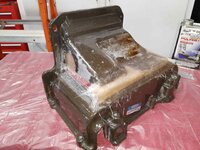
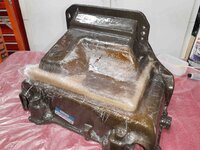
First I measured to see what my options were as far as filter's. That would determine the size of my filter frame and how much clearencing I would need to do. I decided on a Wix 24270 filter but you should be able to go with a Fram 11666 (carbon infused filter). I then needed to get some 1" aluminum 'C' channel. The walls of the channel are 0.125" thick which leaves me with a channel width of .75" which happens to be the exact depth of my filter. I then needed to bend the channel to make my frame. I wanted a 7" wide channel but I had to factor in that aluminum stretches when you bend it so I calculated 6 5/8" measurement would give me 7" when bent. I had to heat the aluminum up to 400 degrees Fahrenheit to take the temper out of the metal so I could bend it without it tearing. I learned this neat trick where if you rub some soap on the back side of your aluminum, then you heat it with a propane torch and the soap will turn black when it gets hot enough. I then had to let the part cool down before bending it to again avoid tearing the metal. It actually turned out to be 6 15/16" once I make my bends but it was close enough and the aluminum didn't tear or break. Once I made my two 90 degree bends I used a chop saw to cut the frame to be 10" tall. I then clearanced the box to fit the frame. Once everything was fitting nicely I decided to test fit it in the car to make sure there weren't any clearance issues but there was. My header was only 1/8" away from the box. The only solution was to remove a section of the side of the aluminum channel with a Dremel, a carbide bit, and a lot of patience. I also trimmed the fiberglass to act like the wall of my channel then secured the frame in place using some urethane. Last night I finished laying up the fiberglass to close the box back up. I did a test fit today and I have about a 1/4" of clearance to my header and I haven't sanded down the fiberglass. Next I'll be making a cover for the air filter out of 0.5" x 0.75" aluminum flat bar, then sanding and finishing the box.
I haven't quite got the project done but I'm hoping to have it done in the next week or so and I'll try to keep you guys up to date.
Hope everyone is staying safe!
I've been posting my winter projects on another thread but I thought this project deserved it's own thread incase anybody wants to do this to their car.
I'm installing a brand new AC system into my car this winter. I removed the evaporator case and I saw quiet a lot of dust in the vents. A lot considering I had just cleaned all of the vents last year. It got me thinking about an idea I had a few years ago of making a custom cabin air filter. I decided I had the time... Quite a lot of time in fact, so I took a stab at it.
I decided to install the filter in the engine bay behind the evaporator. I choose that location because it filter's all of the air. You could probably source a smaller filter and put it in the main vent but if you're using the heater it's possible for unfiltered air to pass into the cabin. I also choose that location because if it got wet there is a drain whole for the evaporator so it should dry up and not get moldy.
First I measured to see what my options were as far as filter's. That would determine the size of my filter frame and how much clearencing I would need to do. I decided on a Wix 24270 filter but you should be able to go with a Fram 11666 (carbon infused filter). I then needed to get some 1" aluminum 'C' channel. The walls of the channel are 0.125" thick which leaves me with a channel width of .75" which happens to be the exact depth of my filter. I then needed to bend the channel to make my frame. I wanted a 7" wide channel but I had to factor in that aluminum stretches when you bend it so I calculated 6 5/8" measurement would give me 7" when bent. I had to heat the aluminum up to 400 degrees Fahrenheit to take the temper out of the metal so I could bend it without it tearing. I learned this neat trick where if you rub some soap on the back side of your aluminum, then you heat it with a propane torch and the soap will turn black when it gets hot enough. I then had to let the part cool down before bending it to again avoid tearing the metal. It actually turned out to be 6 15/16" once I make my bends but it was close enough and the aluminum didn't tear or break. Once I made my two 90 degree bends I used a chop saw to cut the frame to be 10" tall. I then clearanced the box to fit the frame. Once everything was fitting nicely I decided to test fit it in the car to make sure there weren't any clearance issues but there was. My header was only 1/8" away from the box. The only solution was to remove a section of the side of the aluminum channel with a Dremel, a carbide bit, and a lot of patience. I also trimmed the fiberglass to act like the wall of my channel then secured the frame in place using some urethane. Last night I finished laying up the fiberglass to close the box back up. I did a test fit today and I have about a 1/4" of clearance to my header and I haven't sanded down the fiberglass. Next I'll be making a cover for the air filter out of 0.5" x 0.75" aluminum flat bar, then sanding and finishing the box.
I haven't quite got the project done but I'm hoping to have it done in the next week or so and I'll try to keep you guys up to date.
Attachments
-
 IMG_20200415_160934_165.jpg115.7 KB · Views: 119
 -
 IMG_20200404_161805685_compress46.jpg505.2 KB · Views: 106
 -
 IMG_20200406_184006211_compress14.jpg356.7 KB · Views: 93
 -
 IMG_20200406_192223659_compress3.jpg402.1 KB · Views: 90
 -
 IMG_20200415_160934_166.jpg49 KB · Views: 91
 -
 IMG_20200407_151921415_compress47.jpg453.6 KB · Views: 79
 -
 IMG_20200407_211750136_compress69.jpg488.6 KB · Views: 68
 -
 IMG_20200415_160934_170.jpg122.6 KB · Views: 64
 -
 IMG_20200415_160934_171.jpg83.6 KB · Views: 61
 -
 IMG_20200415_160934_178.jpg125.9 KB · Views: 62
 -
 IMG_20200414_152455327_compress17.jpg401 KB · Views: 62
 -
 IMG_20200415_160300898_compress94.jpg452.8 KB · Views: 64
 -
 IMG_20200414_221559975_compress54.jpg554.3 KB · Views: 69